Transform ordinary plant pots into stunning decorative pieces by wrapping them in textured rope, painting geometric patterns with acrylic paint, or adding metallic leaf details. These simple yet impactful techniques instantly elevate your space and help you style indoor plants with personality. Create custom pot designs using natural materials like bamboo strips, dried moss, or woven macramé holders for an organic, bohemian feel. Mix and match decorating styles by combining minimalist white-washed pots with ornate hand-painted companions, or group containers in varying heights and textures to create dynamic visual interest. Whether you’re drawn to sleek modern aesthetics or rustic charm, these pot decoration techniques work across design styles while protecting your containers and highlighting your beloved plants’ natural beauty. The best part? Most of these creative solutions use affordable materials you may already have at home, making it easy to refresh your indoor garden this weekend.
Paint and Pattern Magic
Hand-Painted Designs
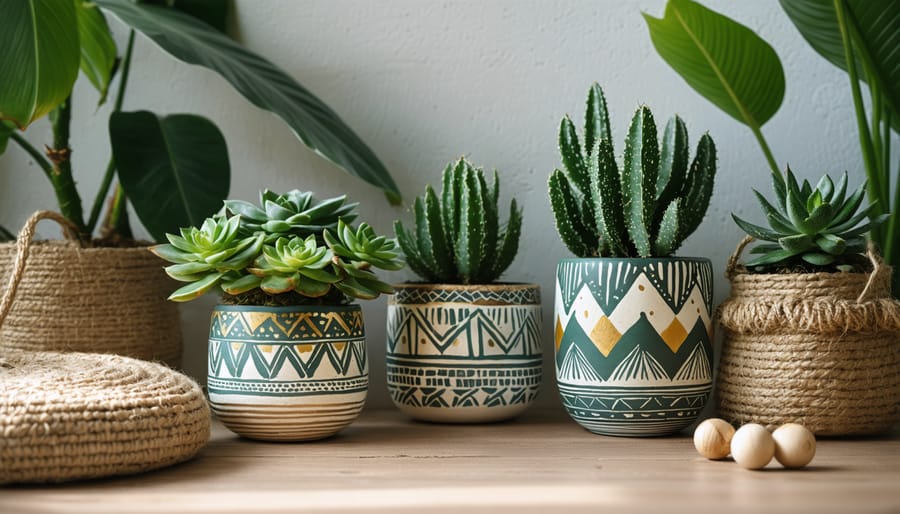
Transform your plain plant pots into works of art with these simple hand-painted design techniques. Start by cleaning your pot thoroughly with soap and water, then let it dry completely. Apply a base coat of exterior-grade primer if you’re working with a terracotta pot, or skip this step for already-painted pots.
Choose acrylic paints suitable for your pot’s material, and gather basic supplies like various brush sizes, a pencil, and painter’s tape. For beginners, start with simple geometric patterns: use painter’s tape to create clean lines for stripes, triangles, or color blocks. Remove the tape while the paint is still slightly wet for the crispest edges.
For more organic designs, try polka dots using the round end of a paintbrush handle, or create leaf patterns using a small detail brush. Want something more adventurous? Try a gradient effect by blending two colors while they’re wet, or create a speckled design by flicking paint with a toothbrush.
Always work in a well-ventilated area and apply at least two thin coats for better coverage. Once your design is complete, allow it to dry for 24 hours, then seal your masterpiece with a clear, water-resistant sealer to protect it from moisture and wear.
Pro tip: Practice your design on paper first, and remember that imperfections often add character to hand-painted pieces. Consider using metallic paints for an elegant touch, or glow-in-the-dark options for a whimsical nighttime display.
Stencil and Pattern Work
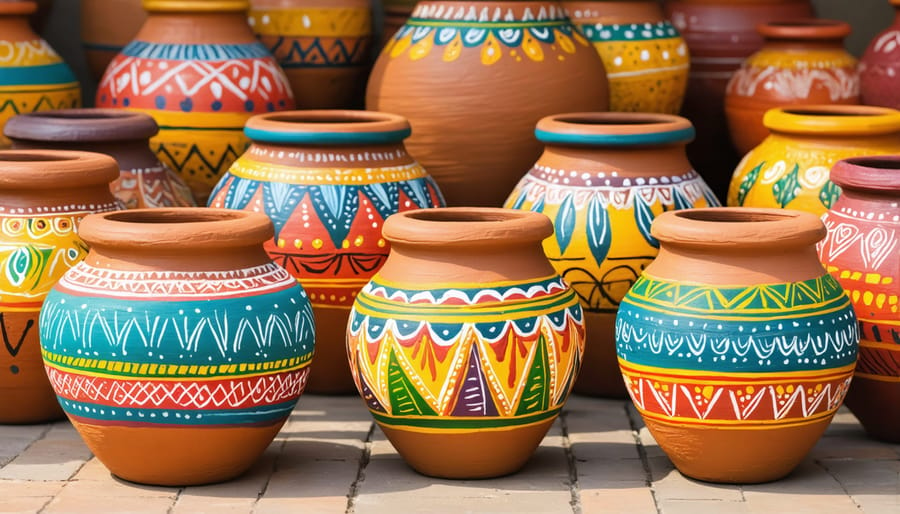
Stencils and patterns can transform ordinary plant pots into eye-catching masterpieces, and you don’t need to be an artist to achieve professional results. Start by selecting adhesive stencils from your local craft store or create your own using contact paper. For beginners, geometric patterns like chevrons, diamonds, or simple repeated shapes work beautifully and are forgiving if you make small mistakes.
Before applying your stencil, ensure your pot is clean and dry. Position the stencil firmly against the pot’s surface, smoothing out any air bubbles to prevent paint bleeding. Use a foam stencil brush or small roller for the best results, and opt for acrylic paint specifically formulated for ceramics or terracotta.
For a modern twist, try overlapping patterns in different colors or create an ombré effect by gradually lightening your paint color as you work your way up the pot. Mandala patterns are particularly striking and can be built up in layers using different sized stencils.
Pro tip: When working with intricate patterns, less is more. Consider leaving some areas of the pot unpainted to create visual interest and prevent the design from appearing too busy. Always seal your finished work with a clear, water-resistant sealant to protect your design from moisture and ensure it stands the test of time.
Natural and Rustic Elements
Rope and Twine Wrapping
Transform your plain plant pots into eye-catching pieces with the timeless charm of rope and twine wrapping. This natural approach not only adds beautiful texture but also ranks among popular eco-friendly decor options for your home.
Start by selecting your preferred natural fiber – jute rope, sisal twine, or hemp cord work wonderfully. Clean your pot’s surface and apply a thin layer of all-purpose adhesive around the base. Begin wrapping the rope tightly, keeping each row snug against the previous one. For a polished look, use hot glue at the beginning and end points of your wrapping.
Get creative with patterns by alternating between different rope thicknesses or creating geometric designs. Try the basket-weave technique by wrapping horizontal and vertical sections, or create an ombré effect using ropes in varying natural shades.
Pro tip: For outdoor-facing windowsills, consider treating your wrapped pots with a clear, water-resistant sealant to protect the fibers from moisture. This simple yet striking decoration method works particularly well with coastal, bohemian, or rustic interior styles, adding warmth and organic texture to your plant display.
Wood and Cork Accents
Adding natural elements to your plant pots brings warmth and organic charm to your indoor space. Wood and cork accents create a perfect balance between nature and design, offering both aesthetic appeal and functionality. Try wrapping a simple terracotta pot with thin cork sheets, securing them with eco-friendly adhesive for an instant rustic upgrade. For a more dramatic look, create a wooden collar by joining small wooden strips around the pot’s rim – this works particularly well with larger floor planters.
Wooden pot feet are another excellent addition, not only elevating your plants for better drainage but also adding a sophisticated touch. You can craft these easily using wooden blocks or dowels cut to size. For a modern twist, consider adding wooden beads or cork balls around the pot’s rim, strung together with natural twine.
DIY enthusiasts can experiment with wooden veneer strips to create geometric patterns on plain pots, while cork coasters make perfect drainage trays that protect your surfaces while maintaining the natural theme. Remember to seal any wooden elements with a plant-safe finish to protect them from moisture, ensuring your decorative additions last longer and maintain their beauty.
Upcycling and Creative Containers
Vintage Items Reimagined
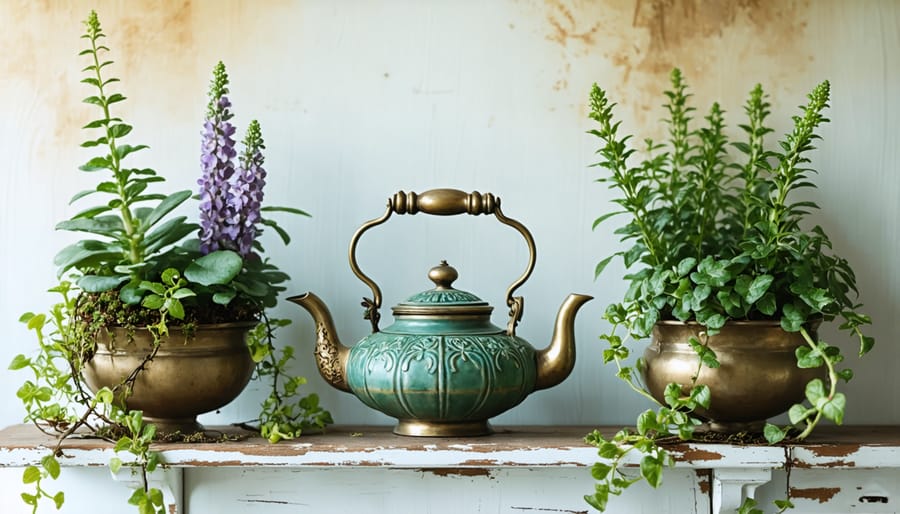
Transform your home into a vintage-inspired paradise by giving new life to antique treasures as unique plant containers. Old teapots, vintage suitcases, and ceramic pitchers can become charming homes for your leafy friends, adding character and history to your space. Consider repurposing brass kettles or copper containers for a warm, timeless appeal that pairs beautifully with trailing plants like pothos or English ivy.
Antique bread boxes make excellent planters for herb collections, while old wooden crates can be lined with moisture-resistant material to house larger plants. Don’t overlook vintage tins, which can be easily transformed into delightful succulent gardens with just a few drainage holes.
For a truly distinctive look, scout flea markets and thrift stores for Victorian-era chamber pots, old metal watering cans, or vintage toolboxes. Before using any antique container, be sure to properly seal wooden items and add drainage holes to prevent water damage. Line metal containers with a protective barrier to prevent rust and protect your plants’ roots.
Pro tip: Group different vintage containers at varying heights to create an eye-catching display. Mix and match styles from different eras, but try to maintain a cohesive color palette to keep the arrangement looking intentional rather than cluttered. Remember that some vintage items might need extra care to preserve their finish, so consider placing saucers underneath to protect both the container and your surfaces.
Household Items Transformed
Looking to add character to your indoor plants without spending a fortune? Your home is probably full of potential plant containers just waiting to be transformed! That vintage teapot gathering dust could become a charming succulent holder, while those old mason jars make perfect homes for trailing pothos or spider plants.
Kitchen items are particularly versatile – consider repurposing colorful colanders as hanging planters, their built-in drainage holes making them perfect for orchids. That neglected ceramic pitcher? It could be your next statement piece with a beautiful peace lily. Even tin cans can be transformed into industrial-chic planters with a coat of chalk paint and some creative detailing.
Don’t overlook unusual items like old boots, wooden crates, or vintage suitcases. With proper drainage holes and waterproof lining, these unexpected containers can become conversation starters. Old light fixtures, especially glass globes, create stunning terrariums for air plants and small succulents.
Remember to prepare any household item properly before using it as a planter. This means creating drainage holes where needed, treating wooden items to prevent rot, and ensuring containers are thoroughly cleaned. For items without built-in drainage, consider using the double-pot method – place your plant in a plastic pot with drainage holes inside the decorative container.
The key is to think creatively while ensuring your chosen container can support healthy plant growth. With a little imagination, those everyday items can become unique botanical displays that reflect your personal style.
Modern and Minimalist Touches
Geometric Designs
Geometric patterns can transform ordinary plant pots into striking modern art pieces that perfectly complement your interior design principles. Start with clean, plain pots as your canvas and create eye-catching designs using painter’s tape and acrylic paint. Try classic triangles, hexagons, or zigzag patterns for a contemporary look. For beginners, stick to simple shapes like diagonal stripes or color blocks, which are both forgiving and impactful.
To create precise geometric patterns, measure and mark your pot with light pencil lines before applying tape. Use a ruler or protractor for perfect angles, and ensure your tape is firmly pressed down to prevent paint bleeding. Consider working with a complementary color palette – think gold and white for elegance, or bold neons for a playful touch.
For a more subtle approach, try painting just the rim or bottom third of the pot with geometric designs. You can also experiment with metallic markers to draw freehand geometric patterns, perfect for smaller pots or detailed work. Remember to seal your finished design with clear varnish to protect it from water damage during plant care.
Metallic Accents
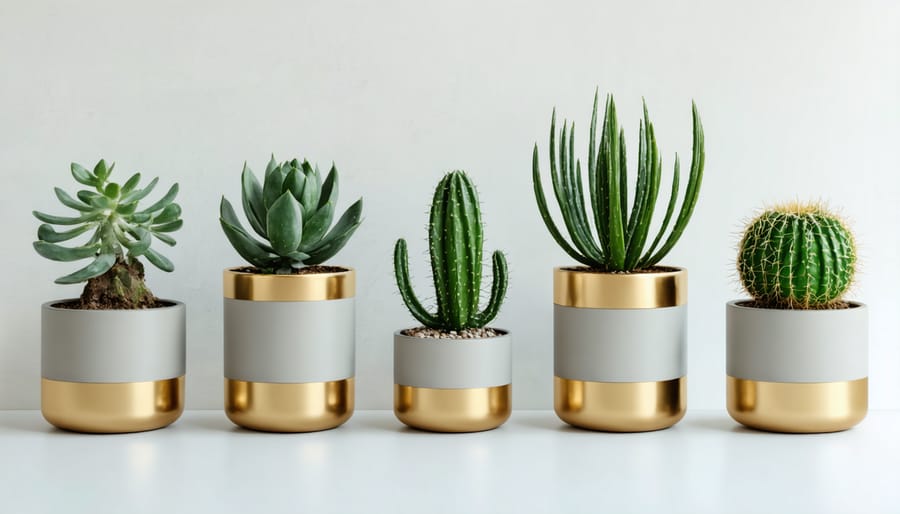
Add a touch of glamour to your indoor plant display with metallic accents that bring sophistication and contemporary flair to any space. Gold, silver, copper, and brass elements can transform ordinary plant pots into stunning decorative pieces that catch and reflect light beautifully.
For a quick update, try metallic paint on terracotta or ceramic pots. Apply it in solid coverage for a bold statement, or create geometric patterns for a modern twist. Metallic spray paints are particularly effective, providing even coverage and a professional finish. For a more subtle approach, try painting just the rim or creating a dipped effect on the bottom third of the pot.
DIY enthusiasts can experiment with metal leaf applications – gold or copper leaf can create an expensive-looking finish at a fraction of the cost. Simply apply adhesive to your desired pattern and carefully lay the metal leaf, then seal it for durability.
Consider adding metallic accessories like copper wire wrapping around pots, brass plant tags, or silver-toned pot feet. These small touches can make a big impact without overwhelming your space. For maximum effect, pair metallic accents with plants that have striking foliage, such as monstera or snake plants, to create an eye-catching contrast.
Seasonal and Theme-Based Decorations
Transform your plant pots into festive focal points with creative seasonal decorating ideas that celebrate nature’s changing rhythms. For spring, wrap pots in pastel ribbons and attach delicate butterfly ornaments or artificial cherry blossoms. Summer calls for vibrant coastal themes – think seashells, twine wrapping, and miniature drift wood pieces secured with weather-resistant glue.
As autumn approaches, embrace warm earth tones by adding artificial fall leaves, pinecones, and copper-colored wire wrapping. Create cozy winter displays using white-painted branches, sparkly snowflake ornaments, and metallic ribbon accents. These seasonal touches can be easily swapped out as the year progresses.
Theme-based decorations offer another creative avenue. For a bohemian vibe, wrap pots in colorful yarn and attach wooden beads or feathers. Creating a minimalist Japanese-inspired look? Opt for clean lines with bamboo coasters as pot bases and simple origami decorations.
Special occasions deserve their own pot makeovers too. For holidays, temporarily add battery-operated fairy lights, festive gift ribbons, or themed ornaments. Children’s rooms can feature whimsical elements like painted animal faces or superhero emblems, while office spaces might benefit from sophisticated geometric patterns or metallic accents that complement professional decor.
Remember to use removable decorations when possible, allowing your pots to evolve with your space and style preferences throughout the year.
Transforming your plant pots from basic containers into eye-catching decor pieces is easier than you might think. With the creative ideas we’ve explored, you can turn any indoor plant display into a stunning focal point that reflects your personal style. Remember, whether you choose to paint, wrap, or embellish your pots, the key is to start with a clear vision and take your time with the execution.
Don’t be afraid to experiment with different techniques and combinations – sometimes the most unique designs come from mixing various elements together. Start small with one or two pots before tackling your entire collection, and remember that even simple decorations can make a significant impact on your space.
Most importantly, let your creativity guide you while keeping your plant’s needs in mind. The best pot decorations not only look beautiful but also maintain proper drainage and growing conditions for your green friends. With these ideas as your foundation, you’re well-equipped to start your pot decoration journey. Happy decorating, and enjoy watching your indoor garden transform into a personalized work of art!