Grab a squeegee, bucket, sponge, and microfiber cloth to clean windows like a pro. Mix a solution of 1 part white vinegar to 10 parts warm water in the bucket. Dip the sponge in the mixture and scrub the glass in a circular motion to loosen dirt and grime. Wipe the glass clean with the microfiber cloth, then use the squeegee to remove any remaining moisture, starting at the top and working down in straight, overlapping strokes. With these simple steps, your windows will sparkle, letting more natural light into your beautiful home.
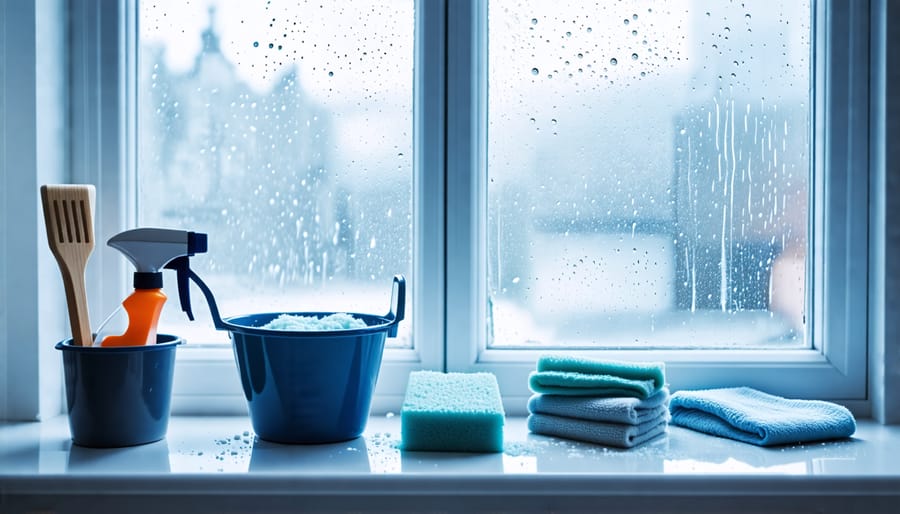
Gather Your Window Cleaning Supplies

Basic Supplies
To clean windows properly, you’ll need a few basic supplies. Start with a good quality squeegee with a comfortable handle and a sharp, clean rubber blade. Microfiber cloths are essential for lint-free cleaning and polishing. Have at least two on hand – one for washing and one for drying. A large sponge or strip washer is handy for applying cleaning solution to the glass. You’ll also want a bucket to hold your cleaning solution. Choose one that’s sturdy and easy to carry when filled. If you’re cleaning high windows, a ladder or extension pole for your squeegee and washer will make the job easier and safer. With these basic supplies ready, you’ll be well-equipped to achieve sparkling clean windows throughout your home.
Cleaning Solutions
There are many store-bought glass cleaners available that do an excellent job, but you can also make your own eco-friendly solutions at home. A simple recipe is to mix equal parts white vinegar and water in a spray bottle. For extra cleaning power, add a squeeze of lemon juice. Another option is to combine 1 tablespoon of cornstarch, 1/4 cup of rubbing alcohol, and 1/4 cup of white vinegar with 2 cups of warm water. These DIY mixtures are what many professional window cleaners use for streak-free results. Always label your homemade solutions and keep them out of reach of children and pets.
Pre-Cleaning Preparation
Before you start cleaning your windows, it’s essential to properly prepare the area. Begin by removing any curtains, blinds, or window treatments that may obstruct your access to the glass. Carefully take them down and set them aside in a clean, dry place. This not only prevents them from getting wet or dirty during the cleaning process but also allows you to thoroughly clean the window frames and sills.
Next, use a soft-bristled brush or vacuum attachment to remove any loose dust, dirt, or cobwebs from the window frames, sills, and tracks. This step is crucial, as it prevents debris from mixing with your cleaning solution and creating a muddy mess on your windows. For stubborn grime or stains on the window sills, use a damp cloth or sponge to wipe them clean. If you encounter any particularly challenging spots, a gentle cleaner or a mixture of warm water and mild dish soap can help break down the dirt.
Once your window frames and sills are clean and dry, lay down a few towels or a drop cloth on the floor beneath the windows. This will catch any drips or spills during the cleaning process, protecting your floors and making cleanup a breeze. With these simple preparatory steps, you’ll be ready to tackle the actual window cleaning with confidence and efficiency.
Step-by-Step Window Cleaning Process
Wash with Soapy Water
To begin cleaning your windows, mix a few drops of mild dish soap into a bucket of warm water until it creates a soapy solution. Avoid using harsh cleaners or too much soap, as these can leave streaks or residue on the glass. Dip a clean, soft sponge or microfiber cloth into the soapy water and gently wring it out so it’s damp but not dripping wet.
Starting at the top of the window, wipe the glass in a zigzag pattern, making sure to cover the entire surface. This technique helps prevent drips and streaks as you work your way down. Be sure to pay attention to the corners and edges where dirt and grime tend to accumulate.
For stubborn spots or stains, apply a bit more pressure or use a soft-bristled brush to gently scrub the area. However, be careful not to scrub too hard, as this might scratch the glass. If you encounter any sticky residue from stickers or labels, try using a mixture of equal parts white vinegar and warm water to help loosen and remove it.
Once you’ve thoroughly washed the window with soapy water, it’s time to rinse. Using a clean, damp microfiber cloth or a squeegee, remove the soap from the glass, making sure not to leave any suds behind. If you’re using a squeegee, start at the top and work your way down, wiping the blade with a clean, lint-free cloth after each stroke to avoid leaving streaks. This initial wash with soapy water sets the stage for a streak-free finish in the next steps of the window-cleaning process.
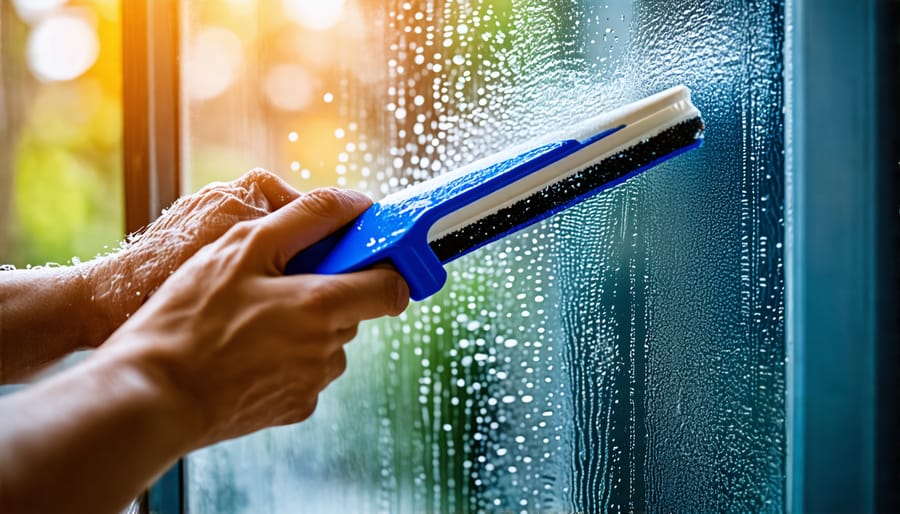
Squeegee the Glass
Here’s how to use a squeegee to get your windows gleaming and streak-free every time. First, dampen the squeegee blade with your cleaning solution. Starting at the top corner of the window, press the squeegee firmly against the glass at a slight angle. Using even, overlapping strokes, draw the squeegee down the length of the pane. After each stroke, wipe the blade with a lint-free cloth to prevent dirt buildup and streaks. For best results, squeegee in a reverse-S pattern – start at a top corner, pull down, then across the bottom and back up. Continue until you’ve squeegeed the entire window. Finish by running the squeegee along the bottom edge to remove any remaining water. With a little practice, you’ll be amazed at the crystal-clear shine a well-wielded squeegee can achieve! Pro tip: for extra sparkle on exterior windows, give the glass a final buff with a chamois or microfiber cloth. This technique not only leaves windows pristine but helps repel dirt and dust between cleanings. Mastering the art of the squeegee puts the perfect finishing touch on your window-washing routine – and the stunning results are worth every stroke.
Clean Edges and Corners
Getting clean edges and corners can be tricky, but with the right technique and a bit of patience, you can achieve a flawless finish. Start by folding your microfiber cloth into a point or using a small, precision cleaning tool. Gently press the tip of the cloth or tool into the corner and wipe along the edges, moving from the corner outward. Be sure to reload your cloth with cleaning solution as needed to maintain effectiveness. For stubborn spots or built-up grime, you may need to apply a bit more pressure or use a slightly abrasive tool, like a soft-bristled toothbrush. Just be careful not to scratch the glass or damage any surrounding surfaces. Once you’ve cleaned the edges and corners, give them a final wipe with a dry, lint-free cloth to remove any remaining moisture and ensure a crystal-clear result. With a little extra attention to detail, your windows will be sparkling from edge to edge!

Cleaning Special Types of Windows
When it comes to cleaning special types of windows like stained glass, leaded, or skylights, a gentle touch and the right techniques are essential to avoid damage. For stained glass windows, start by carefully dusting the surface with a soft, dry brush or microfiber cloth. If needed, create a mild cleaning solution using a few drops of pH-neutral dish soap in distilled water. Dip a soft, lint-free cloth into the solution, wring it out well, and gently wipe the glass. Avoid using excessive water or allowing moisture to seep into the leading or framing. Dry the surface immediately with a clean, lint-free cloth.
Leaded windows require a similar approach. Use a soft, dry brush to remove dust and cobwebs from the crevices. For a deeper clean, create a mild soap solution as described above and apply it using a soft, damp cloth. Be extra cautious around the leading, as it can be delicate. Avoid using abrasive materials or applying too much pressure. Dry the window thoroughly with a clean, soft cloth.
Skylights can be particularly tricky due to their location and angle. Before cleaning, ensure the glass is cool to the touch. If the skylight is accessible from the inside, use a telescopic cleaning pole with a soft brush attachment to remove dust and debris. For a more thorough clean, use a mild soap solution and a soft, lint-free cloth or sponge. Rinse the skylight with clean water using a spray bottle, and then wipe it dry with a clean, lint-free cloth or a squeegee. If the skylight is not easily accessible from the inside, consider hiring a professional to ensure safety and proper cleaning.
Remember, when cleaning any type of special window, always test your cleaning solution on a small, inconspicuous area first to ensure it doesn’t cause any damage or discoloration. If you’re unsure about the best method or products to use, consult a professional to avoid potentially costly mistakes.
Window Cleaning Safety Tips
Safety should be your top priority when cleaning windows. Always use a sturdy ladder and have someone hold it steady for you. Avoid overreaching or leaning too far to one side. If you’re uncomfortable with heights, consider using a telescoping cleaning tool instead.
When handling cleaning chemicals, wear gloves and protective eyewear. Read the labels carefully and follow the manufacturer’s instructions. Avoid mixing different products, as this can create dangerous fumes. Keep the area well-ventilated and take breaks if you feel dizzy or lightheaded.
Be mindful of potential hazards around your windows. Watch out for power lines, tree branches, or any loose objects that could fall and cause injury. If your windows are difficult to access or you notice signs of damage like cracks or rotting frames, it may be time to consider professional window replacements for your safety and peace of mind.
By taking these precautions, you can ensure a safe and successful window cleaning experience. Remember, your well-being is more important than a spotless view. If at any point you feel unsafe or unsure, don’t hesitate to call in the pros.
Conclusion
With these tips and techniques, you’re well on your way to achieving sparkling clean windows that will make your home shine. Remember to gather the right tools, start with a thorough dusting, and use a proven cleaning solution for the best results. Tackle one window at a time, and don’t forget those often-overlooked areas like screens and windowsills. By following this guide and adding window cleaning to your regular home maintenance routine, you’ll enjoy clearer views and a brighter living space. Plus, with your windows looking their best, you might find yourself more motivated and productive when working from home. So grab your supplies, put on some music, and let the natural light inspire you as you transform your windows from grimy to gleaming!