Start your sustainability journey this weekend with these impactful DIY projects:
1. Install a low-flow showerhead to conserve water without sacrificing pressure. Unscrew the old fixture, wrap Teflon tape on the threads, and screw on the efficient replacement.
2. Swap incandescent bulbs for LED versions, slashing energy usage by 75%. Simply remove old bulbs and replace with LEDs that match the base size and desired brightness.
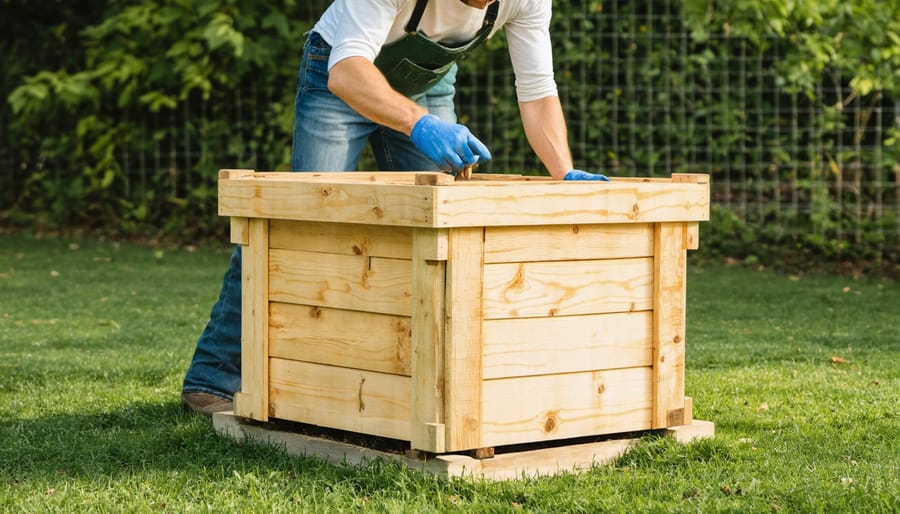
3. Implement sustainable home practices like composting. Drill holes in a lidded plastic bin, layer browns and greens, and mix weekly for nutrient-rich soil in mere months.
4. Craft draft stoppers for doors and windows using old fabric and rice. Measure the gap, sew a tube slightly longer, fill with rice, and stitch closed to eliminate air leaks.
With determination and a free afternoon, you can dramatically reduce your home’s environmental footprint. Start small, stay consistent, and watch your eco-friendly haven take shape.
Crafting a Compost Bin
Gathering Materials
Here’s a list of key materials you’ll need for these sustainable DIY projects, along with eco-friendly sourcing options:
Reclaimed wood: Check local salvage yards, construction sites, or online marketplaces for recycled lumber.
Low-VOC paint: Look for water-based, low-odor options at your local hardware store or eco-friendly retailer.
Energy-efficient light bulbs: Choose LED or CFL bulbs, available at most home improvement stores.
Recycled glass jars: Collect from your own recycling bin or ask friends and neighbors for extras.
Natural fabrics: Opt for organic cotton, linen, or hemp, found at many craft and fabric stores.
Compost bin materials: Use recycled plastic bins or build your own with reclaimed wood and wire mesh.
Rain barrel: Purchase a ready-made barrel or convert a large plastic drum from a local food processing facility.
By sourcing these materials sustainably, you’ll reduce waste and support eco-friendly practices while creating beautiful, functional projects for your home.
Assembly Instructions
To assemble your DIY compost bin, start by drilling 1/2-inch holes evenly spaced around the sides and bottom of the plastic storage bin for aeration. Next, place a layer of shredded newspaper or dry leaves at the bottom to absorb excess moisture. Begin adding your compost materials in layers, alternating between green (nitrogen-rich) and brown (carbon-rich) materials. Green materials include fruit and vegetable scraps, coffee grounds, and grass clippings, while brown materials include dry leaves, shredded paper, and sawdust. Aim for a ratio of about 3 parts brown to 1 part green. After each layer, sprinkle a handful of soil or finished compost to introduce beneficial microorganisms. Continue layering until the bin is about 3/4 full. Mix the contents every 1-2 weeks using a garden fork or compost aerator tool to ensure proper aeration and speed up decomposition. Keep the compost moist but not soggy, adding water as needed. Cover the bin with its lid to retain moisture and heat. In 2-3 months, your compost should be ready to use in your garden or potted plants.

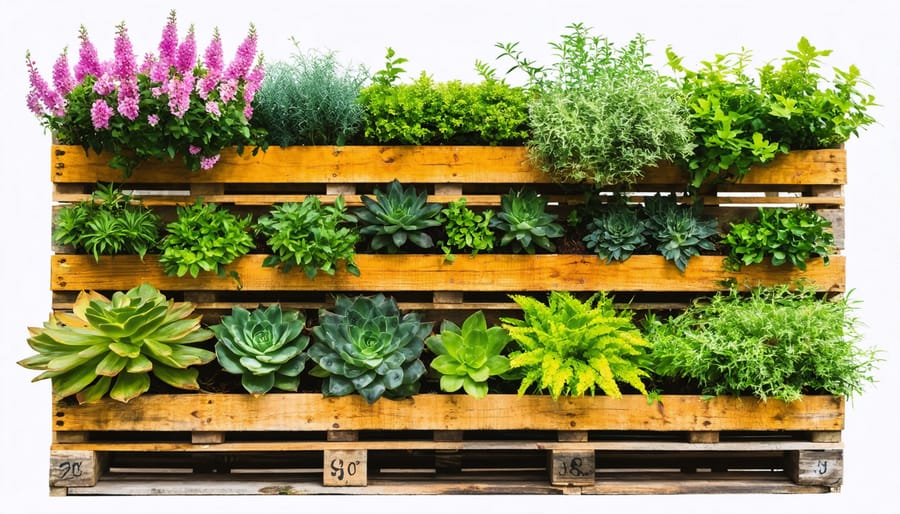
Upcycled Pallet Garden
Preparing the Pallet
Before planting, it’s crucial to properly clean and prepare your pallet. Start by inspecting the wood for any signs of damage, rot, or infestation. Sand down rough edges and splinters to create a smooth surface. If the pallet was treated with chemicals, consider lining it with a non-toxic, waterproof material to prevent leaching into the soil. Next, give the pallet a thorough cleaning using a pressure washer or hose to remove dirt and debris. Allow it to dry completely in the sun before moving on to the next steps of your pallet garden project.
Planting and Care
When selecting plants for your pallet garden, consider your climate, sunlight exposure, and the amount of time you can dedicate to maintenance. Herbs like basil, rosemary, and thyme are great options for beginners as they are relatively low-maintenance and can be used in cooking. Succulents and hardy perennials are also good choices for those with limited gardening experience.
To keep your pallet garden thriving, water it regularly, ensuring the soil remains moist but not waterlogged. Fertilize your plants every few weeks with a balanced, organic fertilizer to provide essential nutrients. Prune and trim your plants as needed to encourage healthy growth and prevent overcrowding. Keep an eye out for signs of pests or disease, and address any issues promptly using natural remedies like neem oil or insecticidal soap. With proper care and attention, your pallet garden will flourish, providing you with fresh herbs, beautiful foliage, and a sense of accomplishment in your sustainable DIY project.

Rain Barrel Installation
Barrel Preparation
Before setting up your rain barrel, it’s essential to properly clean and prepare it. Start by thoroughly rinsing the inside of the barrel with a hose to remove any debris or residue. For a deeper clean, create a solution of water and eco-friendly cleaning tips like vinegar or baking soda. Scrub the interior walls and let the barrel dry completely. Next, drill a hole near the bottom of the barrel for the spigot and another hole near the top for the overflow valve. Secure the spigot and overflow valve in place with silicone caulk to prevent leaks. Finally, cut a hole in the lid of the barrel slightly larger than your downspout and place a fine mesh screen over it to keep debris and insects out. Your rain barrel is now ready for installation and use.
Gutter Connection
To connect your rain barrel to your home’s gutter downspouts, start by positioning the barrel beneath the downspout. Mark where the downspout lines up with the barrel’s inlet, then use a hacksaw to cut the downspout at this point. Attach a downspout elbow joint to direct water into the barrel. Secure the elbow to the downspout and barrel inlet using screws or rivets for a watertight seal. If your barrel lacks a built-in overflow outlet, drill a hole near the top and install an overflow hose to direct excess water away from your home’s foundation. Regularly clean your gutters and downspouts to prevent debris from clogging the system. With proper installation and maintenance, your rain barrel will efficiently collect runoff from your roof, providing a sustainable source of water for your outdoor needs.

Homemade Natural Cleaners
All-Purpose Cleaner
Making your own all-purpose cleaner is a simple and effective way to reduce your reliance on store-bought products filled with harsh chemicals. In a spray bottle, combine 1 cup of white vinegar, 1 cup of water, and 1 tablespoon of dish soap. For a fresh scent, add 10-15 drops of your favorite essential oil, such as lavender or lemon. Shake the mixture well before each use. This versatile solution can be used on most surfaces, including countertops, tables, and sinks. For tougher stains, let the cleaner sit for a few minutes before wiping clean with a damp cloth. Not only is this DIY cleaner effective, but it’s also gentle on your household surfaces and your wallet. Embrace the power of simple, natural ingredients for a cleaner, greener home.
Toilet Bowl Cleaner
For a natural and effective toilet bowl cleaner, combine 1/2 cup of baking soda with 1/4 cup of white vinegar in a bowl. Mix into a paste and apply to the inside of the toilet bowl using a brush. Let sit for 15-20 minutes, then scrub well and flush. The baking soda helps scrub away stains and odors, while the vinegar disinfects and deodorizes. For extra freshness, add a few drops of your favorite essential oil to the mixture. This DIY cleaner is a great alternative to harsh chemical cleaners and can be used for regular toilet maintenance. Pair this with other clever upcycling projects to create a more sustainable home. Happy cleaning!
DIY Beeswax Food Wraps
Materials and Tools
To complete these DIY sustainability projects, you’ll need a few essential materials and tools. Most items can be found at your local hardware store or online retailers. Gather recycled wood, pallets, or scrap lumber for building projects. You’ll also need basic tools like a hammer, saw, drill, screwdriver, measuring tape, and safety glasses. For the compost bin, source a large plastic storage container with a lid. Insulation projects require weather stripping, caulk, and spray foam sealant. Don’t forget gardening supplies like soil, seeds, and pots for your herb garden. With these materials on hand, you’ll be ready to tackle your eco-friendly home improvements.
Crafting Process
To make your own beeswax wraps, start by gathering supplies: cotton fabric, beeswax pellets, jojoba oil, and pinking shears. Preheat your oven to 200°F (93°C). Cut the fabric into desired shapes and sizes using pinking shears to prevent fraying. Place a sheet of parchment paper on a baking tray and lay the fabric pieces on top. Sprinkle beeswax pellets evenly over the fabric, using about 2 tablespoons per 12-inch square. Drizzle a few drops of jojoba oil over the beeswax for added flexibility. Place the tray in the oven for 4-6 minutes until the beeswax melts completely. Using tongs, carefully remove the fabric from the tray and hang it to cool and dry for a few minutes. Once cooled, your beeswax wraps are ready to use! Simply cover bowls or wrap around food items, using the warmth of your hands to mold and seal the wrap. Wash them in cool water with mild soap and air dry between uses. With proper care, these eco-friendly wraps can last up to a year, replacing disposable plastic wrap in your kitchen.
Conclusion
By implementing these DIY sustainability projects, you can make a significant impact on reducing your environmental footprint while saving money on your utility bills. Simple changes like installing low-flow showerheads, creating a compost bin, or setting up a rain barrel can contribute to a more eco-friendly lifestyle without requiring major renovations or investments. Additionally, projects like starting an herb garden or switching to LED light bulbs not only benefit the environment but also enhance your home’s ambiance and functionality. As you embark on your sustainability journey, remember that every small action counts. By sharing your experiences and inspiring others to adopt these practices, you can help create a ripple effect of positive change in your community. So, choose a project that resonates with you, gather your tools, and start making a difference today. Together, we can work towards a greener, more sustainable future, one DIY project at a time.
