Transform your home into an eco-friendly haven with these sustainable DIY projects. Craft a stylish compost bin from reclaimed wood to minimize kitchen waste. Upcycle old furniture with low-VOC paint and natural fabrics for a fresh, non-toxic look. Install a rain barrel to collect water for your organic garden. Swap out energy-draining incandescents for efficient LED bulbs in eye-catching fixtures. With creativity and some elbow grease, you can create a greener living space that’s both beautiful and earth-friendly.
Kitchen Upgrades

Recycled Glass Backsplash
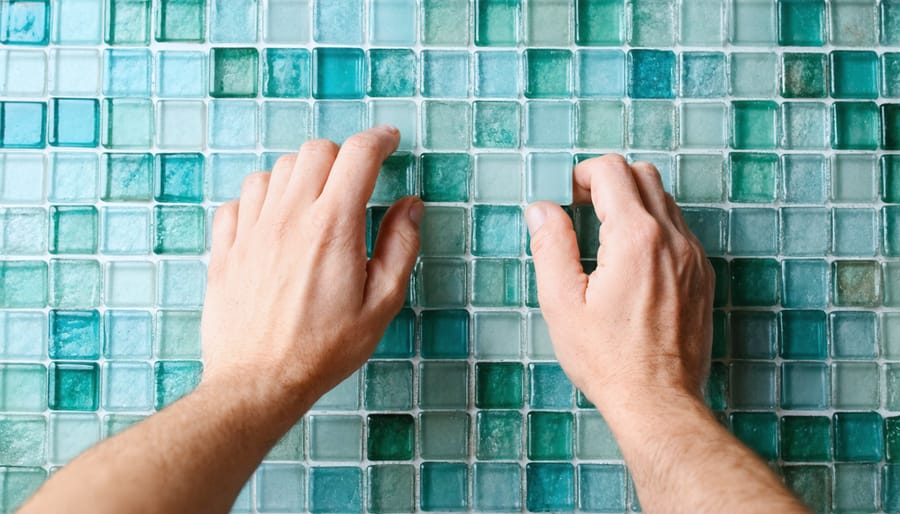
Creating a recycled glass backsplash is a stunning way to add eco-friendly flair to your kitchen. Begin by sourcing recycled glass tiles from a local supplier or online retailer. Look for tiles in colors and patterns that complement your existing décor. Before installation, clean and dry the wall surface thoroughly. Apply a layer of thinset mortar using a notched trowel, then carefully place the tiles in your desired pattern. For a cohesive look, use spacers to ensure even gaps between tiles. Once the thinset has cured, apply grout in the spaces between the tiles using a rubber float. Wipe away excess grout with a damp sponge, being careful not to disturb the tiles. Allow the grout to cure fully before applying a sealer to protect the tiles and grout from moisture and stains. With a little patience and creativity, you’ll have a one-of-a-kind backsplash that’s both beautiful and sustainable. As a bonus, using recycled glass helps reduce waste and supports eco-friendly manufacturing practices. Your new backsplash will be a conversation starter and a testament to your commitment to sustainability.
Reclaimed Wood Shelving
Reclaimed wood shelving is a rustic and eco-friendly way to add character to your kitchen while keeping materials out of landfills. To get started, source some reclaimed wood planks from a local salvage yard or online marketplace. Look for pieces with interesting textures and colors that complement your kitchen’s style.
Sand the wood thoroughly to remove any splinters or rough patches, then seal it with a non-toxic, food-safe finish like beeswax or mineral oil. This will help protect the wood and make it easier to clean.
Next, measure the wall space where you want to install the shelves and cut the planks to size using a saw. If you’re not confident in your DIY skills, consider hiring a professional carpenter for this step.
Attach sturdy metal brackets to the wall studs using a drill and screws. Make sure they’re level and can support the weight of the shelves and any items you plan to store on them. Place the wood planks on top of the brackets and secure them in place with screws driven up through the bottom of each bracket into the wood.
Style your new reclaimed wood shelves with a mix of practical items like dishes and cookbooks, along with decorative accents like plants or artwork. The unique character of the wood will add warmth and visual interest to your kitchen while keeping useful materials in circulation and out of the waste stream. For more ideas on how to create a nature-inspired kitchen, explore organic kitchen design ideas.
Living Room Refresh
Upcycled Furniture
Giving old furniture a new lease on life is a fantastic way to embrace sustainability in your home. When upcycling furniture, opt for non-toxic, low-VOC paints and finishes to minimize harmful chemicals. Chalk paint is a popular choice for its ease of use and versatility – it adheres well to most surfaces without extensive prep work. For a durable top coat, consider natural wax or hemp oil finishes.
Before you begin, clean the piece thoroughly and make any necessary repairs. Sand rough spots for a smooth base. When painting, use thin, even coats, allowing adequate drying time between layers. Experiment with techniques like distressing, stenciling, or decoupage to add character. Swap out dated hardware for modern knobs and pulls. Reupholstering with organic fabrics like linen, cotton, or bamboo can also give chairs and sofas an eco-upgrade.
Upcycling projects not only reduce waste but allow you to create one-of-a-kind pieces that reflect your style. By reviving furniture you already own or rescuing flea market finds, you’ll save money and resources. With a little creativity and elbow grease, you can curate a beautifully sustainable home, one lovingly restored piece at a time.

Natural Fiber Rug
Creating a natural fiber rug is a simple and sustainable DIY project that adds warmth and texture to any room. Start by choosing your favorite eco-friendly fiber, such as jute, sisal, or hemp. These sustainable materials are durable, biodegradable, and have a low environmental impact. Next, determine the desired size of your rug and cut the fiber accordingly. If using multiple strands, make sure they are of equal length.
To begin weaving, tie the strands together at one end, creating a knot. Secure this end to a sturdy object or ask a friend to hold it taut. Divide the strands into three equal sections and start braiding, keeping the tension consistent throughout. Once you reach the end, tie off the braid with another knot.
Now, coil the braided fiber into a spiral shape, starting from the center. Use a large tapestry needle and natural twine to stitch the coils together as you go, ensuring a tight and even placement. Continue stitching until you’ve reached your desired rug size. Tuck any loose ends under the rug and trim if necessary. Your eco-friendly, handmade rug is now ready to add a cozy touch to your living space.

Bedroom Oasis
Organic Linen Bedding
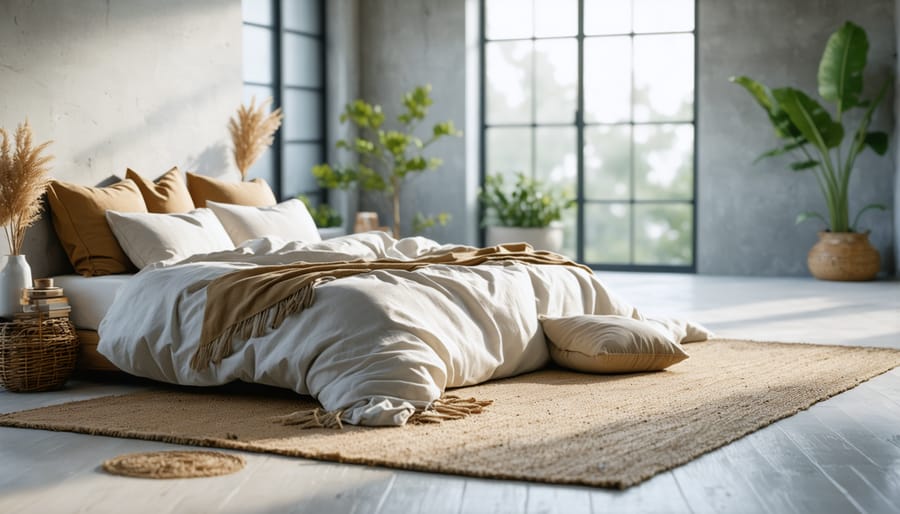
Creating your own organic linen bedding is a rewarding and sustainable DIY project. Begin by sourcing high-quality, GOTS-certified organic linen fabric in your desired color or pattern. Measure your mattress and duvet insert to determine the fabric yardage needed, allowing extra for seam allowances and shrinkage. Prewash and iron the linen before cutting to ensure a perfect fit.
For the duvet cover, cut two panels slightly larger than your insert, and sew them together on three sides with a ½-inch seam allowance. Create button holes or attach ties along the open edge for closure. For the sheets, cut the fabric to your mattress dimensions plus a 12-inch allowance for deep pockets and seams. Sew the corners and elastic casings, then insert elastic for a snug fit.
Finish your eco-friendly home decor by hand-stitching any open seams and adding decorative details like pintucks or embroidery. With care, your organic linen bedding will provide years of soft, breathable comfort while reducing your environmental impact. Embrace the natural wrinkles and texture of linen for a charming, relaxed aesthetic in your sustainable bedroom retreat.
Reclaimed Headboard
Upcycling an old door or shutter into a unique headboard is a creative way to add character to your bedroom while keeping materials out of landfills. To start, choose a door or shutter that fits the width of your bed. If needed, trim it down to size using a saw. Sand the surface thoroughly and fill any holes or cracks with wood filler. Once dry, sand again for a smooth finish.
Next, decide on a design. You can keep it simple or add decorative elements like painting, stenciling, or attaching reclaimed wood pieces for a rustic look. If you’re using a shutter, consider highlighting its natural texture with a fresh coat of paint.
Attach mounting hardware to the back of your headboard, ensuring it’s sturdy enough to support the weight. Position it carefully on the wall, checking for level, and secure it tightly. With a little creativity and effort, you’ll have a one-of-a-kind headboard that’s both sustainable and stylish. Embrace the imperfections and history of your reclaimed materials, knowing you’ve given them a second life in your eco-friendly bedroom retreat.
Bathroom Sanctuary
Natural Bath Mat
Weaving your own bath mat from sustainable materials like bamboo or organic cotton is a rewarding and eco-friendly DIY project. To get started, gather your chosen materials and a sturdy loom or frame. Begin by securing the warp threads vertically on the loom, keeping them evenly spaced and taut. Next, use the weft threads to weave horizontally through the warp, alternating over and under each strand. Experiment with different weaving patterns to create a unique texture and design. As you weave, make sure to maintain consistent tension for a clean, professional look.
Expert Tip: For added durability and slip-resistance, consider using a tighter weave or incorporating a non-slip backing material. Once you’ve reached your desired size, carefully remove the mat from the loom and secure any loose ends. With a little patience and creativity, you’ll have a one-of-a-kind, sustainable bath mat that adds a touch of natural charm to your bathroom décor. Plus, the satisfaction of knowing you crafted it yourself from eco-friendly materials will make each step onto your new mat feel even more rewarding.
Mason Jar Organizers
Mason jars are a versatile and affordable option for creating stylish storage solutions in your home. To transform these humble glass containers into chic organizers, start by thoroughly cleaning and drying your jars. Consider removing the labels for a sleek look, or embrace the rustic charm by leaving them on. Next, decide what you’ll be storing – cotton swabs, cotton balls, makeup brushes, or other small essentials.
You can elevate the jars’ appearance with a coat of paint in a color that complements your décor. Use chalk paint for a matte finish or spray paint for a glossy sheen. Once dry, label the jars using a permanent marker or adhesive vinyl lettering for a polished touch.
Another eco-friendly option is to wrap the jars with twine, jute, or recycled fabric scraps for added texture and visual interest. Secure the material with a dab of hot glue and embellish with buttons, beads, or charms if desired. When arranging your newly upcycled organizers, consider grouping them on a tray or shelf for a cohesive display. Not only will these mason jar organizers help you maintain a clutter-free space, but they’ll also reduce your reliance on plastic storage containers. Plus, when it’s time to clean, simply wash them with eco-friendly cleaners and reuse indefinitely.
Conclusion
By incorporating sustainable DIY projects into your home, you can make a meaningful difference in reducing your environmental impact while saving money and expressing your personal style. From simple swaps like eco-friendly cleaning products to more involved projects like building a vertical garden or crafting a reclaimed wood headboard, there are countless ways to embark on a greener home journey.
Remember, you don’t have to tackle every project at once. Start small, perhaps with a DIY beeswax wrap or a set of upcycled planters, and build momentum as you gain confidence and see the positive changes in your home. With each project, you’ll be contributing to a more sustainable future and inspiring others to do the same.
As you continue exploring eco-friendly DIY, keep an open mind and embrace the opportunity to learn, create, and make a difference. Your sustainable home makeover is an ongoing process, and every step counts. So roll up your sleeves, gather your materials, and enjoy the satisfaction of crafting a greener, more responsible living space, one DIY project at a time.
