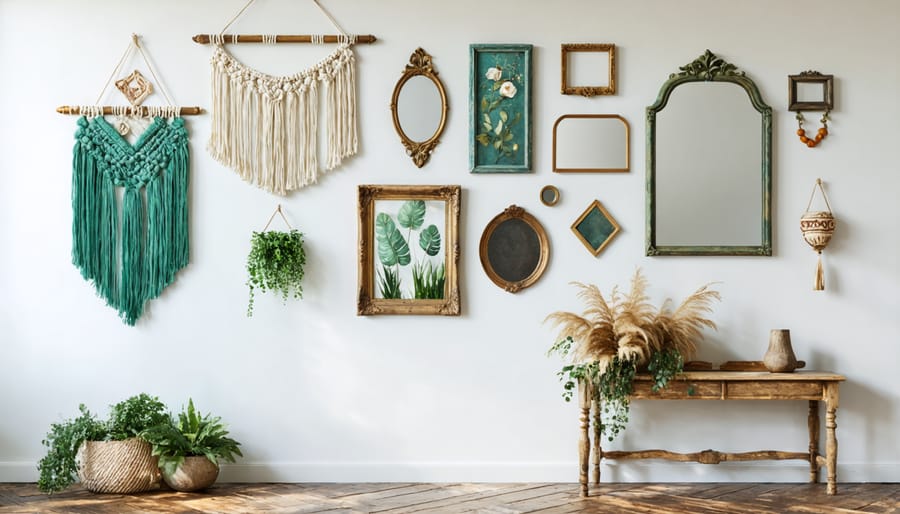
Transform your blank walls into stunning focal points without breaking the bank. Create a bold gallery wall using thrifted frames and personal photos, or craft a striking macramé wall hanging from simple cotton cord and wooden dowels. Turn everyday items like woven baskets, vintage maps, or pressed botanicals into eye-catching wall art that tells your unique story. Learning to save money on home decor doesn’t mean sacrificing style – it’s about unleashing your creativity with materials you already have or can source affordably.
Whether you’re a seasoned DIY enthusiast or just starting your crafting journey, these wall decor projects offer endless possibilities for personalizing your space. From simple washi tape geometric patterns to elaborate yarn wall hangings, each project can be customized to match your skill level and aesthetic preferences. Get ready to discover how everyday materials and a dash of imagination can revolutionize your walls and create conversation pieces that reflect your personality.
Transform Your Walls with Natural Materials
Woven Fiber Art
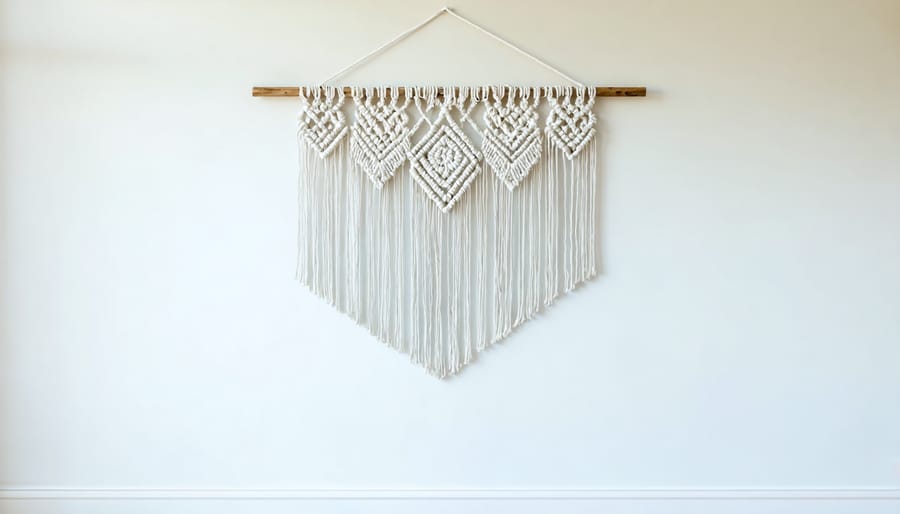
Transform your walls into stunning works of art with woven fiber creations that add texture and warmth to any room. Macramé and weaving aren’t just retro crafts – they’re part of the modern movement toward eco-friendly home improvements using natural materials.
To create a basic macramé wall hanging, start with cotton cord and a wooden dowel. Cut eight 6-foot lengths of cord and fold them in half over the dowel. Begin with simple square knots: take the leftmost four cords, divide them into two pairs, then loop the outer pair over and under the inner pair. Pull tight and repeat, creating a pattern as you work across the piece. Experiment with diagonal knots and varying cord lengths to create interesting shapes and textures.
For a woven piece, construct a simple loom using a picture frame and nails spaced 1/2 inch apart along the top and bottom. String vertical threads (the warp) between the nails. Using yarn, ribbon, or fabric strips, weave horizontally (the weft) over and under the warp threads. Mix textures by incorporating different materials – try chunky wool yarn alongside smooth cotton threads, or add natural elements like dried grasses.
Remember to maintain consistent tension throughout your weaving, and don’t be afraid to include unconventional materials like copper wire or leather strips for unique effects. When finished, secure loose ends and hang your piece using wall hooks or invisible hanging wire.
Pressed Botanical Gallery
Transform your walls into a stunning botanical showcase by creating pressed flower and leaf arrangements. This timeless art form brings nature’s beauty indoors while adding a delicate, artistic touch to your space.
Start by collecting flowers and leaves – choose flat specimens with vibrant colors and interesting shapes. Place your botanicals between sheets of parchment paper, then sandwich them between heavy books. Add more weight on top and let them dry for 2-3 weeks until completely pressed.
While waiting, gather your materials: a shadow box frame, acid-free paper for the background, and archival-quality glue. Once your specimens are ready, experiment with different arrangements on your background paper before committing to the final design. Consider creating patterns, symmetrical layouts, or free-flowing compositions.
When you’re satisfied with your arrangement, carefully secure each piece using tiny dots of glue. Work from larger specimens to smaller ones, adding delicate flowers and leaves last. For added dimension, layer different types of botanicals and incorporate varying textures.
Pro tip: Press extras of each specimen, as some may break during the arrangement process. Also, keep your finished piece out of direct sunlight to preserve the natural colors. Create seasonal collections or theme your arrangements by color for a cohesive gallery wall that celebrates nature’s artistry year-round.
Statement Pieces from Everyday Items
Geometric Mirror Designs
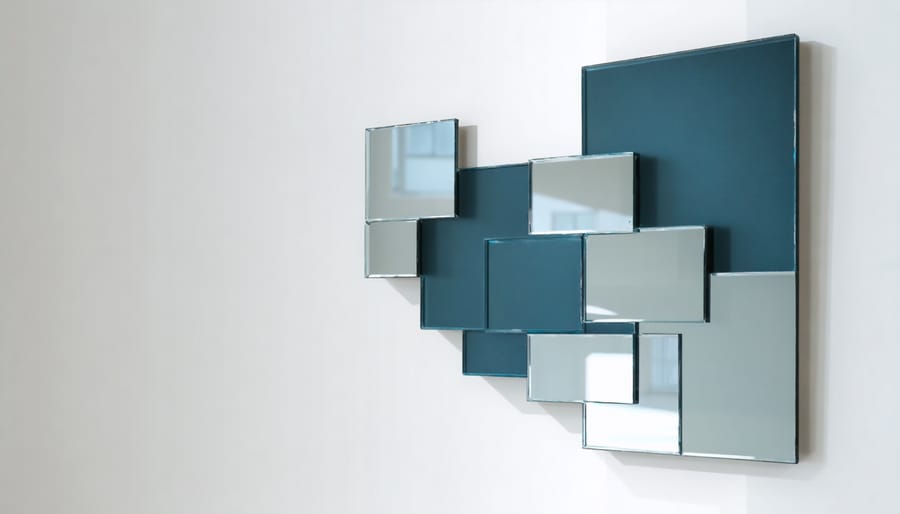
Transform your walls into a stunning focal point with geometric mirror arrangements – one of our favorite beginner-friendly DIY projects that creates maximum impact with minimal effort. Start by gathering your materials: multiple identical small mirrors (12-inch squares work well), a measuring tape, level, pencil, and command strips or mirror mounting hardware.
Begin by sketching your desired pattern on paper. Popular arrangements include diamonds, hexagons, or cascading triangles. For first-timers, try a simple symmetrical design using 6-9 mirrors. Before mounting, lay out your pattern on the floor to perfect the spacing and alignment.
Pro tip: Create paper templates the same size as your mirrors and temporarily tape them to the wall. This helps you visualize the final look and mark exact mounting points without risking mirror placement mistakes.
When you’re ready to mount, start from the center mirror and work your way outward. Keep your level handy – even slight misalignments will be noticeable in the final design. For added precision, measure the spacing between mirrors carefully, aiming for consistent gaps of 1-2 inches.
Safety note: Always check your wall type and use appropriate mounting hardware. For heavier mirrors or plaster walls, consider professional-grade mirror adhesive or wall anchors instead of command strips.
To elevate your design, try mixing mirror shapes or incorporating small decorative elements between the mirrors. Gold or silver geometric wall decals can create stunning transitions between mirror pieces.
Maintenance is simple – just dust regularly with a microfiber cloth and glass cleaner. The best part? This striking feature bounces light around your room, making spaces feel larger and brighter while doubling as functional mirrors for quick outfit checks or makeup touch-ups.
Remember, symmetry is your friend in this project, but don’t be afraid to experiment with asymmetrical designs once you’re comfortable with the basics. The result is a custom art piece that adds depth, light, and modern sophistication to any room.
Vintage Frame Collections
Transform your walls into a captivating gallery with a carefully curated collection of vintage frames. This timeless approach to wall decor combines history, artistry, and personal style, creating a sophisticated focal point in any room.
Start by sourcing frames from thrift stores, flea markets, or estate sales. Look for pieces with interesting details like ornate carvings, gilded edges, or unique shapes. Don’t worry if the frames show signs of wear – these imperfections add character and authenticity to your display.
When selecting frames, aim for variety in sizes, styles, and finishes while maintaining a cohesive theme. Mix oval frames with rectangular ones, or combine baroque-style frames with simpler designs. A unified color scheme can tie different styles together – try painting mismatched frames in complementary shades or stick to a monochromatic palette for elegant consistency.
Before arranging your frames, lay them out on the floor to experiment with different configurations. The classic gallery wall approach works well with vintage frames – start with a central piece and build outward, maintaining consistent spacing between frames. For a more relaxed look, try an asymmetrical arrangement that grows organically across the wall.
Consider these creative display ideas:
– Leave some frames empty for an artistic statement
– Mix in mirrors with traditional artwork
– Display family photos in black and white for a cohesive vintage feel
– Insert pressed flowers or vintage postcards
– Layer smaller frames in front of larger ones for depth
When hanging your frames, use proper wall anchors and ensure each piece is level. Start with the largest frame as your anchor point and work your way outward. Keep a small level and measuring tape handy to maintain precise spacing.
Pro tip: Take photos of your floor arrangement before hanging to use as a reference guide. This helps recreate your planned layout exactly as envisioned when it’s time to mount the frames on the wall.
Paint and Paper Projects
Abstract Canvas Art
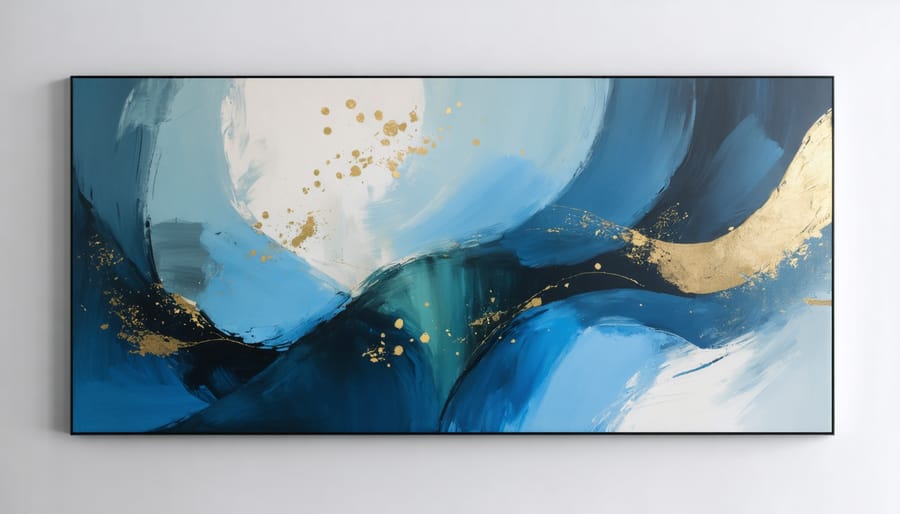
Creating your own abstract canvas art is an exciting way to add a personal touch to your walls while expressing your creativity. The best part? You don’t need to be a professional artist to achieve stunning results. Here’s a simple guide to help you create modern abstract artwork that will become a conversation starter in your home.
Start by gathering your materials: a blank canvas, acrylic paints in your chosen colors, various brushes, palette knives, and optional tools like sponges or texture combs. Select colors that complement your existing décor – consider using 3-4 main colors plus white for balance.
Begin by priming your canvas with a base color. Once dry, start experimenting with different techniques. Try the “drag and blend” method by applying two colors side by side and gently pulling them together with a dry brush. Create interesting textures by dabbing paint with a sponge or scraping it with a palette knife.
For a contemporary look, incorporate geometric shapes by using painter’s tape to create clean lines. Layer different colors and remove the tape when the paint is still slightly wet for crisp edges. Don’t be afraid to add unexpected elements like metallic paint or bold brush strokes.
Remember, abstract art is about expression rather than perfection. Step back occasionally to assess your composition and add elements until you’re satisfied. If you make a “mistake,” incorporate it into your design – sometimes these happy accidents create the most interesting effects.
Allow each layer to dry completely before adding new elements. Once finished, let your masterpiece dry for 24 hours before hanging. Consider creating a series of smaller canvases for a cohesive gallery wall effect that makes a bold statement in your space.
3D Paper Installations
Transform your walls into a gallery of dynamic 3D art using nothing more than paper! This engaging project combines the simplicity of paper crafting with stunning visual impact, making it perfect for those interested in sustainable home decorating.
Start by gathering your materials: cardstock or construction paper in your chosen colors, scissors, a ruler, pencil, and adhesive (either craft glue or double-sided tape). For added precision, a paper cutter can be helpful but isn’t essential.
Begin by creating your basic shapes. Geometric designs work particularly well for this project – try triangles, squares, or hexagons. Cut multiple pieces in varying sizes, keeping them proportional to your wall space. For a cohesive look, stick to a specific color palette that complements your room’s existing decor.
To add dimension, fold each shape carefully along predetermined lines. The key is consistency in your folds – sharp, clean creases will give your installation a professional appearance. Consider creating multiple layers by folding some pieces into more complex shapes, like pyramid forms or accordion pleats.
Arrange your pieces on the floor first to experiment with different patterns. Popular designs include scattered clusters, flowing waves, or symmetrical arrangements. Once you’re satisfied with your layout, take a photo for reference before transferring it to the wall.
Secure each piece to the wall using small dots of adhesive. Start from the center and work your way outward, maintaining even spacing. For added visual interest, vary the mounting depth of different pieces by using foam tape on some elements.
Remember to step back periodically during installation to ensure your design maintains balance and flow. The beauty of this project lies in its adaptability – you can easily add or adjust pieces until you achieve your desired effect.
Wallpaper Accent Pieces
Don’t let those beautiful wallpaper remnants go to waste! Transform them into stunning accent pieces that add personality and charm to your walls. Start by selecting wallpaper scraps with eye-catching patterns or textures – florals, geometrics, or even textured grasscloth can work beautifully.
Create simple yet striking wall art by cutting wallpaper into uniform shapes like circles, hexagons, or diamonds. Arrange these pieces in a pleasing pattern, perhaps in an ombré effect or a scattered design. For added dimension, mount the shapes on foam board before hanging them.
Another creative approach is to use vintage-style wallpaper within empty picture frames. Remove the glass and back, then stretch and secure the wallpaper across the frame. Group several frames of different sizes together for an eclectic gallery wall that costs a fraction of traditional artwork.
For a modern twist, cut wallpaper into silhouettes of birds, trees, or other nature-inspired shapes. These can be arranged to appear as if they’re flying or growing across your wall. You can even mix different wallpaper patterns within the same silhouette for an artistic patchwork effect.
Consider using wallpaper to line the backs of bookcases or create faux panels using decorative molding. These subtle touches can add unexpected visual interest to otherwise plain walls while making use of even the smallest wallpaper scraps.
Remember to use appropriate adhesives for your wall type, and always test in an inconspicuous area first. With careful planning, your wallpaper accent pieces can become conversation-starting focal points in any room.
Textile Wall Features
Tapestry Creations
Transform your walls into works of art with handmade textile tapestries that add warmth and texture to any room. Creating your own wall hanging is simpler than you might think, and the results can be stunning. Start with a wooden dowel or branch as your base, and gather materials like yarn, fabric scraps, or even old t-shirts cut into strips.
For beginners, try the basic weaving technique: tie lengths of yarn to your dowel, leaving them to hang freely. Create visual interest by alternating colors and textures as you weave horizontal rows using different materials. Don’t worry about perfection – organic, slightly uneven patterns often create the most appealing results.
Ready to level up? Experiment with different weaving patterns like diamonds or chevrons. Incorporate natural elements such as driftwood, dried flowers, or feathers for an eclectic bohemian look. You can also try macramé knots to add intricate details to your piece.
Pro tip: Before starting, sketch your design on paper and lay out your materials by color. This helps visualize the final piece and ensures you have enough materials. Remember to maintain consistent tension while weaving to keep your edges straight, but don’t pull too tight – some looseness allows the piece to hang naturally.
Choose colors that complement your existing décor, or go bold with contrasting hues to create a statement piece. Your handmade tapestry will not only beautify your space but also become a conversation starter that showcases your creativity.
Fabric-Wrapped Panels
Transform plain walls into stunning focal points with fabric-wrapped panels – a versatile project that combines your favorite textiles with simple materials. This DIY solution offers endless possibilities for adding color, pattern, and texture to your space while maintaining a professional finish.
To create your panels, you’ll need:
– Wooden frames or foam core boards
– Your chosen fabric
– Batting (optional for extra padding)
– Staple gun and staples
– Scissors
– Iron
– Picture hanging hardware
Start by cutting your board to the desired size – consider creating a series of different-sized panels for visual interest. Iron your fabric to remove any wrinkles, then cut it approximately 4 inches larger than your board on all sides.
If using batting, lay it over your board first. Place your fabric face-down on a clean surface, position the board (batting-side down) in the center, and begin stapling. Work from the middle of each side, pulling the fabric taut as you go. Create neat corners by folding them like you’re wrapping a present.
Pro tip: Choose fabrics that complement your existing decor but don’t compete with other patterns in the room. Consider using outdoor fabrics for high-traffic areas, as they’re more durable and easier to clean.
Arrange your panels in a grid, scatter them asymmetrically, or create one large statement piece. For added dimension, try varying the thickness of your boards or layering different fabrics.
Transforming your walls into personalized works of art doesn’t require professional expertise or a hefty budget – just creativity, patience, and some essential DIY skills. As we’ve explored throughout this guide, there are countless ways to breathe new life into your living spaces through DIY wall decor projects.
Remember to start with a clear vision of what you want to achieve, gather all necessary materials before beginning, and don’t be afraid to experiment with different techniques and combinations. Whether you choose to create a gallery wall with family photos, craft a macramé hanging, or design a geometric paint pattern, the key is to take your time and enjoy the creative process.
Keep in mind that perfection isn’t the goal – it’s about creating something meaningful that reflects your personal style and brings joy to your space. Start with simpler projects to build your confidence, and gradually work your way up to more complex designs as your skills improve.
Most importantly, don’t let fear of making mistakes hold you back. Some of the most stunning DIY wall decor pieces come from happy accidents and creative problem-solving. Your home is your canvas, and these projects are your opportunity to make it truly yours. So gather your supplies, embrace your creativity, and start transforming those blank walls into conversation pieces that tell your unique story.