Transform your windows affordably with basic vinyl roller shades starting at just $5-15 per window – the most budget-friendly option that still delivers privacy and light control. Combine these with thermal curtain panels ($10-20 per panel) to create energy-efficient window treatments that slash heating and cooling costs. For a no-cost solution, repurpose existing sheets or blankets into Roman shade-style treatments using basic sewing skills and $2 worth of cording. Install tension rods ($3-8 each) to hang light curtains without damaging walls – perfect for renters seeking temporary coverage without sacrificing their security deposit. These wallet-friendly options provide immediate window coverage while maintaining a polished look that works in any room.
Cellular Shades: The Budget-Friendly Energy Saver
Why Cellular Shades Work
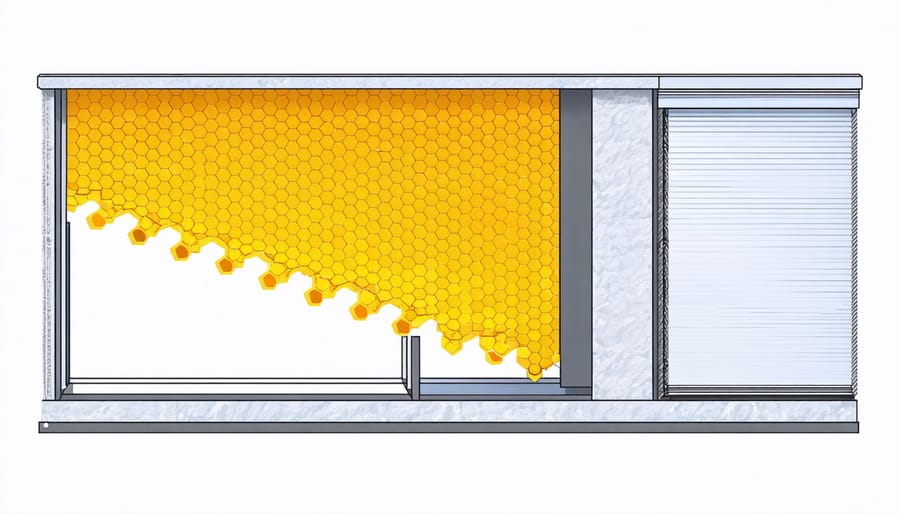
Cellular shades work through a clever design that creates small honeycomb-shaped air pockets between your window and room. These pockets trap air, creating a natural insulation barrier that works in both summer and winter. When cold air tries to enter through your windows in winter, it gets caught in these air chambers instead of flowing directly into your room. Similarly, in summer, the hot air gets trapped before it can heat up your space.
The magic lies in the structure’s multiple layers. Single-cell shades have one layer of honeycomb pockets, while double-cell shades feature two layers for extra insulation. This design isn’t just smart – it’s scientifically proven to reduce heat transfer through windows by up to 40%, depending on the specific product and installation.
What makes cellular shades even more effective is their ability to create a seal against your window frame when properly installed. This seal minimizes air leakage around the edges, enhancing their insulating properties and making them one of the most energy-efficient window treatments available at their price point.
Cost Breakdown and Energy Savings
When it comes to budget-friendly window treatments, vinyl mini blinds are the most economical option, typically ranging from $5 to $25 per window. Basic roller shades follow closely behind at $8 to $30, while simple curtain panels can cost between $10 and $40 per window. These affordable options can help slash your cooling costs by up to 30% when properly installed.
For a standard 3-bedroom home with 10 windows, you could outfit the entire house with basic vinyl blinds for as little as $50-250, compared to $500-2000 for more premium options like cellular shades. The energy savings can offset these initial costs within 1-2 years, with homeowners reporting average savings of $100-200 annually on heating and cooling bills.
DIY installation can save you an additional $30-50 per window in professional installation fees. By combining budget-friendly materials with DIY installation, you can effectively treat all your windows while keeping costs under $300 total – that’s less than the price of a single premium custom blind!
DIY Window Film Solutions
Types of Energy-Saving Films
Energy-saving window films come in several varieties, each offering unique benefits for your home. Solar films are popular for their ability to block up to 99% of UV rays while reducing heat gain in summer. These films typically have a slight tint and work best in warm climates. Low-E films provide year-round benefits by reflecting heat back into your home during winter and keeping it out during summer, making them ideal for all seasons.
Clear insulating films are perfect for those who want energy savings without changing their window’s appearance. They’re nearly invisible but still create an extra barrier against heat loss. For privacy concerns, consider frosted or decorative films that offer both energy savings and seclusion.
Most energy-saving films are DIY-friendly and come with simple installation kits. They’re particularly effective on older windows, where they can significantly improve insulation without the cost of replacement. Remember to check your window warranty before installation, as some manufacturers may void coverage if films are applied.

Installation Tips
Start by thoroughly cleaning your window with glass cleaner and a lint-free cloth. Measure your window dimensions, adding an extra inch on each side. Create a soapy water solution using mild dish soap and fill a spray bottle. Spray the window generously with the solution.
Cut your window film to size, then peel off the backing. Carefully position the film on your window, starting from the top corner. Use a squeegee or credit card to smooth out air bubbles, working from the center outward. For stubborn bubbles, lift the film slightly and reapply.
Trim excess film using a sharp utility knife, leaving a tiny gap between the film and window frame. Finally, spray the film’s surface lightly with the soapy solution and squeegee one last time. Let it dry completely for 24-48 hours before cleaning.
Pro tip: Install film on a cloudy day or early morning to avoid direct sunlight, which can cause premature adhesion.
Thermal Curtains on a Budget
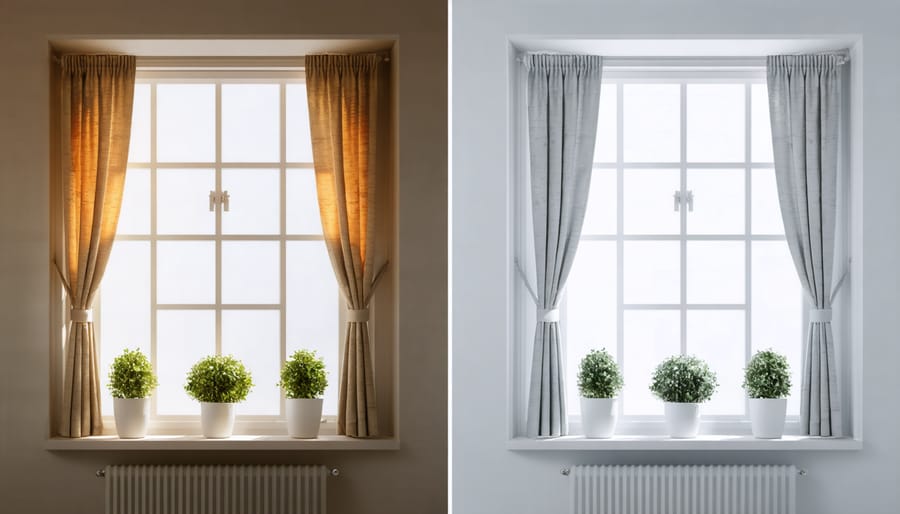
Choosing Budget Thermal Curtains
When shopping for budget-friendly thermal curtains, focus on finding panels made from polyester or polyester blends, which offer good insulation at a lower price point than premium materials. Look for curtains labeled as “thermal” or “insulating” that feature multiple layers of fabric. Many effective options are available between $15-30 per panel.
Consider purchasing slightly longer curtains than your window measurements to ensure proper coverage and maximize insulation. Watch for seasonal sales at big-box stores and online retailers, where you can often find quality thermal curtains at 40-50% off regular prices.
To get the most value, choose neutral colors that work year-round and opt for machine-washable varieties to avoid dry cleaning costs. Pay attention to the header style – rod pocket designs are typically the most affordable while still looking polished. Remember that proper installation is crucial: mount your curtain rod wide and high enough to prevent heat loss around the edges of your windows.
Maximizing Thermal Curtain Efficiency
To maximize energy savings with thermal curtains, proper installation is crucial. Start by mounting your curtain rod 4-6 inches above the window frame and extend it 3-4 inches beyond each side. This creates a tight seal when closed, preventing warm or cool air from escaping around the edges.
Layer your thermal curtains with existing blinds or shades for enhanced insulation. During winter, open curtains during sunny days to let in natural warmth, then close them at sunset to retain heat. In summer, keep curtains closed during peak sunlight hours to block heat gain.
For optimal performance, ensure curtains reach the floor or windowsill with minimal gaps. Use magnetic strips or hook-and-loop tape along the sides to create a better seal against the wall. Consider installing a cornice board or valance at the top to prevent warm air from flowing down behind the curtains.
Remember to clean your thermal curtains regularly according to care instructions, as dust and dirt can reduce their insulating properties.
Creative DIY Solutions
Bubble Wrap Insulation
Bubble wrap isn’t just for popping – it’s actually an ingenious temporary window insulator that costs next to nothing. To apply, simply spray a light mist of water on your clean window glass, then press the bubble side of the wrap against the window. The water creates suction that helps the bubble wrap stick to the glass. Cut the wrap to fit precisely within your window frame for a neater appearance.
This budget-friendly solution can reduce heat loss by up to 50% while still allowing natural light to filter through. For best results, use large-bubble wrap and replace it every season or when it starts showing wear. While not the most attractive option, it’s perfect for rarely-seen windows like those in basements, garages, or spare rooms. Just keep in mind that you’ll lose the ability to open your windows while the bubble wrap is installed, so choose your application spots wisely.
Draft Stoppers and Weather Stripping
One of the most budget-friendly ways to improve your windows’ efficiency is by using draft stoppers and weather stripping. You can create DIY draft stoppers by filling old socks or fabric tubes with rice, beans, or sand, then placing them along windowsills to block cold air. These cost less than $5 to make and can significantly reduce drafts.
Weather stripping is another affordable solution, typically costing between $5-15 per window. Self-adhesive foam tape is the easiest to install – simply clean your window frame, cut the tape to size, and press it into place around the edges where the window meets the frame. For extra protection, consider using shrink film window insulation kits, which create an additional barrier against cold air and usually cost around $15 for multiple windows.
Both solutions are temporary and can be easily removed when warmer weather arrives, making them perfect for renters or those testing different window treatments.
Making the Most of Your Investment
Even budget-friendly window treatments can provide lasting value when properly maintained and strategically used. Start by measuring your windows accurately before installation to ensure a perfect fit and maximum effectiveness. For roller shades or blinds, regularly dust them with a microfiber cloth or vacuum with a brush attachment to prevent dirt buildup and extend their lifespan.
To maximize light control and privacy, consider layering treatments. For example, pair inexpensive mini blinds with DIY curtains made from bed sheets or drop cloths. This combination offers versatility without breaking the bank.
For vinyl blinds or plastic shades, clean them monthly with mild soap and water, avoiding harsh chemicals that could cause damage. If you’ve opted for tension rods and curtains, check the rod’s tightness periodically to prevent sagging or falling.
Make the most of natural light by adjusting your window treatments throughout the day. Open them fully during winter days to let in warming sunlight, and close them during summer afternoons to keep rooms cooler. This simple habit can help reduce energy costs while protecting your window treatments from excessive sun exposure.
For DIY solutions, consider seasonal updates. Switch out lightweight curtains in summer for heavier options in winter, or add thermal liners to existing curtains during colder months. Store unused treatments properly by rolling, not folding, to avoid permanent creases and damage.
Creating an attractive and functional window treatment doesn’t have to break the bank. From budget-friendly roller shades and mini blinds starting at just $10, to DIY options like fabric panels and repurposed materials, you have plenty of affordable choices. Remember that even the most inexpensive window treatments can look stylish when properly selected and installed. Consider starting with one room to test your preferred solution before investing in treatments for your entire home. By combining smart shopping strategies, taking advantage of sales, and being open to DIY projects, you can achieve beautiful window coverage while staying within your budget. Take action today by measuring your windows and exploring the budget-friendly options we’ve discussed – your wallet and your windows will thank you!