Transform your home into an energy-saving powerhouse by implementing these high-impact efficiency measures today. Seal air leaks around windows and doors with weatherstripping to instantly reduce heating and cooling costs by up to 15%. Install a programmable thermostat to automatically adjust temperatures throughout the day, potentially saving $180 annually. Replace outdated light bulbs with LED alternatives to cut lighting expenses by 75% while delivering superior illumination. These smart home upgrades that save money not only reduce your carbon footprint but also deliver substantial monthly savings on utility bills. Whether you’re a seasoned DIY enthusiast or just starting your energy efficiency journey, these proven strategies offer immediate results without requiring significant upfront investment. The best part? Most of these improvements can be completed in a single weekend, making your home more comfortable and cost-effective for years to come.
Quick Wins: No-Cost Energy Savings Starting Today
Smart Temperature Management
Managing your home’s temperature smartly can significantly reduce your energy bills while keeping you comfortable year-round. Start by programming your thermostat to 68°F (20°C) in winter and 78°F (26°C) in summer when you’re home. For every degree you adjust your thermostat closer to the outside temperature, you can save up to 3% on your heating or cooling costs.
Take advantage of natural heating and cooling methods too. During winter, open your curtains on south-facing windows during the day to let in warming sunlight, and close them at night to retain heat. In summer, do the opposite – keep curtains closed during peak sunlight hours and open windows during cooler evening hours to create cross-ventilation.
Consider installing ceiling fans, which use far less energy than air conditioning. Running them counterclockwise in summer creates a cooling breeze, while clockwise rotation in winter helps distribute warm air that naturally rises to the ceiling. Remember to adjust fan direction seasonally and only run them in occupied rooms – fans cool people, not spaces.
Natural Light Optimization
Maximizing natural light in your home isn’t just about creating a brighter space – it’s a smart strategy for reducing your energy bills and creating a more sustainable living environment. Start by keeping your windows clean and removing any outdoor obstacles like overgrown bushes that might block sunlight. During winter months, open your curtains and blinds during the day to let warming sunlight in, and close them at night to retain heat.
Consider installing light-colored, reflective window treatments that can be easily adjusted throughout the day. Cellular shades are particularly effective, as they provide excellent insulation while allowing natural light to filter through. For rooms with limited natural light, strategically placed mirrors can help bounce light deeper into your space.
Make the most of your window positioning by arranging furniture to allow maximum light flow. In warmer months, use light-filtering curtains to reduce heat gain while maintaining brightness. Remember to adjust your window coverings seasonally – what works in winter might not be ideal for summer comfort and energy efficiency.
Pro tip: Install automated blinds or smart window treatments to optimize natural light throughout the day without constant manual adjustments.
Weekend Projects: Budget-Friendly Efficiency Upgrades
Seal and Insulate
One of the most effective ways to boost your home’s energy efficiency is to seal air leaks and improve insulation. This project is among the essential home repair skills you’ll want to master, and it can lead to significant energy savings.
Start by conducting a simple air leak test: on a windy day, hold a lit incense stick near windows, doors, electrical outlets, and other potential leak points. If the smoke wavers, you’ve found a leak. Common trouble spots include:
– Window and door frames
– Electrical outlets and switch plates
– Baseboards and crown molding
– Cable and phone line entry points
– Attic hatches
For windows and doors, install weatherstripping to create a tight seal. Self-adhesive foam tape works well for smaller gaps, while V-strip weatherstripping is perfect for larger openings. Don’t forget door sweeps for the bottom of exterior doors!
For smaller gaps around fixtures and outlets, use caulk to seal them up. For larger openings around pipes or vents, opt for expanding foam sealant. Remember to wear gloves and work in a well-ventilated area when using these materials.
Once you’ve sealed the obvious leaks, consider adding insulation to your attic, walls, or crawl spaces. While this might require more effort, the energy savings are worth the investment.
Smart Power Management
Smart power management doesn’t have to be complicated, and it can make a significant difference in your energy consumption. One of the most effective ways to start is by installing smart power strips throughout your home. These clever devices automatically detect when appliances are in standby mode and cut power to prevent energy waste from phantom loads.
Consider placing smart power strips in entertainment areas where multiple devices are typically connected. For example, your TV setup might include a gaming console, sound system, and streaming device – all potential energy vampires when not in use. A smart power strip can reduce this idle power consumption by up to 10% annually.
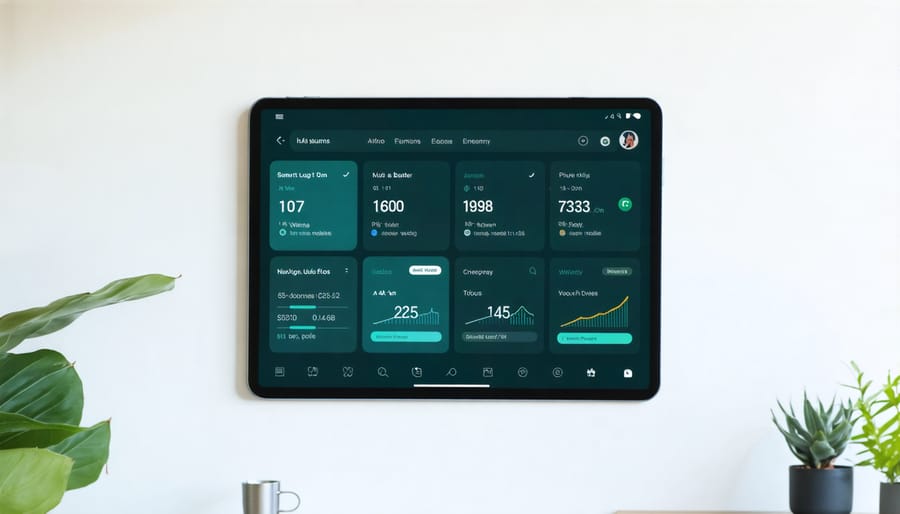
Energy monitors are another game-changing addition to your home. These devices connect to your electrical panel and provide real-time data about your energy usage through smartphone apps. You’ll be able to identify which appliances are consuming the most power and when, helping you make informed decisions about your energy use.
Pro tip: Look for smart power strips with surge protection and multiple “always-on” outlets for devices that need constant power, like routers or security systems. When installing energy monitors, consider models that offer monthly consumption reports and customizable alerts for unusual power usage patterns. This data-driven approach helps you optimize your energy consumption and spot potential issues before they impact your bill.
These smart solutions typically pay for themselves within the first year through reduced energy costs, making them a wise investment for any energy-conscious homeowner.

LED Lighting Conversion
Making the switch to LED lighting is one of the simplest yet most impactful ways to boost your home’s energy efficiency. LED bulbs use up to 90% less energy than traditional incandescent bulbs and can last up to 25 times longer, making them a smart investment for any home.
Start by identifying the most frequently used light fixtures in your home – these should be your priority for replacement. Common high-use areas include kitchen overhead lights, living room lamps, and outdoor security lighting. Rather than replacing all bulbs at once, consider a strategic approach: swap out bulbs as they burn out, or focus on one room at a time to spread out the initial cost.
When selecting LED bulbs, pay attention to lumens (brightness) rather than watts. For example, a 60-watt equivalent LED bulb typically produces about 800 lumens while using only 8-10 watts of power. Also consider the color temperature: warm white (2700-3000K) works well for living spaces, while cool white (4000K) is better suited for task-oriented areas like home offices or garages.
Don’t forget about specialty bulbs! LED options now exist for nearly every fixture type, including dimming lights, recessed lighting, and decorative fixtures. While LED bulbs may cost more upfront, the energy savings typically pay for the investment within a year, especially in frequently used fixtures.
Pro tip: Look for ENERGY STAR certified LED bulbs to ensure quality and efficiency standards are met.
Major Impact Projects: Long-Term Energy Solutions
Smart Home Technology Integration
Smart home technology has revolutionized the way we manage energy consumption, making it easier than ever to maintain an efficient household. At the heart of this transformation is the smart thermostat, a device that learns your temperature preferences and automatically adjusts to optimize energy usage. If you’re new to home automation, our comprehensive smart home automation guide can help you get started.
Installing a smart thermostat is surprisingly straightforward. First, ensure your HVAC system is compatible, then turn off the power before removing your old thermostat. Most smart thermostats come with clear installation instructions and can be connected to your home’s Wi-Fi in minutes. Once installed, take time to program your daily schedule, setting different temperatures for when you’re asleep, away, or at home.
For maximum efficiency, integrate your thermostat with other smart devices. Motion sensors can detect when rooms are empty and adjust temperatures accordingly, while smart blinds can automatically open or close to help with temperature regulation. Creating an effective smart home control setup allows you to monitor and adjust your energy usage from your smartphone.
Pro tip: Many utility companies offer rebates for installing smart thermostats, and some even provide free devices to customers. Check with your local provider about available programs. With proper setup and programming, smart home technology can reduce your heating and cooling costs by 10-15% annually while maintaining optimal comfort levels throughout your home.
Insulation Improvements
Proper insulation is one of the most effective ways to boost your home’s energy efficiency, potentially saving you up to 15% on heating and cooling costs. Think of insulation as your home’s cozy winter coat – it keeps the warm air in during winter and the hot air out during summer.
Let’s start with the attic, as it’s often the easiest place to add insulation and delivers the biggest bang for your buck. Check your current insulation levels – if you can see your ceiling joists, you probably need more. The recommended depth varies by region, but typically ranges from 10 to 14 inches of fiberglass or cellulose insulation.
Wall insulation can be trickier but is equally important. If your walls feel cold to the touch in winter, that’s a sign you might need better insulation. For existing walls, blown-in insulation is usually the best option, as it can be added through small holes that are easily patched afterward. This job typically requires professional installation, but the energy savings make it worthwhile.
Don’t forget about floor insulation, especially if you have a crawl space or unheated basement. Installing batting insulation between floor joists can make a noticeable difference in comfort and energy bills. For crawl spaces, also consider installing a vapor barrier to prevent moisture issues.
Pro tips for your insulation project:
– Always wear protective gear, including a mask and gloves
– Ensure proper ventilation remains in attic spaces
– Address any roof leaks before adding new insulation
– Consider using recycled materials like cellulose for an eco-friendly option
– Don’t compress insulation, as this reduces its effectiveness
– Install weatherstripping around attic hatches
Remember to check for local rebates and incentives – many utility companies offer significant savings on insulation upgrades. While some insulation projects make great DIY tasks, don’t hesitate to consult professionals for more complex installations, especially when dealing with older homes or challenging spaces.
Energy-Efficient Appliance Updates
Upgrading your old appliances to energy-efficient models is one of the most impactful ways to reduce your home’s energy consumption. While the upfront costs might seem high, the long-term savings on your utility bills make these investments worthwhile.
Start by identifying your home’s energy-hungry appliances. Refrigerators, washing machines, and dryers that are over 10 years old are typically prime candidates for replacement. When shopping for new appliances, look for the ENERGY STAR label – these products use 10-50% less energy than standard models.
Here’s a strategic approach to updating your appliances:
1. Begin with your refrigerator, as it runs 24/7 and can account for up to 15% of your home’s total energy use. Modern ENERGY STAR refrigerators use about half the energy of models from the 1990s.
2. Replace your washing machine next. New energy-efficient models use 25% less energy and 33% less water than conventional washers. Look for front-loading machines, which typically use less water and energy than top-loaders.
3. Consider upgrading your dryer to a heat pump model, which can use 20-60% less energy than conventional dryers.
4. Don’t forget smaller appliances like dishwashers and microwave ovens. While their individual impact might be smaller, the combined savings can be significant.
Pro tip: Time your purchases around major holidays and sales events to get the best deals. Many utility companies also offer rebates for ENERGY STAR appliance purchases, so check their websites before making your decision.
Remember to properly dispose of your old appliances through certified recycling programs, and maintain your new appliances according to manufacturer guidelines to ensure optimal performance and longevity.
Maintenance Tips for Lasting Efficiency
Seasonal Checklist
Keeping your home energy-efficient requires different approaches throughout the year. Here’s your seasonal guide to maintaining optimal efficiency:
Spring:
– Clean or replace HVAC filters
– Schedule AC maintenance before summer heat
– Check and clean ceiling fans
– Inspect window and door seals for winter damage
– Clean refrigerator coils
– Test your dehumidifier
Summer:
– Clean window screens to maximize natural ventilation
– Install window films on sun-facing windows
– Check attic ventilation
– Clean outdoor AC unit
– Inspect insulation for pest damage
– Test thermostat accuracy
Fall:
– Schedule heating system maintenance
– Clean gutters to prevent ice dams
– Weather-strip doors and windows
– Inspect roof for damaged shingles
– Service your water heater
– Install programmable thermostat if needed
Winter:
– Seal any drafts around windows and doors
– Reverse ceiling fan direction
– Install door sweeps
– Check attic insulation levels
– Maintain optimal humidity levels
– Inspect heating ducts for leaks
Pro tip: Create calendar reminders for these tasks at the start of each season. Many of these maintenance activities take just a few minutes but can lead to significant energy savings throughout the year. Remember to document any issues you find for future reference or professional repairs.
Professional Inspections
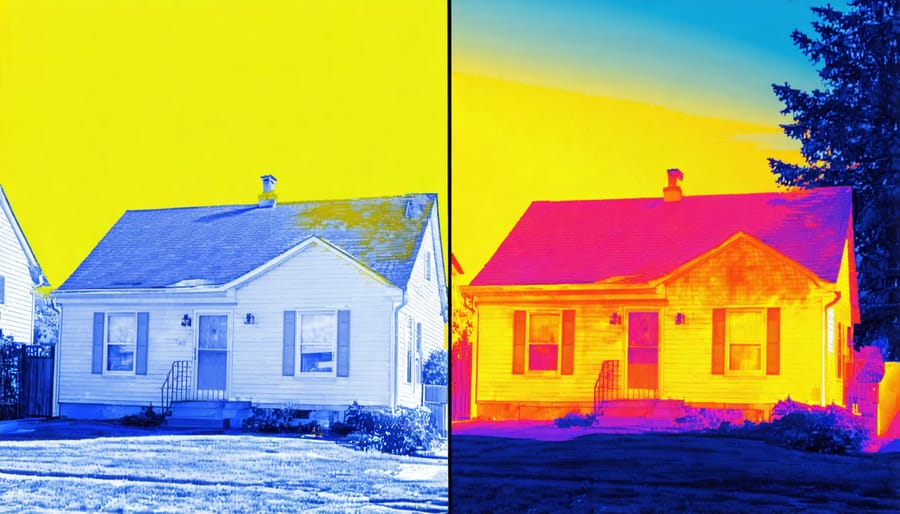
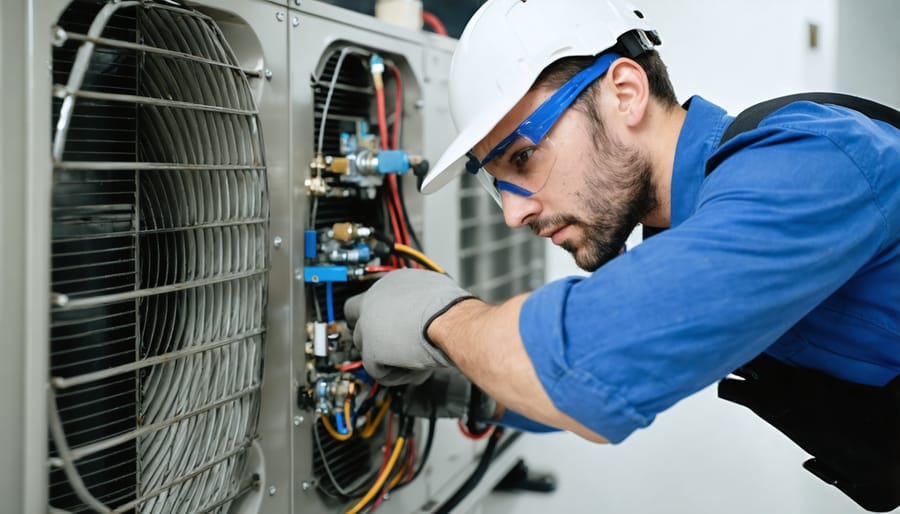
While DIY energy improvements are great, some checks require professional expertise to ensure your home is operating at peak efficiency. Schedule an annual HVAC inspection to verify your heating and cooling systems are running optimally – this includes checking refrigerant levels, cleaning ducts, and calibrating thermostats. A certified energy auditor can conduct a comprehensive home energy assessment, using specialized tools like infrared cameras and blower door tests to identify hidden air leaks and insulation gaps that might be missed during visual inspections.
Have your insulation professionally evaluated every 5-7 years, particularly in your attic and crawl spaces, as these areas are prone to settling and degradation over time. A licensed electrician should inspect your home’s wiring every 3-5 years, especially if you live in an older home, to ensure there are no energy-wasting electrical issues or safety hazards.
Don’t forget about your windows and doors – a professional can assess their seals and overall condition, recommending repairs or replacements when necessary. If you have a fireplace, annual chimney inspections are crucial not just for safety but also for preventing heated air from escaping through a poorly sealed damper.
These professional inspections might seem like an extra expense, but they typically pay for themselves through improved energy efficiency and the prevention of costly repairs down the line.
Making your home more energy efficient doesn’t have to be overwhelming or expensive. By implementing even a few of the strategies we’ve discussed, you can start seeing real improvements in both your energy consumption and utility bills. Start small with simple changes like switching to LED bulbs, sealing drafts, and being mindful of your daily energy habits. As you become more comfortable, you can tackle bigger projects like improving insulation or upgrading to energy-efficient appliances.
Remember, every small step counts toward creating a more sustainable and cost-effective home. The initial investment in energy-efficient improvements often pays for itself through reduced utility bills and increased home value. Plus, many of these changes contribute to a more comfortable living environment while helping protect our planet.
Take a moment to walk through your home and identify areas where you can make immediate improvements. Create a plan that works for your budget and timeline, prioritizing the changes that will have the biggest impact. Don’t forget to check for local rebates and tax incentives that can help offset the costs of larger upgrades.
By taking action today, you’re not just saving money – you’re investing in your home’s future and contributing to a more sustainable world. Start with one change this week, and build from there. Your wallet, your home, and the environment will thank you.