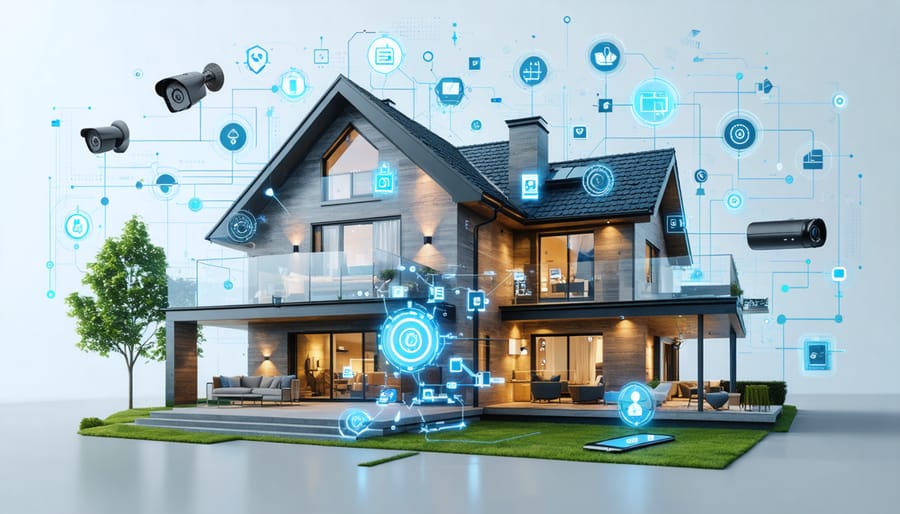
Transform your home into a modern fortress with today’s cutting-edge best smart home security system options, all without breaking the bank or calling in professional help. Installing your own smart security system has never been more accessible, offering savvy homeowners complete control over their property’s protection while saving thousands in installation and monitoring fees. From wireless cameras that connect seamlessly to your smartphone to intelligent door sensors that alert you instantly of unexpected entry, modern DIY security systems combine advanced technology with user-friendly setup processes. Whether you’re a tech enthusiast or a complete beginner, these systems are designed for straightforward installation, typically requiring nothing more than basic tools and a stable Wi-Fi connection. By choosing to self-install, you’ll gain intimate knowledge of your security system’s capabilities, ensure optimal placement of components, and have the flexibility to expand or modify your setup as your needs change.
Why Choose a Self-Install Smart Security System?
Cost Benefits
When comparing costs between professional and DIY installation, the savings are substantial. Professional security system installation typically ranges from $300 to $1,500, depending on system complexity and components. In contrast, self-monitored security systems with DIY installation can save you 60-80% on upfront costs.
Beyond installation savings, you’ll avoid recurring expenses like installation fees, service calls, and mandatory professional maintenance visits. Most self-install systems come with user-friendly apps and detailed guides, making setup straightforward and maintenance manageable.
Consider this: a professionally installed system averaging $800 plus $200 annual maintenance quickly adds up to $2,000 over five years. The same security coverage with a self-install system might cost $400-600 total, with no additional maintenance fees. Plus, you’ll have the flexibility to expand or modify your system without paying professional service charges.
Flexibility and Control
One of the best features of self-install smart home security systems is their incredible flexibility. You can start small with basic components like a camera and door sensor, then gradually expand your system as your needs change or budget allows. Most modern systems let you mix and match components, so you can create a perfectly tailored setup for your home.
Want to add more cameras later? No problem. Need extra door sensors for a new addition to your home? Simply purchase and sync them to your existing system. Many systems also offer useful automation features, letting you create custom rules like turning on lights when motion is detected or recording video when a door opens.
This flexibility extends to monitoring options too. You can choose between self-monitoring through your smartphone or professional monitoring services, and switch between them as needed. Plus, most systems work seamlessly with popular smart home platforms, making it easy to integrate your security setup with other smart devices you already own.
Essential Components for Your DIY Security System
Core Components
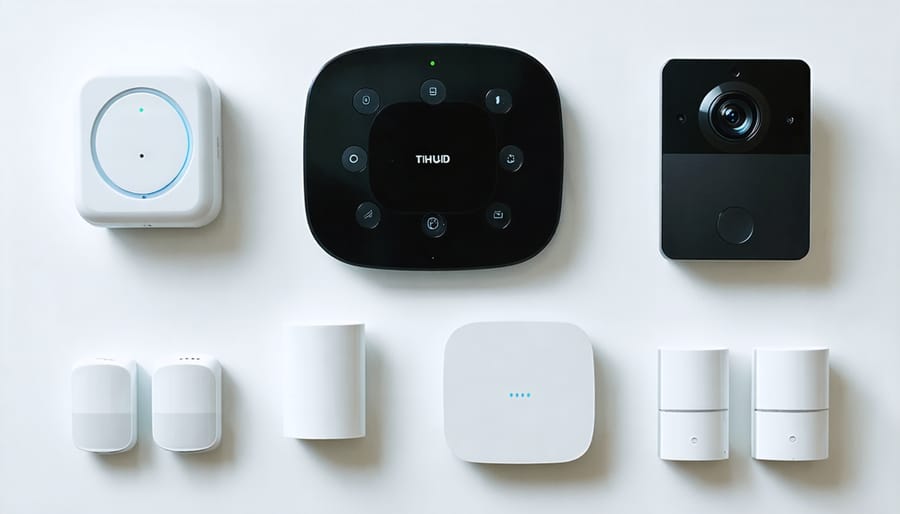
Every self-install smart home security system starts with four essential components that work together to keep your home safe and secure. At the heart of your system is the central hub or control panel, which acts as the brain of your security network. This smart hub connects all your devices and allows you to monitor and control everything from your smartphone.
Motion sensors are your next must-have component. These clever devices detect movement in key areas of your home and can trigger alerts when activity is detected. Place them in high-traffic areas like entryways, hallways, and living spaces for optimal coverage. Door and window sensors are equally important – they alert you whenever someone opens or closes an entry point to your home.
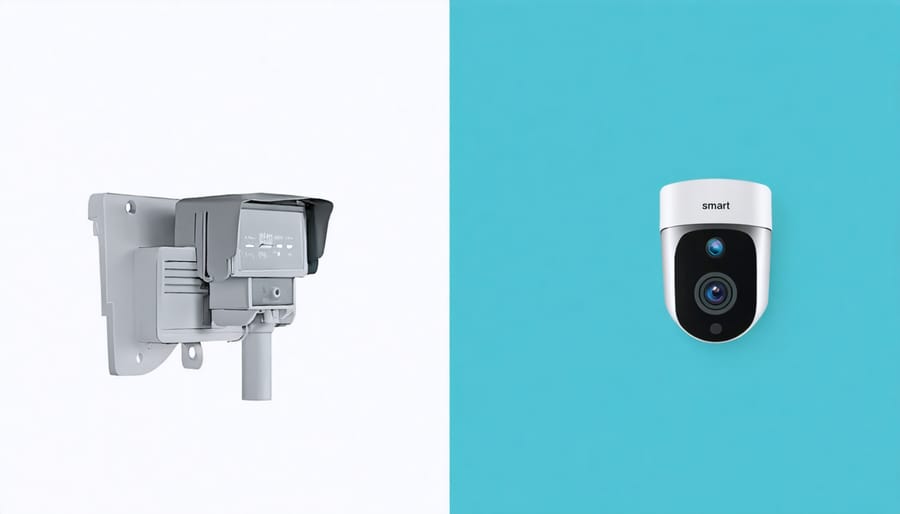
Security cameras have become more affordable and user-friendly than ever. Today’s smart cameras offer crystal-clear HD video, night vision, and two-way audio communication. Many even include advanced features like person detection and motion zones to reduce false alerts.
To round out your basic setup, consider adding environmental sensors that detect smoke, carbon monoxide, or water leaks. These devices not only protect against intruders but also help prevent costly damage from environmental hazards.
The beauty of modern security systems is their modularity – you can start with these core components and expand your system over time as your needs change or your budget allows.
Optional Enhancements
Want to take your security system to the next level? These optional add-ons can transform your basic setup into a comprehensive suite of smart home safety features that enhance both security and convenience.
A video doorbell camera is one of the most popular upgrades, letting you see, hear, and speak with visitors whether you’re home or away. Most models offer motion detection, night vision, and cloud storage for recorded footage. Smart locks are another game-changer, allowing you to lock and unlock your doors remotely, create temporary access codes for guests, and track who comes and goes.
For comprehensive protection, consider adding smart smoke and carbon monoxide detectors. These devices not only alert you when you’re home but also send notifications to your phone when you’re away. Water leak sensors can prevent costly damage by alerting you to potential flooding or pipe issues before they become serious problems.
Motion-activated smart lights add both security and convenience, automatically illuminating dark areas when movement is detected. For pet owners, indoor cameras with two-way audio let you check on and even interact with your furry friends throughout the day.
Remember, you can add these enhancements gradually as your needs and budget allow. Each component integrates seamlessly with your base system, creating a more robust and personalized security solution.
Step-by-Step Installation Process
Planning Your Setup
Before diving into installation, taking time to plan your smart home security setup will save you countless headaches down the road. Start by sketching a basic floor plan of your home, marking all entry points, windows, and areas that need monitoring. This visual guide will help you determine the optimal placement for each component.
For motion sensors, focus on high-traffic areas and corners that provide the widest coverage. Place them at a height of 6-8 feet, away from heat sources and direct sunlight to prevent false alarms. Door and window sensors should be installed on all ground-level entry points, with priority given to those less visible from the street.
Your control panel or hub needs a central location with strong Wi-Fi connectivity. Consider placing it near your router, but keep it out of sight from windows to prevent tampering. For indoor cameras, position them to cover main living areas and entrances, while outdoor cameras should focus on approaches to your home, including driveways and backyards.
Remember to account for power sources – while many devices are battery-powered, cameras often need constant power. Plan cable routes carefully to maintain a clean look. Also, consider future expansions when laying out your system. Leaving room to add components later can save you from having to reorganize your entire setup.
For optimal performance, test your Wi-Fi signal strength at each planned device location before final installation. This simple step can prevent connectivity issues that might affect your system’s reliability.
Physical Installation
Now that you’ve gathered all your components, let’s get them properly installed! Start by creating a rough sketch of where each device will go – this will make the process much smoother. Begin with your hub or base station, placing it centrally in your home and near a power outlet and your Wi-Fi router for optimal connectivity.
For door and window sensors, clean the mounting surfaces thoroughly with alcohol wipes. Remove the adhesive backing and press firmly for 30 seconds – these need to align perfectly, so take your time. Motion sensors work best in corners at about 6-7 feet high, angled slightly downward. Remember to avoid placing them near heating vents or direct sunlight.
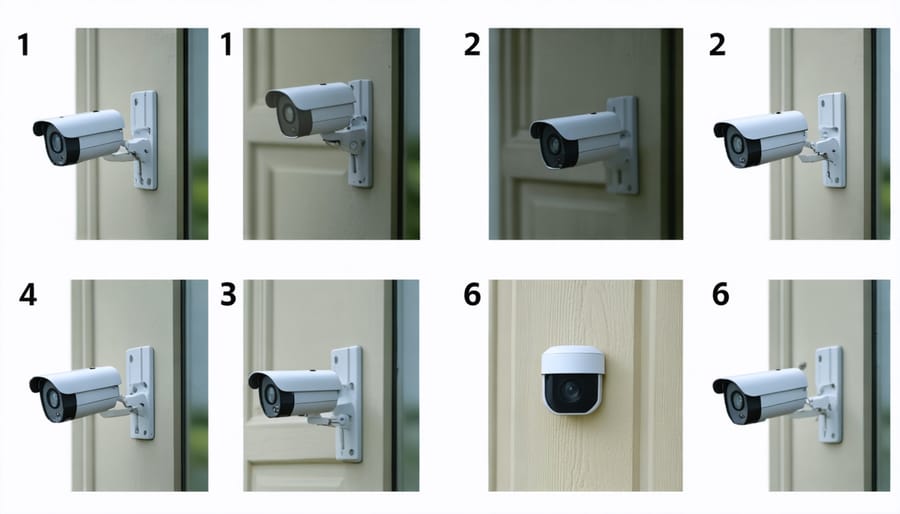
Your smart cameras deserve special attention. For indoor cameras, consider high shelves or wall corners that provide a wide view of entry points. Outdoor cameras should be mounted under eaves or protected areas, ideally 8-10 feet high and angled downward at 15-20 degrees. Don’t forget to route power cables neatly and secure them with cable clips.
If your system includes a keypad, mount it near your primary entrance at a comfortable height – typically around 5 feet. For video doorbells, ensure they’re at eye level (about 48 inches high) and check that your existing doorbell wiring is compatible if needed.
Quick Pro Tip: Before permanently mounting anything, test each component’s signal strength in its intended location using your system’s app.
App Setup and Configuration
Once you’ve got your hardware in place, it’s time to bring your security system to life through the app setup process. Start by downloading your system’s dedicated mobile app from either the App Store or Google Play Store. Most modern security systems offer user-friendly apps that transform your smartphone into a powerful control center.
Create your account using a strong password, and follow the in-app prompts to connect your hub to your home’s Wi-Fi network. The app will typically guide you through a step-by-step process of adding and naming each component. Take time to customize sensor names based on their locations – for example, “Front Door Sensor” or “Living Room Camera.”
Next, configure your notification preferences. Decide which alerts you want to receive and how – whether through push notifications, text messages, or emails. Many systems allow you to create custom rules, like receiving alerts only during specific hours or when certain sensors are triggered.
As you set up your smart digital hub, take advantage of automation features. Create schedules for your system to arm and disarm automatically, or set up geofencing to trigger your system based on your phone’s location.
Don’t forget to add trusted family members or roommates to your system and set appropriate access levels. Take time to test each component through the app to ensure everything’s working correctly before finalizing your setup.
Maintenance and Troubleshooting Tips
Regular Maintenance Schedule
Keeping your smart home security system in top shape doesn’t have to be complicated. Here’s a simple maintenance timeline to help you stay on track:
Monthly Tasks (5-10 minutes):
• Test all door and window sensors
• Check camera angles and clean lenses
• Verify motion detector sensitivity
• Test mobile app notifications
• Ensure all components show “connected” status
Quarterly Tasks (15-20 minutes):
• Replace batteries in wireless components
• Update system firmware and mobile apps
• Test backup power systems
• Clean outdoor camera housings
• Check Wi-Fi signal strength throughout your home
Annual Tasks (30-45 minutes):
• Deep clean all components
• Verify emergency contact information
• Review and update automation rules
• Check physical mounting of all devices
• Test cellular backup if included
Pro tip: Create calendar reminders for these maintenance checks. Most modern systems will notify you about critical updates and low batteries, but it’s wise to stay proactive. Remember to document any changes or adjustments you make during maintenance – this can be invaluable for troubleshooting later.
Quick safety note: Always test your system after performing maintenance to ensure everything works perfectly. Your security is worth those few extra minutes!
Common Issues and Solutions
Even the best DIY security systems can encounter occasional hiccups. Here are common issues you might face and their simple solutions:
Connection Problems: If your devices aren’t connecting to your home’s Wi-Fi, try moving your router closer to the devices or adding a Wi-Fi extender. Sometimes, simply restarting your router can resolve connectivity issues.
False Alarms: To reduce false alerts, ensure motion sensors are positioned away from heating vents, windows with moving curtains, and areas where pets frequently move. Adjust the sensitivity settings if your system allows it.
Battery Drain: If you notice batteries depleting quickly, check if your devices are placed in extreme temperature areas or too far from the hub. Most components should have batteries lasting 6-12 months under normal conditions.
App Not Responding: When your mobile app becomes unresponsive, start by forcing the app to close and reopening it. If issues persist, uninstall and reinstall the app, making sure you’re using the latest version.
Sensor Placement Issues: If door/window sensors aren’t triggering properly, clean the contact points and ensure they’re properly aligned. The gap between sensors shouldn’t exceed the manufacturer’s recommended distance, typically 1/4 inch.
Remember, most system providers offer excellent customer support through their websites or phone lines if you need additional assistance.
Taking control of your home security has never been more accessible, and installing a smart security system yourself is a rewarding way to protect what matters most. As we’ve explored throughout this guide, self-install security systems offer the perfect blend of convenience, cost-effectiveness, and customization that modern homeowners need.
Remember that successful installation starts with careful planning and component selection. Take time to assess your home’s specific needs, choose compatible devices, and create a comprehensive security plan. Don’t feel overwhelmed – the technology has become increasingly user-friendly, and most systems come with detailed instructions and helpful support resources.
The benefits of DIY installation extend beyond the initial cost savings. You’ll gain valuable knowledge about your security system, making troubleshooting and future upgrades much easier. Plus, you’ll have the flexibility to modify and expand your system as your needs change.
Whether you’re just starting with a basic setup or planning a comprehensive smart home security solution, the key is to begin. Start small if needed – even a simple system with a few strategic components can significantly enhance your home’s security.
Ready to take the next step? Gather your tools, review the installation steps, and embrace the satisfaction of knowing you’ve personally ensured your home’s protection. Your safer, smarter home awaits!