Transform your outdoor space into an automated oasis with modern smart lighting control systems that combine convenience, security, and energy efficiency. These intelligent systems let you orchestrate your exterior lighting from anywhere, creating the perfect ambiance while cutting energy costs by up to 50%.
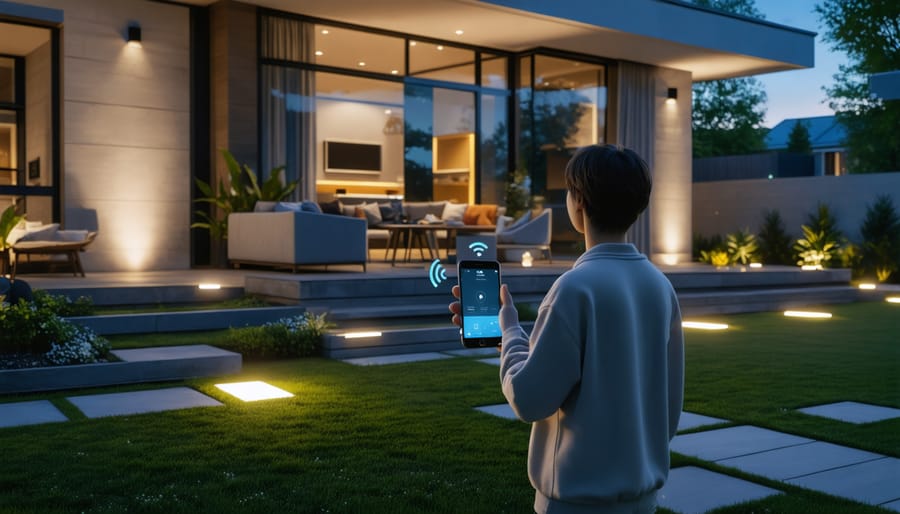
Gone are the days of fumbling with manual timers or leaving lights on unnecessarily. Today’s outdoor smart lighting solutions offer motion detection, smartphone control, and automated scheduling that adapts to sunset and sunrise times. Whether you’re hosting a backyard gathering or securing your property while away, these systems provide unprecedented control over your outdoor illumination.
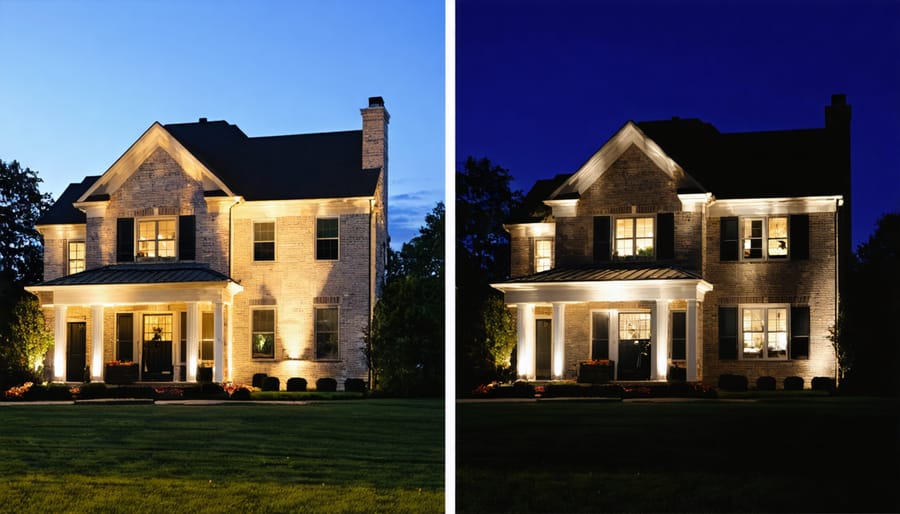
From elegant pathway lights to powerful flood lamps, smart lighting control systems integrate seamlessly with existing outdoor fixtures while adding features like dimming, color changing, and weather-responsive automation. The technology not only enhances your home’s curb appeal but also contributes to a safer, more energy-efficient environment.
This comprehensive guide explores everything you need to know about selecting, installing, and maximizing the benefits of outdoor smart lighting control systems – from basic components to advanced features that will revolutionize how you illuminate your outdoor spaces.
How Smart Outdoor Lighting Systems Work
Essential Components
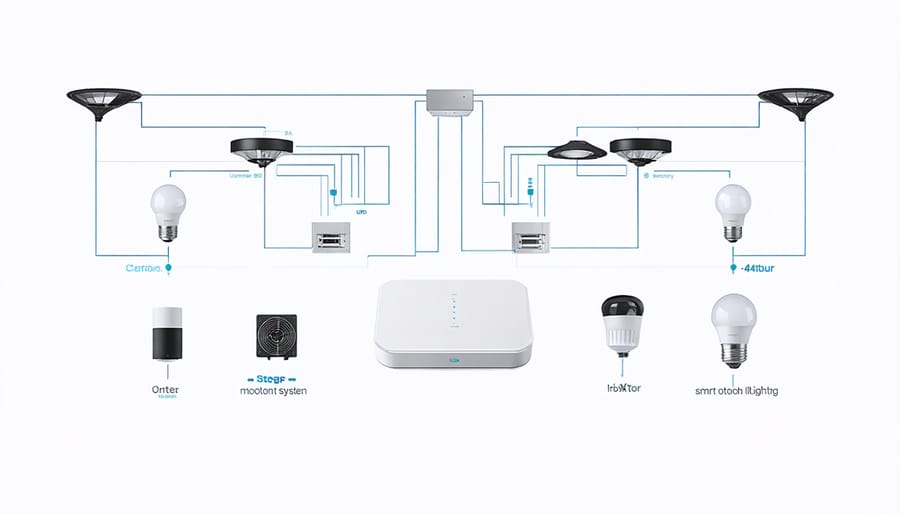
A well-designed outdoor smart lighting system consists of four key components that work together seamlessly. At its heart is the central controller, which serves as the brain of your system and can be easily managed through a smartphone app. This controller is part of the broader ecosystem of smart home upgrades that make your life easier and more efficient.
Motion and light sensors form the second crucial element, automatically detecting movement and ambient light levels to trigger your lighting when needed. These weatherproof sensors can be strategically placed around your property to ensure optimal coverage and response.
Smart bulbs or fixtures are the third component, offering features like dimming capabilities, color changing options, and energy-efficient LED technology. These bulbs can be individually controlled and programmed to create different lighting scenes for various occasions.
Finally, a reliable hub or bridge connects all these elements to your home’s Wi-Fi network, enabling seamless communication between components. Some systems use protocols like Zigbee or Z-Wave for more stable connections, especially in larger outdoor spaces where Wi-Fi signals might be weaker.
Connectivity Options
Getting your outdoor smart lights connected is easier than ever, thanks to various wireless protocols available today. WiFi is perhaps the most familiar option, letting you control your lights directly through your home network and smartphone. It’s perfect for basic setups and offers good range, though it might impact your network if you have many devices.
Bluetooth is another popular choice, especially for smaller setups. While it has a shorter range, it’s incredibly easy to set up and doesn’t require an internet connection. Plus, it’s very energy-efficient, which means your battery-operated lights will last longer.
For serious smart lighting enthusiasts, Zigbee and Z-Wave protocols offer excellent reliability and range. These systems create a mesh network where each light acts as a signal repeater, extending coverage throughout your yard. While they require a hub, they’re incredibly stable and work well with other smart home devices.
Consider your specific needs when choosing: WiFi for convenience and wide compatibility, Bluetooth for simple setups, or Zigbee/Z-Wave for more advanced systems. Remember that some systems can work with multiple protocols, giving you the flexibility to expand your setup over time.
Key Features That Make Outdoor Lighting Truly Smart
Motion Detection and Security
Motion detection capabilities transform your outdoor smart lighting into an active security system for your home. When integrated with motion sensors, your lights automatically illuminate when they detect movement, creating an immediate deterrent for potential intruders while providing convenient illumination for welcome visitors and yourself.
Many smart lighting systems allow you to customize sensitivity levels and detection zones, so you won’t have lights triggering unnecessarily when cars pass by or when neighborhood cats explore your garden. You can also set up instant notifications on your smartphone whenever motion is detected, keeping you informed about activity around your property even when you’re away.
For enhanced security, consider programming your lights to mimic occupancy patterns when you’re on vacation. You can create schedules that vary slightly each day, making it appear as though someone is home. Some systems even integrate with security cameras and smart doorbells, creating a comprehensive security network that keeps your home protected around the clock.
Pro tip: Position motion sensors strategically near entry points, walkways, and darker corners of your property for maximum effectiveness.
Scheduling and Automation
Modern smart lighting control systems offer incredible flexibility when it comes to scheduling and automation. You can easily program your lights to turn on at sunset and off at sunrise, or create custom schedules that match your daily routines. Most systems come with user-friendly mobile apps that make programming as simple as a few taps on your phone.
Want your front porch lights to welcome you home from work? Set them to activate just before you arrive. Planning a vacation? Create random on/off patterns to make it look like someone’s home. Many systems also support motion detection, automatically illuminating pathways and entrances when someone approaches.
The real magic happens when you combine different automation features. For example, you can set your garden lights to turn on at dusk but only at 50% brightness, then increase to full brightness when motion is detected. Some systems even integrate with weather data, adjusting schedules during storms or particularly dark days.
Advanced features like geofencing can automatically activate your outdoor lights when you’re approaching home, while smart scenes let you create perfect lighting combinations for different occasions – from subtle evening ambiance to full security lighting.
Weather Responsiveness
Modern outdoor smart lighting systems are impressively attuned to their environment, making real-time adjustments based on weather conditions to enhance both functionality and energy efficiency. These systems use built-in sensors to detect rain, snow, fog, and other weather elements, automatically adjusting brightness levels to maintain optimal visibility and safety.
During rainy conditions, your lights can automatically increase their intensity to cut through the precipitation and improve visibility. When fog rolls in, the system can adjust to prevent glare while ensuring adequate illumination. Some advanced systems even factor in humidity levels and temperature to optimize performance and prevent moisture-related issues.
What’s particularly clever is how these systems integrate weather forecasts into their programming. If snow is predicted, your lights might automatically brighten to ensure your pathways remain visible under fresh snowfall. During storm conditions, the system can enter a safety mode that maintains consistent lighting levels despite fluctuating weather.
To maximize these weather-responsive features, consider positioning your sensors away from overhangs and ensuring they have a clear view of the sky. Regular cleaning of weather sensors helps maintain accurate readings and proper system response, especially in areas with frequent weather changes.
Installation and Setup Made Simple
DIY Installation Tips
Installing your outdoor smart lighting system can be a rewarding weekend project that helps beautify your outdoor space while adding convenience and security. Before starting, gather all necessary tools: a voltage tester, wire strippers, screwdrivers, and weatherproof wire connectors. Always begin by turning off power at the circuit breaker – safety first!
Start by planning your light placement and hub location. The hub should be centrally located and within range of your Wi-Fi router. For best results, install the app and pair your hub before mounting any fixtures. This allows you to test connectivity before finalizing positions.
When mounting lights, ensure all connections are weatherproofed using silicone sealant and appropriate outdoor-rated junction boxes. Keep wiring neat and protected from the elements by running cables through conduit where exposed. Most smart outdoor lights connect to existing wiring, but if you’re adding new fixtures, consider hiring an electrician for the initial power setup.
Label each light during installation – this makes troubleshooting and future adjustments much easier. Take photos of your wiring connections before closing up junction boxes, and save the manual in your home maintenance files. Remember to test each light individually through the app before moving on to the next installation.
For motion sensors, position them 6-10 feet high and angle slightly downward for optimal detection. Take time to adjust sensitivity settings to prevent false triggers from pets or swaying branches.
Professional Installation Considerations
While many outdoor smart lighting systems are designed for DIY installation, there are several scenarios where professional installation might be your best bet. If your project involves complex wiring, integration with existing electrical systems, or mounting fixtures in hard-to-reach places, a licensed electrician can ensure everything is done safely and up to code.
Consider professional installation if you’re planning a comprehensive system with multiple zones, motion sensors, or integration with other smart home systems. An expert can optimize sensor placement, ensure proper voltage requirements are met, and configure advanced programming features that might be challenging for DIY enthusiasts.
Professional installation is particularly recommended when your setup requires new electrical lines, weatherproof housing installation, or modifications to your home’s electrical panel. These tasks often require permits and specialized knowledge of local building codes.
The cost of professional installation typically ranges from $200 to $800, depending on system complexity and location. While this adds to your initial investment, it can save money in the long run by preventing costly mistakes and ensuring optimal system performance. Many professional installers also offer warranties and ongoing support, giving you peace of mind and reliable assistance if issues arise.
Remember, even if you’re confident in your DIY abilities, it’s worth consulting with a professional for a quick assessment of your project’s complexity before making a final decision.
Maximizing Energy Efficiency
Smart Scheduling Strategies
Creating an effective schedule for your outdoor smart lighting doesn’t have to be complicated. With the right strategy, you can enhance security, create ambiance, and slash your lighting bills simultaneously. Start by mapping out your property’s lighting needs throughout different times of the day.
Consider setting your front entrance lights to activate at sunset and dim to 30% brightness after midnight. For pathways and driveways, motion sensors can trigger full brightness when movement is detected, then return to a subtle 20% illumination for basic visibility. This approach maintains security while conserving energy.
Garden and decorative lighting can be programmed to shine during evening entertainment hours (typically 6 PM to 10 PM) and switch off completely overnight. During special occasions, override these settings using your smartphone app for extended lighting periods.
Don’t forget to adjust your schedules seasonally. Winter months might require longer lighting periods, while summer allows for shorter durations. Many smart systems can automatically adapt to seasonal sunset times, taking the guesswork out of programming.
Pro tip: Create different zones in your yard and assign specific schedules to each. This allows for more precise control and ensures you’re only using light where and when it’s needed. Remember to review your scheduling patterns monthly and adjust based on your family’s changing needs and usage patterns.
Monitoring and Adjusting
Keeping track of your outdoor smart lighting system’s performance is crucial for maximizing its benefits. Most modern systems come with user-friendly apps that provide detailed insights into your energy consumption patterns. These apps typically display daily, weekly, and monthly usage statistics, making it easy to spot trends and identify areas for improvement.
To optimize your system, start by reviewing your lighting schedules regularly. Pay attention to seasonal changes in daylight hours and adjust your timers accordingly. Many homeowners find they can reduce energy consumption by fine-tuning motion sensor sensitivity and adjusting brightness levels based on actual needs rather than preset configurations.
Take advantage of your system’s data logging features to compare energy usage before and after implementing energy-saving lighting solutions. This helps you quantify your savings and justify your investment. Most smart systems also send alerts when bulbs are approaching the end of their life or when unusual patterns are detected, helping you maintain optimal performance.
Consider creating different lighting zones and scenarios, then monitor which ones are most efficient. For example, you might discover that certain areas don’t need full brightness or that some motion sensors are triggering too frequently. Make small adjustments over time, and document the changes to understand what works best for your specific setup.
As we’ve explored throughout this guide, outdoor smart lighting control systems offer an impressive array of benefits that can transform your home’s exterior spaces. From significant energy savings and enhanced security to the sheer convenience of automated scheduling and remote control, these systems represent a smart investment in your property’s future.
By implementing a smart lighting system, you’re not just upgrading your outdoor lights – you’re creating a more efficient, secure, and welcoming environment for your family and guests. The ability to control your lighting from anywhere, combined with features like motion detection and weather-responsive settings, means you’ll never have to worry about wasted energy or dark pathways again.
While the initial setup might seem daunting, the long-term advantages far outweigh any installation challenges. With many systems now offering user-friendly apps and straightforward setup processes, even DIY enthusiasts can successfully implement these solutions. Plus, the potential energy savings can help offset the initial investment over time.
Whether you’re looking to enhance your home’s security, reduce your energy bills, or simply add convenience to your daily routine, an outdoor smart lighting control system is a practical and forward-thinking choice. Take the first step toward smarter outdoor lighting today – your future self will thank you for making this bright decision.