Transform high window cleaning from a daunting task into a manageable project with the right tools and techniques. Clean windows start with a telescoping pole equipped with a microfiber head, eliminating the need for dangerous ladder work while reaching heights up to 20 feet. For optimal results, tackle this job on an overcast day when direct sunlight won’t cause cleaning solutions to dry too quickly, leaving frustrating streaks behind.
Safety comes first: secure your footing on level ground, maintain awareness of power lines, and use extension tools designed specifically for high-reach cleaning rather than risky DIY alternatives. Professional-grade window cleaning solutions cut through dirt and grime more effectively than household glass cleaners, making your effort count where it matters most. Whether you’re refreshing your home’s curb appeal or maximizing natural light indoors, mastering high window cleaning techniques saves money while delivering crystal-clear results that rival professional services.
This guide breaks down exactly how to achieve streak-free, sparkling windows at any height – without compromising your safety or breaking your budget.
Essential Safety Measures for High Window Cleaning
Assessing Window Height and Accessibility
Before tackling those high windows, it’s crucial to evaluate their height and accessibility to determine the safest cleaning approach. Start by measuring the approximate height of your windows using a tape measure from ground level. Windows up to 12 feet can typically be cleaned using an extension pole, while anything higher might require special equipment or professional help.
Consider your access points carefully. Can you reach the windows from a balcony or sturdy deck? Is there level ground beneath the windows, or are there obstacles like shrubs or air conditioning units? These factors will influence your cleaning strategy and the tools you’ll need.
Check if your windows tilt inward for cleaning – many modern windows have this feature. This can be a game-changer, allowing you to clean both sides safely from inside your home. Also, assess the window’s size and weight if you’re planning to clean from the inside.
Safety is paramount, so be honest about your comfort level with heights and physical capabilities. If you feel unsure about reaching any window safely, it’s better to explore alternative solutions or contact a professional window cleaner.
Remember to factor in weather conditions and time of day – cleaning windows during overcast weather prevents cleaning solutions from drying too quickly and reduces glare, making the task both safer and more effective.
Required Safety Equipment
Before tackling those high windows, you’ll need to ensure you have all the proper safety equipment on hand. Start with a sturdy ANSI-approved ladder that’s tall enough to reach your windows comfortably without overextending. For extra stability, use ladder stabilizers or standoffs that keep you at a safe distance from the wall.
A safety harness is essential when working at heights above 6 feet. Make sure it’s properly fitted and attached to a secure anchor point. Non-slip shoes with good grip are crucial – avoid any footwear with smooth soles that might cause you to slip.
Protect your hands with rubber-coated work gloves that offer both grip and chemical resistance. Safety goggles are a must to shield your eyes from cleaning solutions and debris. If you’re using chemical cleaners, a face mask or respirator will protect you from fumes.
Keep a spotter nearby whenever possible – they can help stabilize your ladder and call for help if needed. Consider using a tool belt to keep cleaning supplies within easy reach, reducing the need to climb up and down frequently.

Professional Tools for Reaching High Windows
Telescopic Window Cleaning Systems
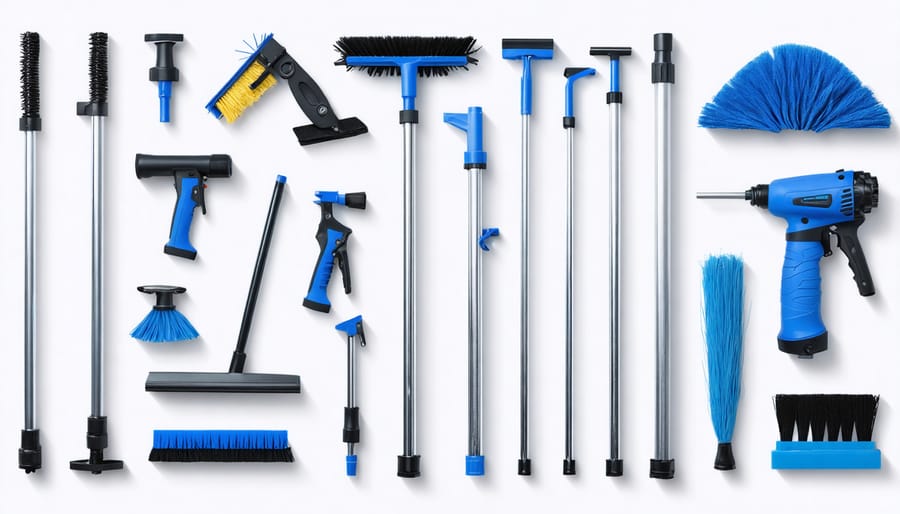
Telescopic window cleaning systems are a game-changer for tackling those hard-to-reach windows, and they’re among the most popular professional window cleaning tools for good reason. These systems typically consist of an extendable pole that can reach heights of 20 feet or more, making them perfect for second-story windows and skylights.
The basic setup includes a lightweight aluminum or carbon fiber pole that extends in sections, similar to a telescope. Most poles feature quick-lock mechanisms that keep each section securely in place while you work. At the business end, you’ll find a universal attachment point that accepts various cleaning heads.
The most common attachments include:
– Microfiber washing sleeves for applying cleaning solution
– Squeegee heads for streak-free drying
– Combination tools that feature both washing and squeegee elements
– Corner cleaning attachments for detailed work
When choosing a telescopic system, look for one with comfortable grip handles and a weight you can manage comfortably. The best systems also feature quick-release mechanisms for changing attachments and angle adjusters that help you clean at various positions without straining.
Remember to start with the pole slightly shorter than needed and extend it gradually as you work. This gives you better control and helps prevent the pole from becoming unwieldy during use.
Water-Fed Pole Systems
Water-fed pole systems are a game-changer for cleaning high windows safely from the ground. These professional-grade tools use purified water pumped through an extendable pole, eliminating the need for ladders or lifts. The system combines a soft brush head with flowing water to scrub away dirt, while the pure water leaves windows spot-free as it dries.
The poles typically extend from 20 to 60 feet, making them perfect for reaching windows up to five stories high. They’re lightweight, usually made from carbon fiber or aluminum, which helps reduce arm fatigue during extended cleaning sessions. Most systems come with different brush heads to tackle various window sizes and dirt levels.
What makes these systems particularly effective is their use of deionized water. This specially treated water contains no minerals, meaning it dries without leaving streaks or water spots. The continuous flow of water also helps lift dirt away from the glass while preventing the brush from scratching the surface.
While the initial investment might seem steep (ranging from $500 to $2,000), it’s a worthwhile consideration if you regularly clean high windows. For best results, work methodically from top to bottom, allowing the pure water to rinse away dirt naturally. Remember to keep the brush head in contact with the glass while cleaning to maintain control and ensure thorough cleaning.
Step-by-Step High Window Cleaning Technique
Preparing Your Cleaning Solution
Creating an effective window cleaning solution doesn’t have to be complicated or expensive. While there are many natural cleaning solutions available, here’s a tried-and-tested mixture that works wonderfully on high windows:
Mix 2 cups of warm water with 1/4 cup of white vinegar and 1/2 teaspoon of liquid dish soap. For extra sparkle, add 2 tablespoons of cornstarch, which helps prevent streaking. Pour this mixture into a spray bottle for easy application.
Pro tip: Avoid cleaning windows on sunny days, as the solution can dry too quickly and leave streaks. If you’re working outdoors, add an extra tablespoon of vinegar to help cut through environmental grime.
For extremely dirty windows, you might need to create a stronger solution by increasing the vinegar to 1/2 cup. Always test your mixture on a small area first to ensure it doesn’t leave residue. Remember to label your spray bottle and keep it out of reach of children and pets.
Store any leftover solution in a cool, dark place and use it within two weeks for best results.
The Two-Step Cleaning Process
The secret to achieving crystal-clear windows lies in mastering these effective cleaning techniques through a systematic two-step approach. Start with the washing phase by applying your cleaning solution generously to the window surface using a strip washer or microfiber mop. Work in gentle, overlapping S-patterns from top to bottom, ensuring you cover the entire surface while avoiding any dry spots.
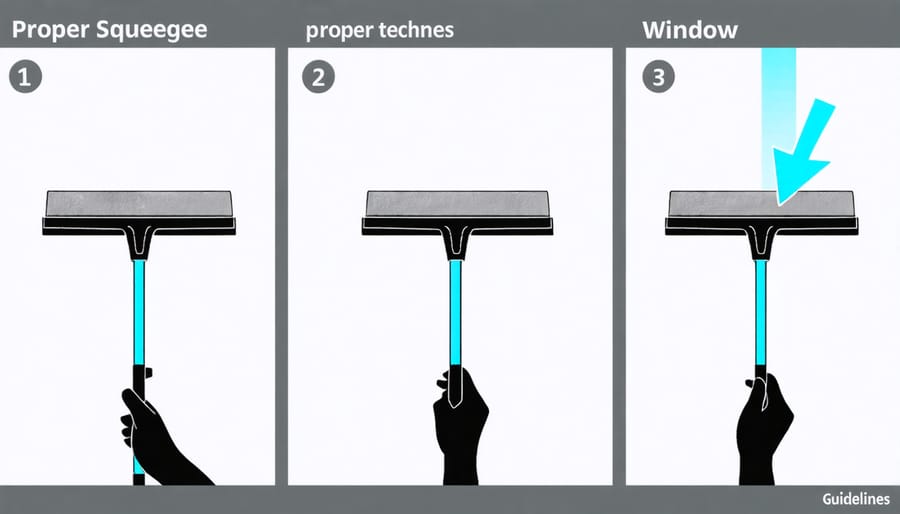
Once you’ve thoroughly soaked the window, move on to the crucial squeegee phase. Position your squeegee at a 45-degree angle against the glass, starting at the top corner. Apply firm but gentle pressure as you pull the squeegee across the window in a straight, horizontal stroke. After each stroke, wipe your squeegee blade clean with a lint-free cloth to prevent streaking.
For the best results, slightly overlap each squeegee stroke and maintain consistent pressure throughout. Work your way down the window, being careful not to miss any spots. As you complete each section, use a clean microfiber cloth to wipe any remaining water from the edges and corners. This method ensures streak-free results while minimizing drips and mess.
Remember to frequently change your cleaning solution if it becomes dirty, and always use fresh, clean cloths for wiping. This methodical approach might take a bit more time, but the sparkling results are well worth the effort.
Dealing with Stubborn Spots
Even the most thorough window cleaning routine can meet its match with stubborn spots. For those particularly challenging stains, start by softening the debris with a mixture of warm water and dish soap, letting it sit for 2-3 minutes. For mineral deposits or hard water stains, white vinegar is your best friend – apply it directly to the spot and let it work its magic for 5-10 minutes before scrubbing gently.
Tree sap can be especially tricky, but rubbing alcohol on a soft cloth will help break it down without damaging the glass. For bird droppings, never scrape them dry as this can scratch your windows. Instead, saturate the area with a specialized enzyme cleaner or soapy water until the deposit loosens naturally.
If you encounter paint spots or construction debris, a plastic scraper designed for glass can help, but always test it on a small area first. For extremely stubborn spots that won’t budge with these methods, a professional-grade adhesive remover might be necessary – just be sure to choose one that’s safe for use on glass.
Remember to always work from the edges of the stain toward the center to prevent spreading the mess further across your window.
Alternative Methods for Hard-to-Reach Windows
Indoor Cleaning Solutions
Cleaning high windows from inside your home can be just as effective as exterior cleaning when done correctly. Start by investing in an extension pole with a microfiber window cleaner attachment – this basic tool will become your best friend for reaching those tricky spots. For optimal results, choose a telescopic pole that extends to your specific ceiling height while remaining sturdy and manageable.
Begin by dusting the windows and frames with a dry microfiber cloth on your extension pole to remove loose debris. Next, prepare your cleaning solution – a mixture of warm water and a few drops of dish soap works perfectly. For streak-free results, add a small amount of white vinegar to your solution.
When applying the cleaning solution, work in sections and avoid oversaturating the windows. Use smooth, overlapping strokes in an S-pattern, starting from the top and working your way down. This technique prevents cleaning solution from dripping onto already-cleaned areas.
For stubborn spots, use a window squeegee attachment on your extension pole. The rubber blade effectively removes dirt while minimizing streaks. Keep a clean, dry microfiber cloth handy to wipe any drips along the windowsill or floor immediately.
Pro tip: Choose a cloudy day for indoor window cleaning, as direct sunlight can cause your cleaning solution to dry too quickly, leaving unwanted streaks. Remember to place towels beneath the windows to catch any drips and protect your floors.
When to Call a Professional
While DIY window cleaning can be rewarding, there are times when calling a professional is the safest and smartest choice. If your windows are above the third floor, require specialized equipment, or are difficult to access safely from inside, it’s time to consider professional cleaning methods.
Safety should always be your primary concern. If you feel uncomfortable with heights, lack proper safety equipment, or have physical limitations that might compromise your balance, don’t hesitate to contact a professional. This is especially important for homes with architectural features that make window access challenging, such as steep roofs or complex layouts.
Consider professional help if your windows have extensive buildup, mineral deposits, or damage that requires special treatment. Professionals have access to industrial-grade equipment and cleaning solutions that might be necessary for optimal results. They’re also trained to spot potential window problems early, potentially saving you money on repairs down the line.
Weather conditions can also influence your decision. If you live in an area with strong winds or unpredictable weather patterns, professionals have the experience and equipment to work safely in these conditions. Additionally, if you’re preparing your home for sale or a special event, professional cleaners can ensure your windows look their absolute best.
Remember, investing in professional services isn’t just about convenience – it’s about ensuring your safety and protecting your home’s value.
Cleaning windows at height doesn’t have to be a daunting task when you’re equipped with the right tools and knowledge. Throughout this guide, we’ve covered essential methods and safety measures to help you achieve sparkling results while staying protected. Remember to always prioritize your safety by using sturdy equipment, checking weather conditions, and never overreaching or taking unnecessary risks.
Whether you’ve chosen to use an extension pole, telescopic cleaning kit, or ladder system, the key is to work methodically and maintain three points of contact when using elevated equipment. Take your time with each window, and don’t rush the process – thorough preparation and careful execution will yield the best results.
For those particularly high or challenging windows, don’t hesitate to call in professional help. While DIY solutions can work well for many situations, some windows might be better left to experienced window cleaners who have specialized equipment and training.
Keep your cleaning supplies well-maintained and regularly inspect your safety equipment before each use. By following the techniques and safety guidelines we’ve discussed, you can maintain crystal-clear windows throughout your home while keeping yourself safe and secure.
Remember, the satisfaction of having spotless windows is never worth compromising your safety. Start with the easier-to-reach windows to perfect your technique before tackling more challenging heights, and always trust your instincts if a window seems too difficult to clean safely on your own.