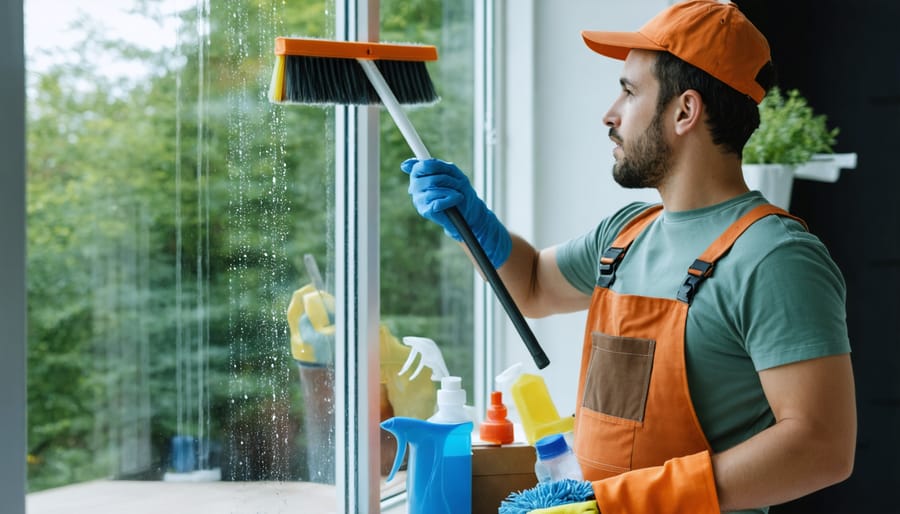
Transform your windows from streaky to sparkling with professional-grade cleaning techniques that deliver flawless results. Mix one part white vinegar with two parts distilled water in a spray bottle, add a drop of dish soap, and eliminate stubborn streaks that regular cleaners leave behind. Professional window cleaners start at the top corner and work in consistent S-patterns, using a microfiber cloth for streak-free results – never paper towels or newspapers that can leave residue. Master the squeegee technique by angling the blade at 45 degrees and maintaining constant contact with the glass, wiping the blade clean after each stroke.
Whether tackling floor-to-ceiling windows or small panes, these commercial-grade methods ensure crystal-clear views while protecting your glass from damage. Learn these techniques once, and you’ll achieve professional results that last longer and require less frequent cleaning, saving both time and money in the long run.
Essential Window Cleaning Tools and Materials
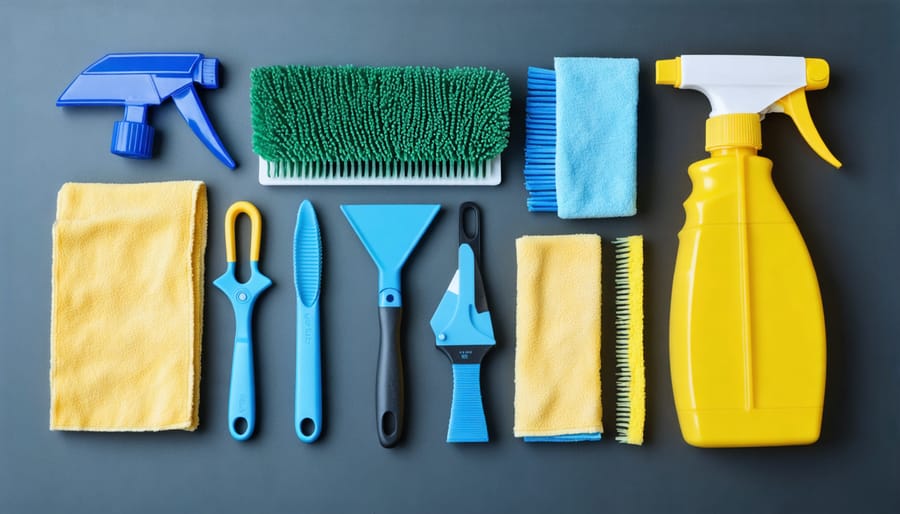
Professional vs. Household Tools
When it comes to achieving crystal-clear windows, choosing the right tools can make all the difference. While professional window cleaning tools might seem expensive at first, they often deliver superior results and last longer than their household counterparts.
Professional-grade squeegees feature precision-engineered rubber blades that leave streak-free finishes and can be replaced when worn. They’re typically wider and more ergonomic than basic models found in home stores. Professional microfiber cloths are also more densely woven, offering better absorption and lint-free cleaning.
However, household tools can still be effective for regular maintenance. A good-quality spray bottle, microfiber cloths, and a basic squeegee will serve most homeowners well. The key difference lies in durability and efficiency – professional tools can clean larger areas faster and with better results.
For occasional window cleaning, household tools are perfectly adequate. But if you’re cleaning windows frequently or have large glass surfaces, investing in professional equipment could save time and improve results in the long run.
Eco-Friendly Cleaning Solutions
Want to keep your windows sparkling clean while being kind to the environment? Eco-friendly cleaning solutions are not only better for the planet but can be just as effective as commercial cleaners. Start with a simple mixture of equal parts white vinegar and water – this natural combination cuts through dirt and leaves glass streak-free. For stubborn spots, make a paste using baking soda and water, which provides gentle abrasion without scratching.
Another fantastic natural option is combining two tablespoons of cornstarch with half a cup of vinegar, half a cup of rubbing alcohol, and two cups of warm water. This solution works wonders on exterior windows and removes tough mineral deposits. For a pleasant scent, add a few drops of lemon or orange essential oil to your mixture.
Keep in mind that using old newspapers or microfiber cloths instead of paper towels reduces waste while providing excellent streak-free results. These natural solutions are safe for children and pets, cost-effective, and eliminate the need for harsh chemicals in your home. Plus, you probably already have most of these ingredients in your kitchen!
Step-by-Step Cleaning Process
Pre-Cleaning Preparation
Before diving into the cleaning process, proper preparation is essential for achieving streak-free, sparkling windows. Start by clearing the window area – remove curtains, blinds, and any decorative items that might get in the way. If you have window screens, carefully remove and set them aside for separate cleaning.
Dust the window frames, sills, and surrounding areas using a microfiber cloth or duster to prevent dirt from mixing with your cleaning solution later. Pay special attention to corners and crevices where cobwebs and debris often accumulate.
Lay old towels or newspapers along the windowsill and floor to catch any drips and spills. This simple step will save you from additional cleanup later. If you’re working with particularly dirty windows, consider doing a preliminary wipe-down with warm water to remove excess grime.
Check the weather forecast before starting – avoid cleaning on hot, sunny days as the cleaning solution can dry too quickly and leave streaks. Early morning or cloudy days are ideal for window cleaning. Finally, gather all your cleaning supplies within arm’s reach to make the process more efficient.
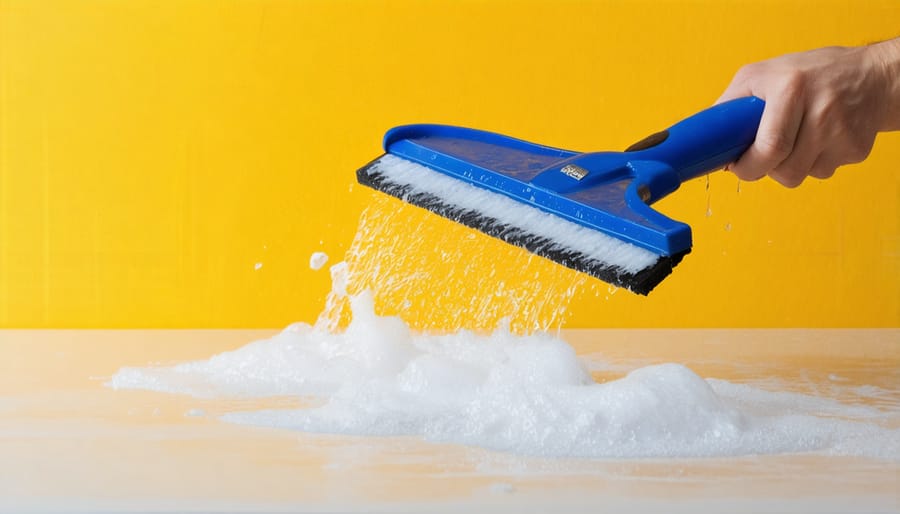
The Two-Step Washing Method
If you’re looking to achieve professional-level results, the two-step washing method is one of the most effective streak-free cleaning techniques you can use at home. This method involves first cleaning the windows with a soap solution, followed by a thorough rinse with clear water.
Start by filling two separate buckets: one with warm water and a few drops of dish soap, and another with clean water for rinsing. Using a soft microfiber cloth or sponge, apply the soapy solution generously to the entire window surface, working from top to bottom. Pay special attention to corners and edges where dirt tends to accumulate.
Without letting the soap solution dry, immediately move to the second step. Dip a clean, lint-free cloth into the rinse water and wring it out well. Starting from the top corner, pull the cloth across the window in a straight, overlapping pattern. This technique helps prevent water streaks and ensures no soap residue remains on the glass.
For the best results, work on one window at a time and avoid cleaning in direct sunlight, as this can cause the cleaning solution to dry too quickly. After the rinse, use a squeegee to remove excess water, wiping the blade with a clean cloth after each stroke. Finally, buff the window with a dry microfiber cloth to achieve that crystal-clear finish professionals are known for.
Remember to clean your tools between windows to prevent transferring dirt and ensure consistently spotless results throughout your home.
Drying and Finishing Touches
The final step in achieving spotless windows is all about proper drying technique – this is where the magic happens! Start by using a squeegee to remove most of the cleaning solution, working from top to bottom in a reverse S-pattern. Make sure to wipe your squeegee blade with a clean microfiber cloth after each stroke to prevent streaking.
For the best results, immediately follow up with a lint-free microfiber cloth to dry any remaining water droplets or streaks. Pay special attention to the corners and edges where water tends to collect. A pro tip is to use two microfiber cloths – one slightly damp for initial wiping and one completely dry for the final polish.
If you notice any stubborn streaks, buff them out using a clean, dry microfiber cloth with circular motions. For extra sparkle, try using crumpled newspaper for the final wipe – the ink contains chemicals that help create a streak-free shine (just wear gloves to protect your hands).
Complete your window cleaning by wiping down the window sills and tracks with a dry cloth to prevent water damage. For a professional touch, check your work by viewing the windows from different angles and in different lighting conditions. If you spot any missed spots or streaks, a quick touch-up with your microfiber cloth should do the trick. Remember, patience during this final stage is key to achieving that crystal-clear finish you’re after.
Dealing with Challenging Situations
Hard Water Stains
Hard water stains can be one of the most frustrating challenges when cleaning windows, but don’t worry – they’re not impossible to tackle! These stubborn mineral deposits occur when water containing high levels of calcium and magnesium dries on your glass surfaces. The key to removing hard water stains effectively lies in using the right combination of cleaning solutions and techniques.
Start by mixing equal parts white vinegar and distilled water in a spray bottle. This natural solution helps break down mineral deposits without damaging the glass. Spray the mixture generously on affected areas and let it sit for 5-10 minutes. For particularly stubborn deposits, you can create a paste using baking soda and water.
Use a soft microfiber cloth or non-abrasive sponge to gently work the solution into the stains using circular motions. Avoid using metal scrapers or abrasive materials, as these can scratch your windows. For extra-tough stains, commercial limescale removers specifically designed for glass surfaces can be effective.
After treating the stains, wipe the area clean with a fresh microfiber cloth and finish with a standard glass cleaner to restore shine. To prevent future hard water stains, consider installing a water softener system or immediately wiping windows dry after they get wet from rain or sprinklers. Regular maintenance is key to keeping your windows crystal clear and stain-free.
Weather-Related Challenges
Weather can make window cleaning tricky, but with the right approach, you can tackle any condition. On sunny days, avoid cleaning during peak hours when direct sunlight can cause cleaning solutions to dry too quickly, leaving streaks. Instead, work in the early morning or late afternoon, or clean windows on the shaded side of your house first.
For rainy days, while it might seem counterintuitive, light rain can actually help with the pre-rinse phase. However, wait for a dry spell before applying your cleaning solution to ensure proper results. High humidity can make windows fog up quickly, so use a microfiber cloth to prevent condensation buildup while cleaning.
Cold weather presents its own challenges. Avoid cleaning when temperatures are near freezing, as solutions can freeze on the glass. If you must clean in cold weather, add a small amount of rubbing alcohol to your cleaning solution to lower its freezing point. This also helps prevent streaking in chilly conditions.
Wind can be particularly troublesome, carrying debris and causing cleaning solutions to evaporate rapidly. Create a windbreak using drop cloths or work from the inside when possible. For dusty conditions, start with a thorough dry dusting to prevent mud-like streaks from forming when you apply your cleaning solution.
Remember to check the weather forecast before starting your window cleaning project, and plan accordingly to achieve the best results.
Maintenance Tips
Regular maintenance is the secret to keeping your windows sparkling year-round and reducing the time you spend on deep cleaning. Here’s how to stay ahead of the game with some preventive measures that really make a difference.
First, develop a routine of quick weekly wipes using a microfiber cloth to remove surface dust and fingerprints. This simple habit prevents dirt buildup and makes your thorough cleaning sessions much easier. During rainy seasons, pay extra attention to your window tracks and sills – wipe them dry to prevent mold and mildew growth.
Install good quality weatherstripping around your windows to keep dust and debris from sneaking in. This not only helps maintain cleaner windows but also improves your home’s energy efficiency. Consider applying a rain-repellent coating to exterior windows – it creates a protective barrier that helps water bead up and roll off, carrying dirt with it.
For those living in hard water areas, install a water softener for your outdoor spigots or use distilled water for cleaning. This prevents mineral deposits that can leave stubborn spots on your windows. Keep your window screens clean by gently vacuuming them monthly with a brush attachment.
Trim any bushes or trees that brush against your windows to prevent scratches and reduce pollen accumulation. During construction or renovation work nearby, consider temporarily covering your windows to protect them from dust and debris.
Remember to check your window seals annually for any damage or wear. Addressing small issues promptly prevents bigger problems and keeps your windows in top condition. By following these maintenance tips, you’ll spend less time on intensive cleaning and more time enjoying your crystal-clear views.
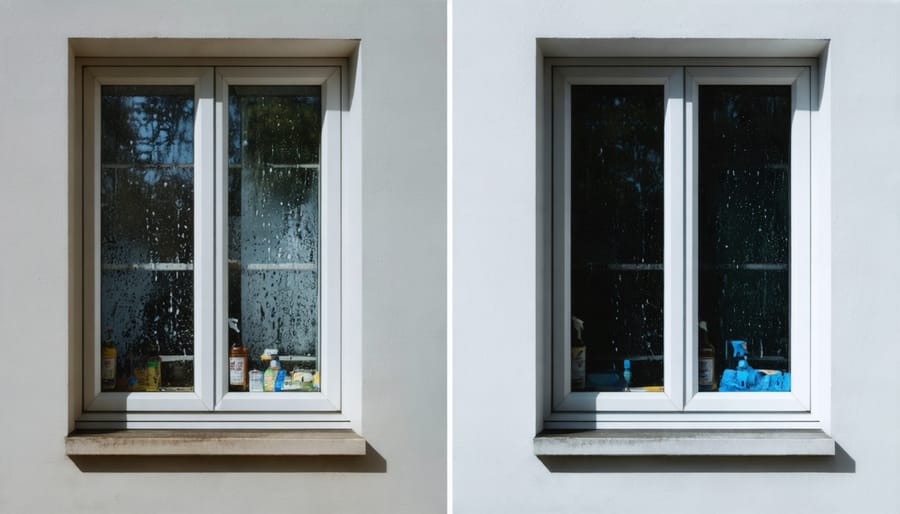
Clean, sparkling windows can transform your home’s appearance and brighten your living spaces. By following the professional techniques we’ve covered, you can achieve streak-free, crystal-clear results that rival those of professional services. Remember to always start with the right tools and cleaning solutions, work in manageable sections, and use proper techniques like the S-pattern method for optimal results.
Safety should always be your priority, especially when cleaning exterior windows or working at heights. Don’t hesitate to invest in quality tools and solutions – they’ll pay for themselves through better results and time saved. Regular maintenance using these techniques will keep your windows looking their best year-round and prevent the buildup of stubborn dirt and grime.
Whether you’re tackling a small apartment’s windows or maintaining a large home, these proven methods will help you achieve professional results. Start implementing these techniques during your next cleaning session, and you’ll notice the difference immediately. With practice, you’ll develop a efficient routine that makes window cleaning less of a chore and more of a satisfying home improvement activity.
Remember, clean windows not only enhance your home’s appearance but also allow more natural light in, creating a more welcoming and energizing living environment. Happy cleaning!