Transform your RV’s comfort level with a properly installed water heater that delivers reliable hot water for showers, dishes, and cleaning. Installing an RV water heater requires careful planning, precise execution, and attention to safety protocols – but with the right approach, it’s a manageable DIY project that can save hundreds in professional fees. Before starting your installation, review these common installation mistakes to avoid to ensure a smooth process.
Whether you’re upgrading an existing unit or installing a new system, proper preparation makes the difference between a successful installation and potential complications. From gathering the right tools and materials to understanding your RV’s specific requirements, this guide will walk you through every critical step needed to safely install your water heater while maintaining compliance with manufacturer specifications and safety codes.
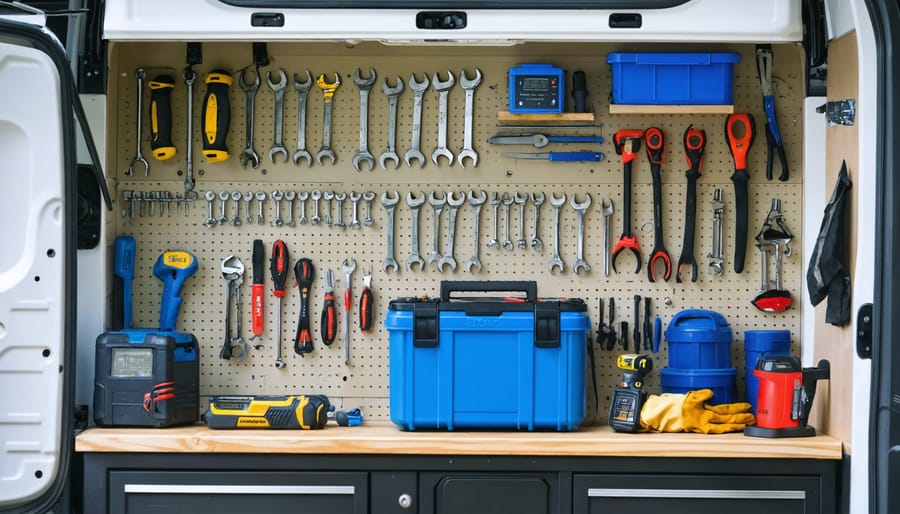
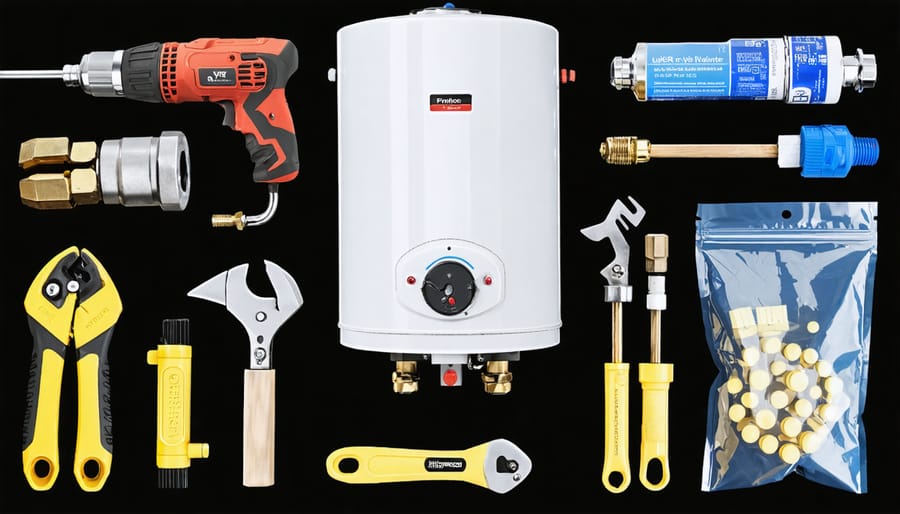
Essential Tools and Materials
Safety Equipment
Before starting your RV water heater installation, gather essential safety equipment to protect yourself and ensure a smooth process. Always wear safety glasses to shield your eyes from debris and chemical splashes. Heat-resistant gloves are crucial when handling hot pipes or components. Keep a fire extinguisher nearby as you’ll be working with gas lines and electrical connections. A voltage tester is essential for confirming power is off before working on electrical components. Consider wearing knee pads if you’ll be working in cramped spaces, and use a respirator mask if working in dusty conditions or with adhesives. Remember to have a first aid kit readily available and work in a well-ventilated area. These precautions might seem extensive, but they’re vital for a safe installation process.
Installation Tools
Before starting your RV water heater installation, gather these essential tools to ensure a smooth process. You’ll need an adjustable wrench, pipe wrench, and screwdrivers (both Phillips and flathead). A utility knife and wire strippers are crucial for handling electrical connections safely. Don’t forget your measuring tape, level, and pencil for accurate positioning.
For plumbing connections, have Teflon tape, pipe sealant, and a tube cutter handy. A voltage tester is essential for electrical safety, while a socket set will help with various mounting hardware. Keep safety equipment nearby, including work gloves, safety glasses, and a flashlight for better visibility in tight spaces.
Pro tip: Create a dedicated tool tray or small parts organizer to keep everything within reach. This prevents lost items and saves time during installation. Consider having spare fittings and connectors on hand – it’s better to have them and not need them than to pause your project for a hardware store run.
Preparation Steps
Removing the Old Unit
Before removing your old water heater, ensure you’ve turned off both the water supply and power source. For electric heaters, disconnect the power at your RV’s breaker box. If it’s a gas unit, shut off the propane supply valve. Next, drain the water heater completely by opening the pressure relief valve and removing the drain plug.
Once drained, disconnect all plumbing connections, including hot and cold water lines. Use a wrench to loosen the fittings, but be careful not to damage the surrounding pipes. For gas units, carefully detach the gas line – if you’re unsure about this step, it’s best to consult a professional.
Remove all mounting screws securing the unit to your RV’s frame. You may need a helper at this point, as RV water heaters can be quite heavy. Carefully slide the unit out of its compartment, watching for any sharp edges or protruding elements that could damage your RV’s exterior. Clean the opening thoroughly, removing any old sealant or debris to prepare for the new installation.
Preparing the Installation Space
Before installing your new RV water heater, proper preparation of the installation space is crucial for a successful project. Start by completely removing the old water heater if there is one, being careful to disconnect all power sources and water lines. Thoroughly clean the opening using a mild detergent solution to remove any dirt, debris, or old sealant.
Inspect the surrounding area for any signs of water damage, rust, or structural issues that need addressing before the new installation. If you spot any problems, repair them now to prevent future complications. Measure the opening carefully to ensure your new water heater will fit properly, and check that the existing cutout is level.
Next, prepare the mounting surface by sanding any rough edges and wiping down the area with rubbing alcohol to ensure proper adhesion of the new sealant. If the opening has old foam insulation, remove and replace it with new material to maintain energy efficiency. Finally, lay out all your tools and materials nearby for easy access during installation.
Remember to protect the surrounding surfaces with painter’s tape to prevent any accidental damage during the installation process.
Step-by-Step Installation Process
Mounting the Unit
Proper mounting of your RV water heater is crucial for both safety and efficiency. Following professional installation techniques will ensure your unit stays secure during travel and functions optimally.
Start by cleaning the mounting area thoroughly and checking that the opening meets the manufacturer’s specifications. Most RV water heaters require a standard 12.5″ x 12.5″ cutout, but always verify your specific model’s requirements. Position the unit so it sits flush with the exterior wall, ensuring there are no gaps that could allow water infiltration.
Before securing the unit, apply a continuous bead of approved RV sealant around the mounting flange. This creates a waterproof barrier between the heater and your RV’s wall. Insert the water heater carefully, making sure not to disturb the sealant.
Secure the unit using the mounting screws provided by the manufacturer. Work in a cross-pattern to ensure even pressure distribution, similar to tightening lug nuts on a tire. Don’t overtighten the screws, as this could crack the flange or compress the sealant too much.
Finally, check that the unit is level both horizontally and vertically. A properly leveled water heater prevents air pockets and ensures optimal performance. Double-check all mounting screws after your first road trip, as vibration can sometimes loosen connections.
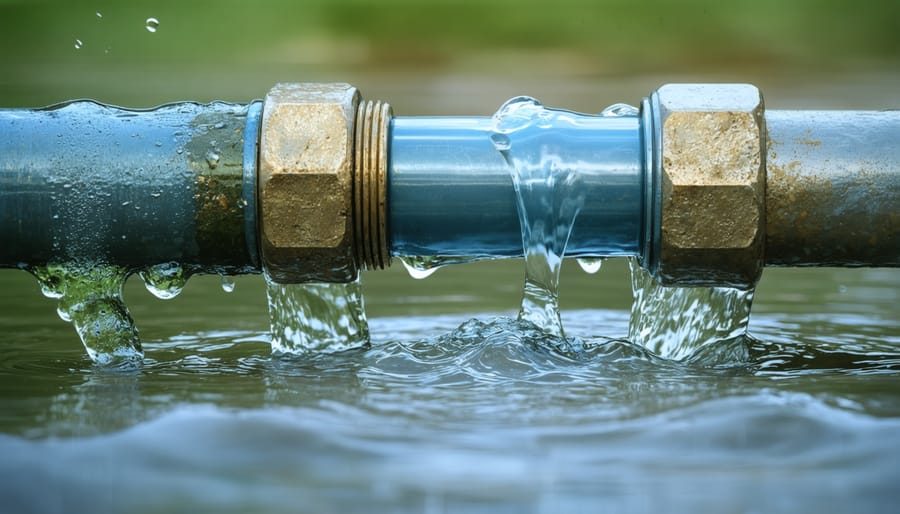
Water Line Connections
Connecting the water lines to your RV water heater is a crucial step that requires attention to detail and proper technique. Start by identifying the cold water inlet and hot water outlet ports on your water heater – they’re typically clearly marked and located on the top or side of the unit.
Before making any connections, wrap plumber’s tape (also called Teflon tape) around the male threads of all fittings. This helps prevent leaks and ensures a secure connection. Apply the tape clockwise, making 3-4 complete wraps around each fitting.
For the cold water line connection:
1. Locate the main cold water supply line
2. Install a shut-off valve if one isn’t already present
3. Connect the flexible water line to the cold water inlet port
4. Tighten the fitting with a wrench, but avoid over-tightening
For the hot water line connection:
1. Connect the outgoing hot water line to the outlet port
2. Ensure the line runs to all hot water fixtures in your RV
3. Double-check that all connections are secure
4. Use support clamps every 16-24 inches to prevent line sagging
Pro tip: Use flexible braided water lines rather than rigid pipes when possible. They’re easier to install and help absorb vibration during travel, reducing the risk of leaks.
Once all connections are made, turn on the water supply slowly and check for leaks. Look for drips or moisture around all connection points. If you spot any leaks, turn off the water immediately and retighten the connections. Sometimes, adding an extra wrap of plumber’s tape can help resolve persistent leaks.
Remember to purge air from the lines by opening all hot water taps until you get a steady flow of water. This ensures proper operation of your newly installed water heater and helps prevent air locks in the system.
Gas or Electric Connections
Setting up your RV water heater’s power connections is a crucial step that varies depending on whether you have a gas or electric model. For electric water heaters, you’ll need to connect the heater to your RV’s 12-volt DC system and 120-volt AC power supply. Start by locating the electrical junction box on your water heater and ensuring all power sources are turned off before proceeding.
For electric connections, connect the black wire to the hot terminal, white wire to neutral, and green or bare copper wire to ground. Double-check that all wire nuts are secure and properly insulated. Most electric RV water heaters require a dedicated 20-amp circuit, so verify your electrical system can handle this load.
If you’re installing a gas water heater, you’ll need to connect it to your RV’s propane system. Use approved flexible gas lines and always apply gas-rated thread sealant to prevent leaks. The gas line should be properly sized (typically 3/8 inch) and include a manual shut-off valve for safety. Remember to test all gas connections with a soapy water solution to detect any leaks.
For dual-powered models that use both gas and electric, you’ll need to complete both sets of connections. These hybrid systems offer flexibility in power sources, which is particularly useful when camping in different locations with varying amenities.
Some key safety tips to remember:
– Always follow manufacturer guidelines for power requirements
– Use appropriate gauge wiring for electrical connections
– Install a proper ground fault circuit interrupter (GFCI)
– Keep gas lines away from electrical components
– Test all connections thoroughly before first use
– Have proper ventilation for gas heaters
Once connections are complete, test the system gradually, starting with low pressure for gas systems and checking electrical functionality at each stage. If you’re unsure about any aspect of the installation, don’t hesitate to consult a professional RV technician.
Testing and Troubleshooting

Initial Testing
After completing the installation, it’s crucial to test your RV water heater before heading out on your first trip. Start by filling the water heater tank completely and checking for any leaks around the connections. Once filled, turn on the power and set your desired temperature, typically between 120-140°F.
Listen for the normal operating sounds of your water heater and watch for the indicator light to confirm it’s working properly. After about 20-30 minutes, test the hot water at different faucets throughout your RV. Pay attention to water pressure and temperature consistency.
During this initial testing phase, keep an eye out for any unusual noises, water discoloration, or unexpected behavior. If you notice anything concerning, turn off the system immediately and double-check your connections. Remember that some new units might have a slight odor or steam during their first use – this is normal and should dissipate quickly.
Remember to run both electric and gas modes if you have a dual-system heater to ensure both power sources are functioning correctly.
Common Issues
Even with careful installation, you might encounter some common issues with your RV water heater. If you notice water leaking around the connections, double-check all fittings and apply plumber’s tape to ensure proper sealing. A pilot light that won’t stay lit often indicates a faulty thermocouple or dirty pilot assembly – both easily fixable with basic maintenance.
Sometimes, you might experience inconsistent hot water temperature. This usually stems from sediment buildup in the tank or incorrect gas pressure settings. Regular flushing of the system can prevent sediment issues, while a pressure check with a manometer can help adjust gas flow properly.
If your heater isn’t turning on at all, verify all electrical connections are secure and check your circuit breaker. For gas heaters, ensure the propane tank isn’t empty and all valves are fully open. Remember, most installation issues stem from rushed work, so take your time and double-check each step as you go.
Maintenance Tips
To keep your RV water heater running smoothly, establish a regular maintenance routine every six months. Start by flushing the tank to remove sediment buildup – simply turn off the power, drain the tank, and run fresh water through until it runs clear. Check the anode rod annually and replace it if it’s more than 75% corroded to prevent tank deterioration.
Inspect all connections and fittings for signs of wear or leaks, and tighten them as needed. Clean the burner assembly and check the thermocouple if you have a gas heater. For electric models, test the heating elements and thermostats regularly. Don’t forget to improve energy efficiency by insulating exposed pipes and checking the temperature setting – 120°F is typically ideal for most users.
During winter months, always drain and winterize your water heater if your RV won’t be in use. This prevents freeze damage and extends the unit’s lifespan. Keep the area around the heater clear of debris and ensure proper ventilation at all times. Address any unusual noises or performance issues promptly to prevent more serious problems down the line.
Installing an RV water heater might seem daunting at first, but with the right preparation and careful attention to safety guidelines, it’s a manageable DIY project. Remember to always double-check your connections, follow manufacturer specifications, and test thoroughly before hitting the road. Keep your manual handy for future reference and maintenance needs. If you ever feel uncertain during the installation process, don’t hesitate to consult a professional. Regular maintenance of your newly installed water heater will ensure years of reliable hot water for your RV adventures. With proper installation and care, you’ll enjoy the comfort of hot water while camping, making your RV feel more like home.