Transform your entryway into a haunted welcome zone with strategically placed LED candles, cobweb-draped doorframes, and motion-activated props that startle guests upon arrival. Create an eerie atmosphere throughout your space by layering different lighting elements – combining blacklights, flickering flame bulbs, and carefully positioned spotlights to cast dramatic shadows. Master your seasonal decoration planning by establishing themed zones: a witch’s potion station in the kitchen, a haunted cemetery in the yard, and a supernatural photo booth in the living room. Elevate ordinary spaces with budget-friendly DIY elements like floating cheesecloth ghosts, painted pumpkin clusters, and spooky silhouettes cut from black construction paper – perfect for windows and walls. Remember to keep pathways clear and secure all hanging decorations to ensure both an immersive and safe experience for your guests.
Creating an Enchanting Entrance
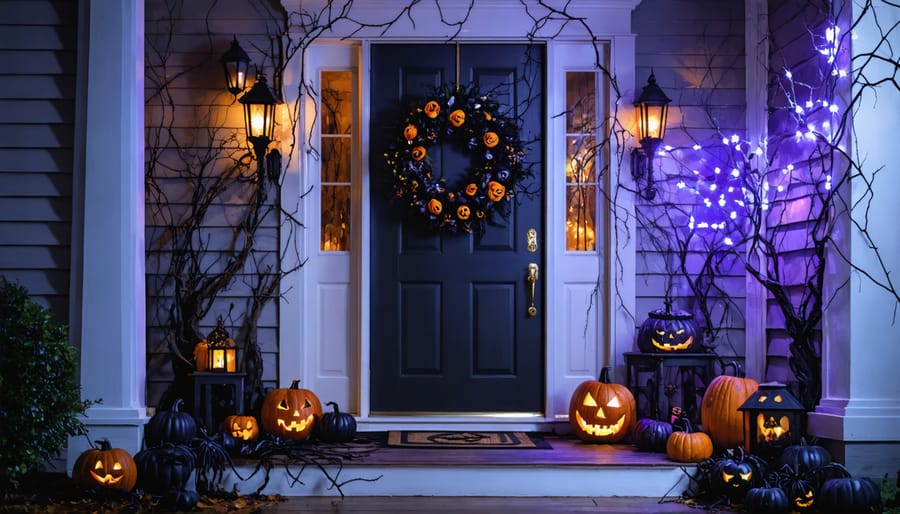
Doorway Drama
Transform your entryway into a spine-chilling welcome zone that sets the perfect mood for your Halloween party. Start by draping large spider webs across your doorway, using stretchy cotton cobweb material for an authentic look. Add a few plastic spiders of varying sizes to create depth and movement within the webs.
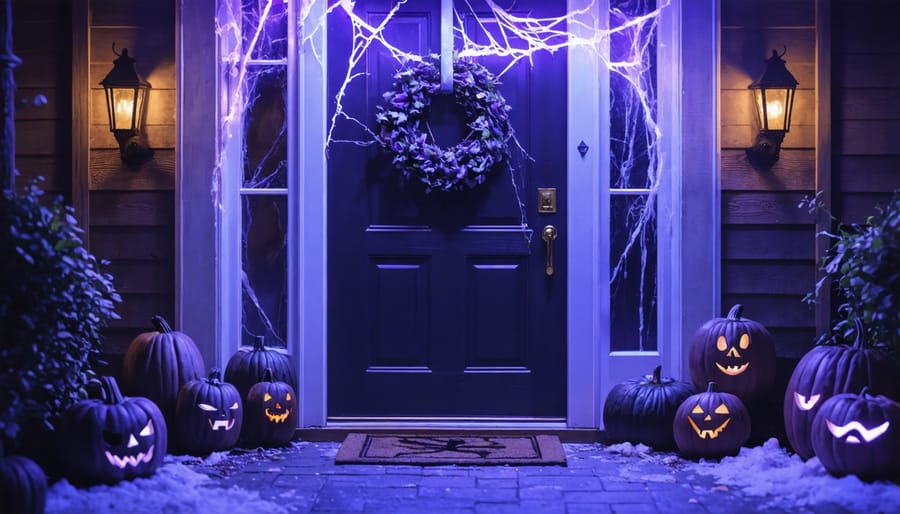
Frame your door with battery-operated LED string lights in orange or purple to create an eerie glow. For added drama, position a couple of battery-powered spotlights at the base of your door, angling them upward to cast dramatic shadows. Don’t forget to hang a spooky wreath made from black flowers, miniature skulls, or twisted branches.
Create a fog effect near the entrance using a small fog machine, but keep it slightly away from the doorway to prevent guests from walking through thick fog. Add motion-activated props like hanging ghosts or animated decorations that trigger when guests approach. For a finishing touch, position a few LED candles in mason jars along the path to your door, creating a ghostly guidance system for your arriving guests.
Remember to keep the walkway clear and well-lit enough for safety, while maintaining the spooky atmosphere you’re creating.
Pathway Haunts
Transform your entryway into a spine-chilling introduction to your Halloween party with these atmospheric pathway decorations. Line your walkway with traditional jack-o’-lanterns, spacing them every few feet for consistent lighting. For an extra eerie touch, place battery-operated LED candles inside instead of real flames for safety and longevity.
Create depth by positioning different-sized tombstones along the path edges, using foam board or corrugated plastic for DIY versions. Enhance the spooky ambiance by draping spider webs between trees or posts, and don’t forget to add a few plastic spiders for authenticity.
Ground fog machines strategically placed behind shrubs can create an incredible creepy effect, especially when combined with green or purple spotlights. For a budget-friendly alternative, use white shower curtains or sheets as ghost forms, suspended from trees or shepherd’s hooks.
Remember to keep the path itself clear of tripping hazards while maintaining the scary atmosphere. Solar-powered stake lights can provide both guidance and ghostly illumination, ensuring your guests’ safety without breaking the Halloween mood.
Main Party Space Magic
Ceiling and Wall Transformations
Transform your party space from floor to ceiling with these spooktacular overhead decorations. Start by creating a cobweb canopy using stretchy spider web material across the ceiling, anchoring it at different points for a naturally draped effect. Add battery-operated LED spiders that can be nestled within the webs for an eerie glow.
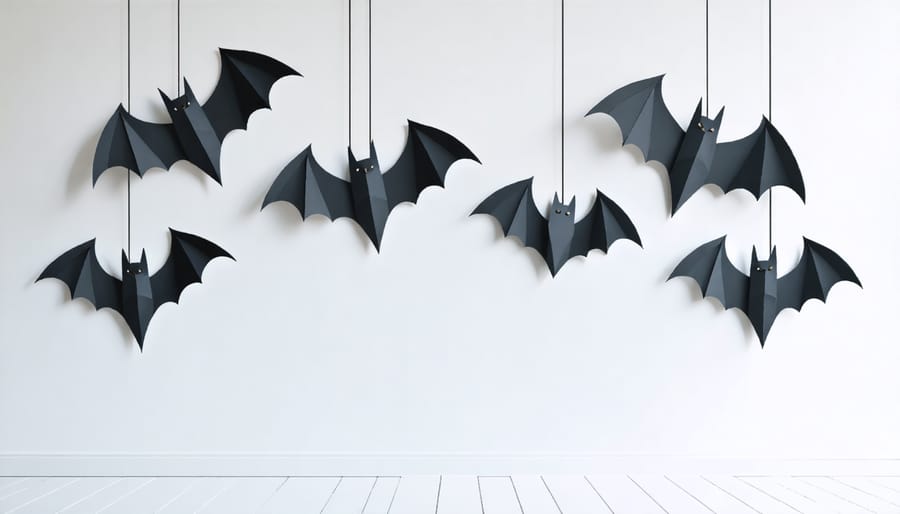
For a dramatic impact, hang paper bats in varying sizes from fishing line at different heights. Create a swarm effect by clustering them together in corners and spreading them out across the ceiling. Black tissue paper ghosts can also be suspended to float mysteriously overhead.
Make your walls come alive with shadow projections using battery-operated LED candles and cut-out silhouettes. Position them strategically to cast spooky shapes across the room. For a quick and effective wall transformation, apply temporary Halloween-themed wall decals or create a gallery wall of vintage horror movie posters.
Don’t forget about corners and transitional spaces. Drape black cheese cloth from ceiling corners and accent with purple or orange string lights. For an extra creepy touch, install motion-activated props that drop down unexpectedly when guests walk by. Remember to secure all overhead decorations properly and keep them away from heat sources and light fixtures for safety.
A professional tip: use removable adhesive hooks rated for the weight of your decorations to avoid damage to your ceiling and walls. This makes both installation and cleanup much easier after the party.
Table and Buffet Styling
Transform your buffet table into a spooky focal point that’ll have guests talking long after the party ends. Start with a dramatic tablecloth – layer a black base with tattered cheesecloth or spider web material for an instantly eerie effect. Create height variation by using cake stands and boxes covered in Halloween-themed fabric to display your treats at different levels.
Add ambiance with strategically placed LED candles in vintage-style holders or hollow pumpkins. For a truly haunting touch, arrange “specimen jars” filled with water, food coloring, and plastic toys between your serving dishes. Label them with creative names like “Witch’s Brew” or “Preserved Dragon Eyes.”
Don’t forget your serving utensils! Wrap handles in twine or black ribbon, and add small Halloween trinkets like plastic spiders or mini skulls. Place cards become conversation starters when written on miniature tombstones or attached to small potion bottles.
For the centerpiece, create a dramatic arrangement using black branches, artificial ravens, and battery-operated string lights. Scatter plastic insects or autumn leaves around serving platters for an extra creepy touch. Remember to leave enough space between dishes for easy access – nothing breaks the spooky atmosphere quite like a traffic jam at the buffet table!
Pro tip: Keep wet wipes or decorated paper towel holders nearby for quick cleanup of any spills, ensuring your haunted feast stays presentable throughout the night.

Ambient Lighting Effects
Creating the perfect spooky atmosphere starts with strategic lighting choices that can transform any space into a haunted haven. Begin by replacing regular bulbs with colored LED options – deep purples, eerie greens, and blood reds work particularly well. Understanding color theory for ambient lighting can help you create the perfect mysterious mood.
Layer your lighting effects by combining different sources. Position LED candles in clusters on tables and windowsills, using varying heights for visual interest. Battery-operated string lights can be draped along walls or wrapped around banisters, creating ethereal patterns that cast dancing shadows. For an extra ghostly touch, place uplighting behind curtains or in corners to create looming silhouettes.
Don’t forget about black lights – they’re perfect for making white decorations and certain fabrics glow mysteriously. Place them strategically near your spookiest displays or use them to illuminate a dance floor area. For a fog-machine effect that really pops, position cool-toned lights near the ground where the fog will roll.
A pro tip is to create “dark zones” – areas with minimal lighting that build suspense and contrast with better-lit spaces. Use flickering light effects (easily achieved with smart bulbs or specialized Halloween lights) to add movement and unpredictability to your space. Remember to keep some practical lighting in food service areas and pathways for safety.
DIY Decoration Projects
Paper Craft Decorations
Transform your Halloween party space with budget-friendly creative paper decorations that pack a spooky punch! Start with classic paper bats by cutting simple bat shapes from black construction paper and arranging them in a flying formation on walls. Create an eerie atmosphere with DIY paper lanterns using orange and black paper, decorated with spooky faces or Halloween symbols.
For a show-stopping centerpiece, craft a paper chain chandelier using alternating orange and black strips, adorned with dangling paper ghosts. Add depth to your party space with accordion-fold paper pumpkins – they’re surprisingly simple to make and can be scaled to any size. Door frames become more dramatic with paper spider webs; just cut strips of white paper and arrange them in a web pattern, complete with paper spiders.
Create instant ambiance with paper bag luminaries. Draw or cut spooky faces on brown paper bags, weight them with sand, and add battery-operated tea lights for a safe, flickering effect. For windows, craft silhouette scenes using black paper – think witch silhouettes, haunted houses, or creepy trees.
Don’t forget the finishing touches! String paper garlands made from mini pumpkins, ghosts, or Halloween phrases across the room. Make oversized tissue paper flowers in Halloween colors for an unexpected twist. For table settings, fold black napkins into bat shapes or create place cards with tombstone cutouts. These paper decorations are not only cost-effective but also easy to customize and perfect for getting kids involved in the party preparation.
Upcycled Halloween Props
Transform everyday household items into spooktacular Halloween decorations with these creative upcycling ideas. Empty wine bottles can become elegant candle holders – simply paint them black or white and add dripping wax effects using hot glue. After they dry, pop in some orange or purple LED taper candles for an eerie glow.
Those cardboard boxes cluttering your garage? Turn them into tombstones! Cut them into grave marker shapes, coat with gray spray paint, and add spooky epitaphs using black paint or markers. Weather-proof them with clear sealant for outdoor use.
Old mason jars make perfect supernatural specimens – fill them with water tinted with food coloring, add plastic toys like snakes or eyeballs, and label them as “Witch’s Brew” or “Zombie Eyes.” For an extra creepy touch, wrap the jar tops with gauze or cheesecloth.
Transform worn-out sheets into ghostly decorations by draping them over beach balls or balloons suspended from the ceiling. Create faces using black fabric paint or felt cutouts. Paper grocery bags can be cut into silhouettes of cats, bats, or witches – perfect for window decorations when backlit.
Don’t toss those empty paper towel rolls! Paint them black, add LED tea lights, and create spooky eyes that glow in the dark. Group them together in windows or dark corners for a startling effect. Even plastic milk jugs can become ghost lanterns – just draw faces with permanent markers and place battery-operated lights inside.
Remember to keep all upcycled decorations away from open flames and heat sources for safety. With a little creativity, your everyday items can become the talk of your Halloween party!
Safety and Storage Tips
While creating a spooky atmosphere is essential for your Halloween party, following proper holiday decoration safety guidelines is equally important. Start by keeping lit candles away from flammable decorations and consider using LED alternatives instead. When hanging decorations, ensure they don’t block exits, emergency signs, or fire sprinklers.
For outdoor decorations, secure them properly to prevent wind damage and trip hazards. Use weather-resistant extension cords and keep them away from walkways. If using fog machines, ensure proper ventilation and keep them away from smoke detectors.
When the party’s over, proper storage will help preserve your decorations for next year. Clean fabric items like tablecloths and cushion covers before storage to prevent mold growth. Remove batteries from electronic decorations to prevent corrosion. Sort decorations by type and store them in clear, labeled plastic containers to make next year’s setup easier.
For delicate items like artificial cobwebs and paper decorations, store them in separate containers to prevent tangling or crushing. Keep stringed lights wrapped around cardboard pieces to prevent knots. Store everything in a cool, dry place away from direct sunlight to prevent fading and damage.
Consider creating an inventory list of your decorations and taking photos of your setup. This will help you remember successful arrangements and make future party planning more efficient. For handmade decorations, store them with care instructions to ensure they remain in good condition. Keep all storage containers elevated off the ground to protect against potential water damage and pests.
Remember to test all electronic decorations before storing them away, noting any repairs needed for next year. This small step can save you time and frustration when planning your next Halloween celebration.
Creating a spooktacular Halloween party atmosphere doesn’t have to be complicated or expensive. With the ideas and tips we’ve explored, you can transform your space into a haunted haven that your guests will remember for years to come. From crafting eerie entrance decorations to setting up atmospheric lighting and creating themed food displays, each element contributes to an immersive Halloween experience.
Remember to start your planning early, giving yourself plenty of time to gather supplies and create DIY decorations. Mix and match store-bought items with handmade touches to achieve a unique and personalized look while staying within your budget. Don’t forget to consider your guests’ comfort and safety when placing decorations, especially if children will be attending.
The key to successful Halloween decorating is finding the right balance between spooky and welcoming. Whether you opt for a classic haunted house theme or a more sophisticated autumn harvest style, let your creativity shine through. Start collecting ideas and materials now, and you’ll be well-prepared to host an unforgettable Halloween celebration that delights guests of all ages.