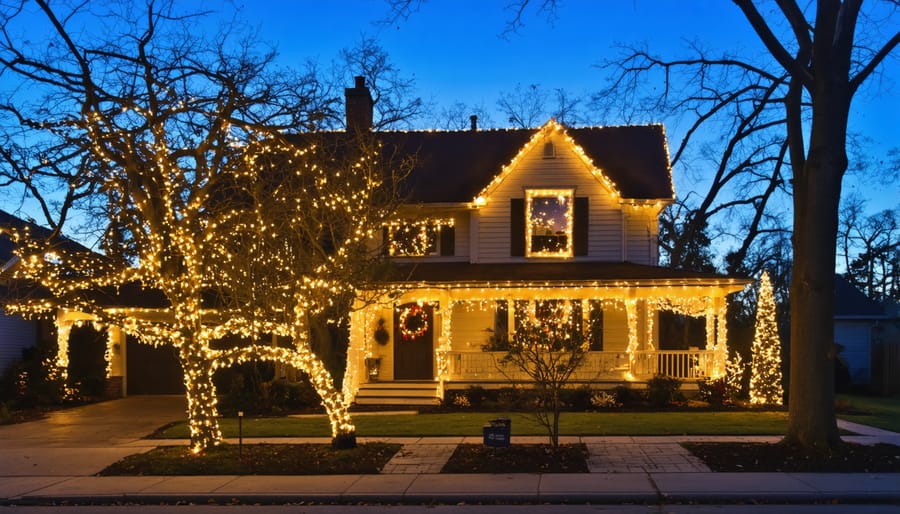
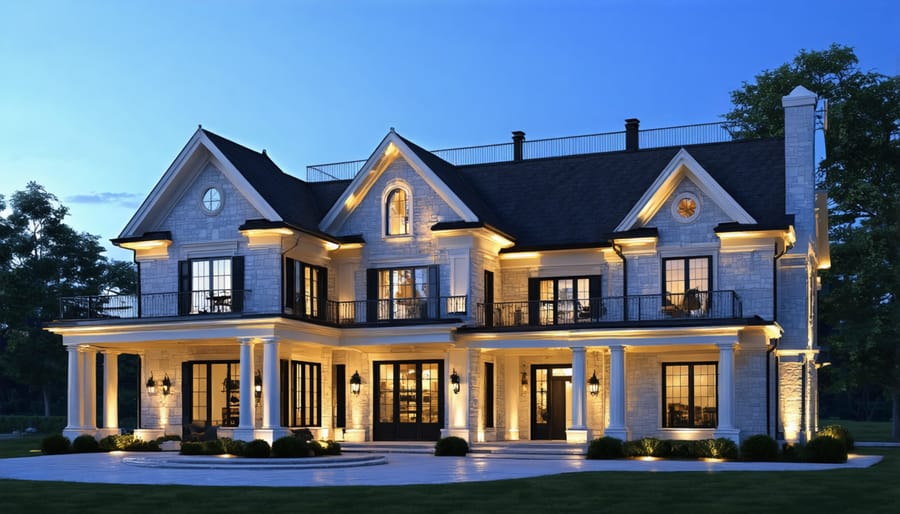
Transform your outdoor space into a magical wonderland by strategically placing warm white LED string lights along rooflines, wrapping tree trunks in spiral patterns, and using net lights to enhance your entrance with elegant illumination. Modern outdoor seasonal lighting combines energy efficiency with stunning visual impact, offering homeowners the perfect balance of practicality and enchantment. Professional-grade lights with weatherproof ratings ensure your display withstands winter elements while timer systems and smart controllers provide convenient automation. Whether creating a subtle holiday ambiance or designing an eye-catching showcase, proper planning and installation techniques maximize both safety and visual appeal. Focus on layering different light types – from icicle drops to pathway markers – while maintaining consistent color temperatures and spacing for a cohesive, professional look that transforms your property into a neighborhood highlight.
Planning Your Outdoor Light Display
Measuring Your Space
Before you start stringing up those twinkling lights, take a few minutes to measure your space accurately. This simple step will save you time, money, and frustration later on. Start by measuring the length of your roofline, including any peaks and valleys. For every foot of roofline, plan on using about two feet of lights to account for proper draping.
Don’t forget to measure other outdoor features you plan to decorate. For trees, multiply the height by the circumference to estimate how many lights you’ll need. For columns or posts, measure the height and multiply by the number of wraps you’d like to make (typically 4-6 wraps look best).
Pro tip: Create a quick sketch of your house and note all measurements. Include walkways, bushes, and any architectural features you want to highlight. Add up all your measurements and add an extra 10% for contingency. Remember that it’s better to have a few extra feet of lights than to come up short mid-installation.
For bushes and hedges, plan on using roughly 100 mini lights or 50 C7/C9 bulbs for every 5 feet of coverage. This ensures a full, professional-looking display without gaps or dark spots.
Power Requirements and Safety
Safety should always come first when setting up your outdoor seasonal lights. Start by checking your home’s electrical capacity – most modern homes can handle holiday lighting loads, but it’s wise to calculate your total wattage needs beforehand. A typical 15-amp circuit can safely handle around 1,800 watts, so keep your total lighting display below this threshold.
When selecting extension cords, always choose ones rated for outdoor use and match their amperage rating to your lighting needs. Position them away from high-traffic areas and never run them under carpets or through doorways. Consider using multiple outlets around your home rather than connecting everything to a single source to distribute the electrical load evenly.
GFCI (Ground Fault Circuit Interrupter) outlets are essential for outdoor lighting – they’ll automatically cut power if they detect a short circuit or ground fault, preventing electrical fires and shocks. If your outdoor outlets aren’t GFCI-protected, consider having an electrician install them.
Timer systems aren’t just convenient; they’re also a safety feature. Set your lights to turn off automatically during daylight hours and late at night to prevent overheating and reduce energy consumption. During wet weather, ensure all connections are properly sealed and elevated off the ground.
Remember to inspect all light strings before installation, looking for frayed wires, broken bulbs, or damaged plugs. Replace any compromised sets immediately – attempting repairs on outdoor lights can be dangerous and isn’t worth the risk.
Choosing the Right Lights
LED vs Traditional Bulbs
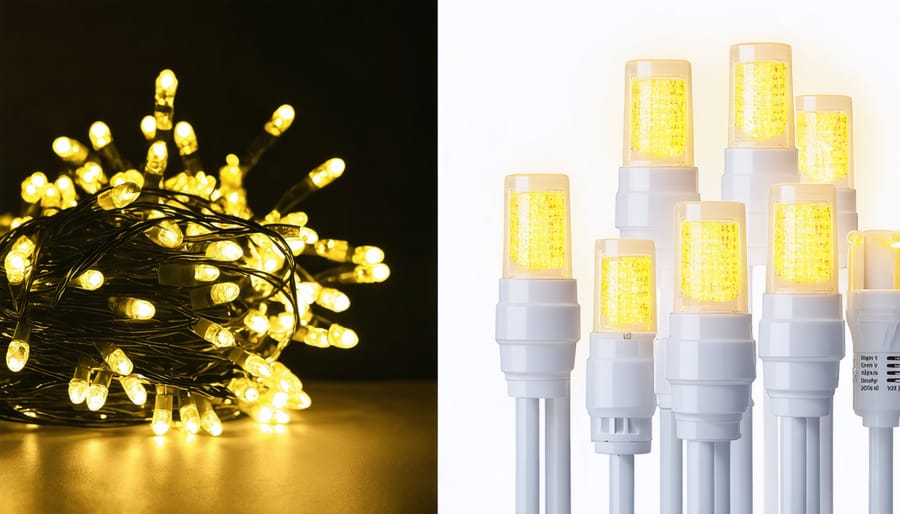
When it comes to creating magical outdoor displays, the choice between LED and traditional incandescent bulbs can significantly impact both your electric bill and the environment. LED lights have revolutionized energy-efficient outdoor lighting, offering numerous advantages over their traditional counterparts.
LED bulbs consume up to 90% less energy than incandescent lights, which means substantial savings on your holiday electric bills. They also last much longer – typically 25,000 to 50,000 hours compared to just 1,000 to 2,000 hours for traditional bulbs. This longevity means you’ll spend less time replacing burnt-out bulbs and more time enjoying your display.
While LED lights might cost more upfront, they quickly pay for themselves through energy savings and reduced replacement needs. They’re also more durable, with plastic casings that resist breakage, making them perfect for outdoor use. Unlike traditional bulbs, LEDs stay cool to the touch, reducing fire risk and making them safer around children and foliage.
Color quality has improved dramatically in recent years, with LED lights now offering warm, vibrant hues that rival traditional bulbs. They’re also available in a wider range of styles and effects, from classic steady glows to twinkling patterns that can transform your outdoor space into a winter wonderland.
Weather-Resistant Features
When selecting outdoor seasonal lights, weather resistance should be your top priority. Look for lights specifically labeled as “outdoor-rated” or “weatherproof,” as these are designed to withstand various environmental challenges. The IP (Ingress Protection) rating is particularly important – aim for lights rated IP65 or higher, which ensures protection against both dust and water jets from any direction.
Quality outdoor lights feature sealed connections and weatherproof wire insulation to prevent moisture from causing shorts or electrical hazards. The bulb housing should be made from durable materials like polycarbonate or heavy-duty plastic that won’t crack in extreme temperatures. For areas with heavy snowfall, choose lights with reinforced wire connections that can handle the weight of accumulated snow and ice.
UV resistance is another crucial feature to consider, especially if you plan to leave your lights up for extended periods. UV-protected materials prevent the light casings from becoming brittle or discolored due to sun exposure. Additionally, look for lights with rubber gaskets around connection points and sealed end caps to provide extra protection against rain and humidity.
Temperature tolerance is equally important. Quality outdoor lights should function properly in both freezing winters and hot summers, typically ranging from -13°F to 140°F (-25°C to 60°C). Some manufacturers also include drain holes in their designs to prevent water accumulation, which can extend the life of your seasonal lighting display.
Creative Display Ideas
Architectural Highlighting
Strategic lighting placement can dramatically enhance your home’s exterior by highlighting its best architectural features. Start by identifying key focal points like columns, archways, or decorative trim. Use warm white lights to outline these elements, creating depth and dimension in the evening hours.
For peaked rooflines, install lights along the edges to emphasize your home’s silhouette. Wrap columns with mini lights in a neat spiral pattern, spacing them evenly for a professional look. Window frames become magical borders when outlined with strings of lights, while dormers and bay windows pop with strategic uplighting.
Don’t forget architectural details like stone facades or brick textures – use spotlights positioned at ground level to create dramatic shadows and highlights. For porches and entryways, combine overhead lighting with wrapped pillars to create a welcoming atmosphere.
Remember to maintain symmetry in your design and use consistent light colors throughout. This approach ensures a cohesive look that accentuates your home’s architectural character while creating an inviting nighttime presence.
Landscape Integration
Integrating seasonal lights into your existing landscape requires thoughtful planning to create a cohesive and magical outdoor display. Start by mapping out your yard’s natural features and identifying key elements like trees, shrubs, and architectural features that could benefit from illumination. Using professional garden lighting techniques can help you achieve a balanced look that complements your landscaping year-round.
Wrap string lights around tree trunks and branches, working from bottom to top, ensuring even spacing. For bushes and hedges, use net lights to create uniform coverage without damaging the plants. Consider installing permanent guide wires or hooks along rooflines and fences to make seasonal installation easier while protecting your landscaping.
Don’t forget to incorporate your pathway lights and existing outdoor fixtures into your seasonal display. Use similar color temperatures and styles to create a harmonious look. For garden beds, opt for stake lights that can be easily removed during maintenance, and consider using decorative covers that match your seasonal theme while protecting connections from moisture.
Theme Creation
Creating a cohesive theme with your outdoor seasonal lights transforms your display from random decorations into a stunning visual story. Start by choosing a central theme that reflects your style and complements your home’s architecture. Popular options include winter wonderland, traditional holiday, or modern minimalist designs. For inspiration, check out these winter decorating ideas that work throughout the season.
Consider using a consistent color palette throughout your display. White lights create an elegant, classic look, while multicolored lights offer a playful, festive atmosphere. Layer your lighting by combining different types of lights – string lights for outlining, projector lights for texture, and spotlights for focal points.
Create visual flow by connecting different areas of your outdoor space. Use pathway lights to guide the eye from your entrance to key decorative elements. Remember to maintain balance in your design by distributing lights evenly and avoiding overcrowded areas. For maximum impact, focus on three main areas: your entryway, architectural features, and landscape elements.
Installation Tips and Techniques

Tools and Hardware
Before starting your outdoor lighting project, gather these essential tools to ensure a smooth installation process. A sturdy extension ladder with rubber feet is crucial for reaching higher areas safely. You’ll need multiple outdoor-rated extension cords and a good supply of plastic clips or hooks designed specifically for hanging lights.
Keep basic hand tools nearby, including scissors or wire cutters for trimming zip ties, a hammer for securing stakes, and a screwdriver set for mounting permanent hooks or clips. A voltage tester helps identify live circuits and ensure safe electrical connections.
For precise timing and convenience, invest in an outdoor timer that’s weatherproof and rated for your total wattage. Light-hanging poles with attachment hooks can help you reach high spots without constantly moving the ladder. Don’t forget safety equipment: non-slip gloves, safety glasses, and a tool belt or bucket for keeping supplies organized while you work.
Consider having spare bulbs, fuses, and zip ties on hand for quick fixes. A measuring tape and level will help achieve professional-looking, straight light lines. For ground installations, keep a rubber mallet and landscape stakes ready to secure light strands and cords.
Professional Tricks
Want to achieve that professional-looking light display? Here are some insider tricks that seasoned decorators swear by. Start by planning your installation during daylight hours, using plastic clips or hooks specifically designed for gutters and shingles rather than nails or staples. This prevents damage to your home while ensuring secure attachment.
For trees and bushes, work from the trunk outward, wrapping lights in a spiral pattern. Use zip ties in matching colors to secure light strands – they’re practically invisible at night. When laying out roof lines, measure twice and use light clips at consistent intervals (typically every 12-18 inches) for that crisp, clean look.
To avoid unsightly cords, route them along natural lines in your architecture and landscaping. Consider using outdoor-rated extension cords in green or brown to blend with your surroundings. For perfectly straight lines along walkways, use a string as a guide before securing your lights.
Pro tip: Test every strand before installation and keep spare bulbs handy. Working with two people makes the job easier and safer, especially when using ladders.
Maintenance and Storage
Proper maintenance and storage are key to extending the life of your outdoor seasonal lights and ensuring they’re ready for next year’s festivities. During the season, regularly check for any signs of wear, loose bulbs, or damaged wires. If you notice any frayed cords or broken sockets, replace them immediately to prevent safety hazards.
Keep your lights clean by gently wiping them with a soft, dry cloth when they’re turned off. For stubborn dirt, use a slightly damp cloth, but never spray water directly on the lights. Always ensure connections and plugs stay dry and protected from the elements.
When the season ends, take time to carefully remove your lights. Don’t pull or yank them down, as this can damage both the lights and your home’s exterior. Instead, work systematically to unwrap them from their mounting points.
Before storage, test all light strands to identify any issues that need addressing before next season. Wind each strand loosely around a piece of cardboard or a storage reel to prevent tangling. Place them in weatherproof containers with silica gel packets to absorb moisture.
Label each container with the contents and location used (e.g., “Front Porch Icicle Lights”) to make next year’s setup easier. Store in a cool, dry place away from direct sunlight and extreme temperatures. Consider using specialized light storage containers with compartments to keep different types of lights organized and protected.
Transforming your outdoor space with seasonal lights is an exciting project that can bring joy throughout the year. By following proper planning, installation, and maintenance guidelines, you can create a stunning display that’s both safe and energy-efficient. Remember to choose weather-appropriate lights, secure them properly, and consider using timers and smart controls to maximize convenience and energy savings. Whether you’re decorating for the holidays or creating year-round ambiance, outdoor lighting adds warmth and character to your home’s exterior. Don’t be afraid to experiment with different designs and lighting combinations to find what works best for your space. With the right approach and attention to detail, you can create a beautiful outdoor lighting display that you and your neighbors will enjoy for seasons to come. Start your lighting project today and watch as your outdoor space transforms into a magical evening retreat.