Transform your home studio into a pristine wellness sanctuary for sound with strategic acoustic treatment. Start by identifying major reflection points – corners, parallel walls, and ceiling-floor bounces – where sound waves create unwanted echoes. Place bass traps in room corners to control low-frequency buildup, the most common challenge in home studios. Mount broadband absorbers at first reflection points, typically 30-40% of wall space, to achieve professional-grade sound clarity without deadening the room’s natural ambiance. Balance absorption with diffusion using textured panels or bookshelves to maintain a lively, controlled space that’s perfect for recording and mixing. Strategic placement of furniture, particularly soft furnishings, further enhances acoustic performance while preserving your room’s aesthetic appeal. These foundational steps create an optimal recording and mixing environment that rivals professional studios, all while maintaining the comfort and style of your home space.
Understanding Room Acoustics: The Foundation of Sound Wellness
Common Acoustic Problems in Home Spaces
When setting up a home studio, you’ll likely encounter several common acoustic challenges that can affect your sound quality. The most prevalent issue is echo, which occurs when sound waves bounce off hard surfaces like bare walls and windows, creating that hollow, cave-like effect we’ve all experienced in empty rooms.
Another frequent problem is excessive reverberation, where sound continues to linger in the space longer than desired. While some reverb can add warmth to music, too much can muddy your recordings and make speech unclear. This is especially noticeable in rooms with high ceilings or lots of hard, parallel surfaces.
Flutter echo is particularly troublesome in home studios – it’s that ping-pong effect you hear when sound bounces rapidly between parallel walls. You might also notice standing waves, which create spots in your room where certain frequencies sound louder or quieter than others.
Bass frequencies often pose a special challenge, typically collecting in corners and causing boomy, undefined low-end sound. This can make it difficult to achieve accurate mixing and monitoring in your space.
How Sound Affects Your Well-being
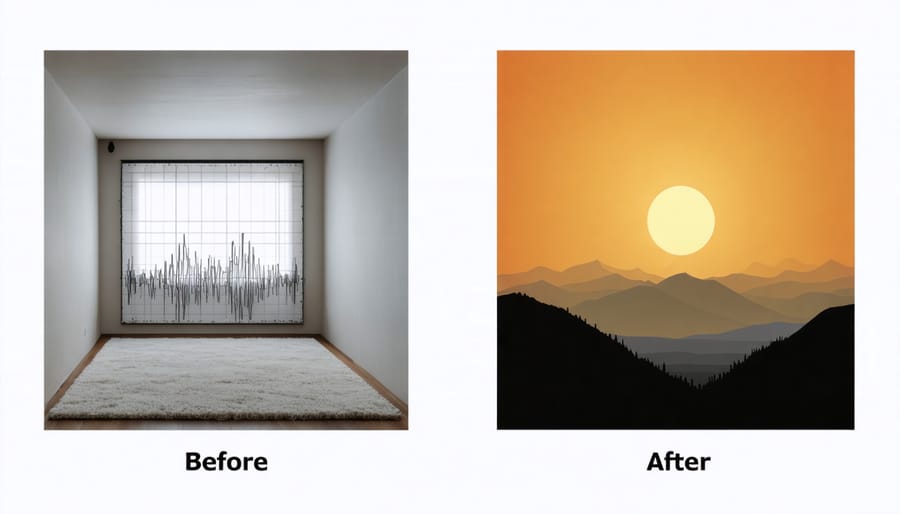
Poor acoustics can significantly impact your daily well-being in ways you might not realize. When sound waves bounce chaotically around your space, they create an environment that can increase stress levels and drain your mental energy. Think about those times when echoes and reverberations make it difficult to focus on your work or enjoy your favorite calming soundscapes.
Research shows that exposure to poor acoustic environments can lead to increased heart rate, elevated blood pressure, and difficulty concentrating. For creative professionals working from home, these conditions can stifle inspiration and reduce productivity. Even casual conversations become more challenging, as your brain works overtime to process distorted sound reflections.
The good news is that proper acoustic treatment can transform your space into a sanctuary that promotes well-being. By controlling sound reflections and minimizing unwanted noise, you create an environment that allows your mind to relax and focus naturally. This not only enhances your work quality but also contributes to better mental health and overall life satisfaction.
Essential Acoustic Treatment Solutions
Bass Traps: The Corner Solution
Bass traps are your secret weapon in taming those troublesome low frequencies that love to build up in corners. Think of them as acoustic superheroes that catch and absorb bass waves before they can bounce around and muddy up your sound.
These specialized acoustic panels work best in room corners, where bass frequencies naturally accumulate. The reason is simple: corners are where sound waves from multiple directions meet and stack up, creating what we call “standing waves.” By placing bass traps in these strategic spots, you’re addressing the problem right at its source.
For optimal results, start with the upper corners where your walls meet the ceiling, and the bottom corners where walls meet the floor. If you’re serious about your sound treatment, consider placing bass traps in all eight corners of your room. Don’t worry if you can’t cover every corner – even treating just the front corners of your studio space can make a noticeable difference in your room’s sound quality.
Remember, effective bass trapping doesn’t mean sacrificing style. Modern bass traps come in various designs and colors that can complement your room’s décor while doing their acoustic heavy lifting.
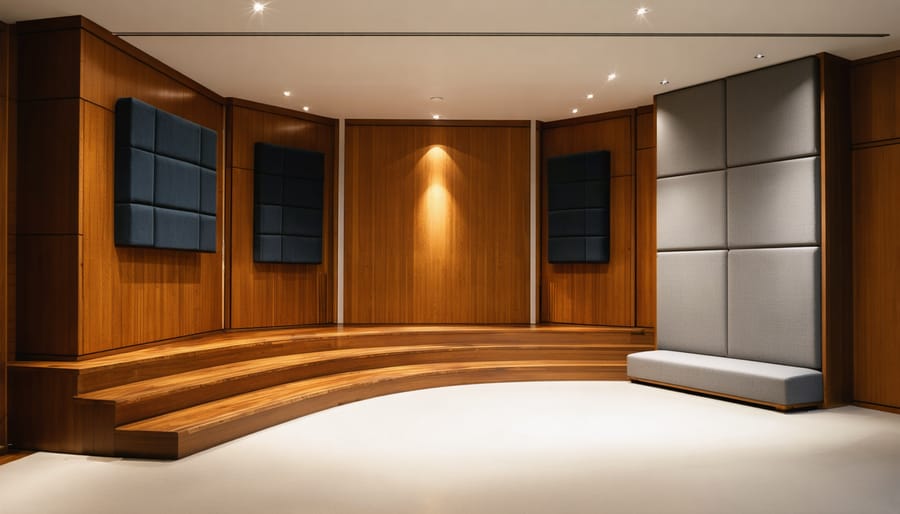
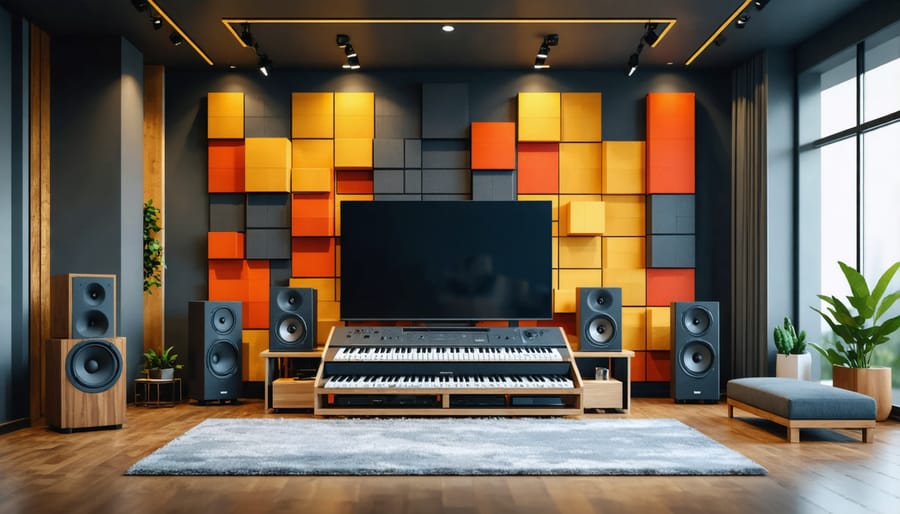
Acoustic Panels That Complement Your Decor
Gone are the days when acoustic treatment meant covering your walls with unattractive foam panels. Today’s acoustic solutions seamlessly blend function with style, creating a mood-enhancing environment without compromising your interior design vision.
Consider fabric-wrapped acoustic panels that come in a spectrum of colors and patterns to match your existing décor. These panels can be arranged in artistic configurations, transforming them into statement pieces that guests might mistake for intentional wall art. Many manufacturers now offer customizable options where you can print your own artwork or photographs onto acoustically transparent fabric, making each panel a unique piece of functional art.
For a more organic approach, wooden diffuser panels add warmth while incorporating natural design elements into your space. These can feature geometric patterns or wave-like designs that not only scatter sound waves effectively but also create visual interest.
Textured wall panels in three-dimensional designs offer another stylish solution. Available in various shapes and sizes, these panels can create stunning focal points while providing excellent sound absorption. Consider options like hexagonal panels that can be arranged in honeycomb patterns or curved panels that create flowing, sculptural installations.
Modular acoustic solutions are particularly versatile, allowing you to adjust their placement as your needs change. Look for panels that can be easily mounted and repositioned, giving you the flexibility to refresh your space’s look while maintaining optimal acoustic performance.
Diffusers: Balancing Sound and Style
Diffusers are the unsung heroes of acoustic treatment, offering both sound-enhancing properties and aesthetic appeal. Unlike absorbers that can make a room look industrial, diffusers can actually add character to your space while dispersing sound waves evenly throughout the room.
For a stylish approach, consider geometric wood diffusers that double as wall art. These panels feature irregular surfaces that break up sound reflections while creating stunning visual patterns. You can even paint or stain them to match your room’s color scheme. Another creative option is the bookshelf diffuser – arrange books of varying heights and depths on your shelves to create natural sound diffusion while maintaining a lived-in, cozy atmosphere.
Custom-made QRD (Quadratic Residue Diffuser) panels can be crafted from materials like wood or MDF and finished to complement your décor. For a more subtle approach, try incorporating different textured surfaces throughout your room – mixing materials like wood, fabric, and metal naturally creates diffusion while adding visual interest.
Position your diffusers strategically at key reflection points, typically on the rear wall and ceiling. Remember that effective diffusion doesn’t mean covering every surface – sometimes less is more. Start with a few well-placed panels and adjust based on your room’s acoustics and aesthetic preferences. The key is finding the sweet spot where sound quality and visual appeal meet in perfect harmony.
DIY Acoustic Treatment Projects
Building Custom Acoustic Panels
Building your own acoustic panels is a rewarding project that can save you money while achieving professional-quality sound treatment. Let’s break down what you’ll need and how to put it together.
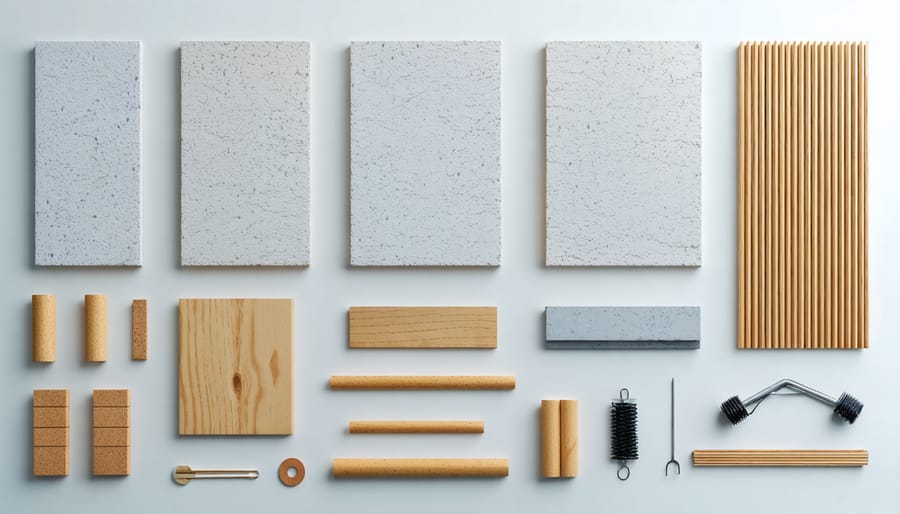
Materials Needed:
– Wooden frames (1×4 inch lumber)
– Rockwool or fiberglass insulation (2-4 inch thick)
– Breathable fabric (like burlap or speaker cloth)
– Wood screws
– Staple gun and staples
– Corner brackets
– Basic tools (saw, drill, measuring tape)
Step-by-Step Construction:
1. Create your frame by cutting the lumber to size (typical panel size is 2×4 feet) and assembling with wood screws and corner brackets.
2. Cut your insulation material to fit snugly inside the frame. Wear protective gear – mask, gloves, and eye protection are essential when handling insulation.
3. Wrap your fabric around the frame and insulation. Start by laying the fabric face-down, place the frame on top, and pull the fabric tight while stapling it to the back of the frame.
4. Pay special attention to corners, folding them neatly like wrapping a present. This ensures a professional finish.
Pro Tips:
– Choose fabric colors that complement your room’s decor
– Consider using printed fabric for a more decorative look
– Double-check measurements before cutting materials
– Add a vapor barrier if installing in humid environments
– Use French cleats for secure wall mounting
Remember to space your panels evenly and position them at primary reflection points for optimal acoustic performance. The entire project typically takes 2-3 hours per panel once you get the hang of it.
Creative Upcycling for Sound Control
Looking to improve your studio’s acoustics without breaking the bank? Your home might already have some surprisingly effective sound-control solutions hiding in plain sight. Thick blankets and quilts can serve as excellent temporary sound absorbers when hung on walls or suspended from ceiling tracks. Those empty egg cartons collecting dust? They can work as diffusers when arranged in a pattern on walls, though they’ll need proper fire-retardant treatment first.
Consider repurposing old bookshelves filled with books as natural sound diffusers – they break up sound waves while adding character to your space. Thick moving blankets can be transformed into hanging panels, while sturdy cardboard boxes filled with recycled denim or cotton can become effective bass traps for corners.
Even your closet can contribute – hanging clothes act as natural sound absorbers. Old throw pillows can be upcycled into acoustic panels by covering them with breathable fabric and mounting them strategically on walls. Remember to secure all DIY solutions properly and consider fire safety when selecting materials. These creative solutions might not match professional acoustic treatments, but they’re excellent starting points for improving your room’s sound quality.
Room Layout and Placement Strategies
The layout of your home studio plays a crucial role in achieving optimal acoustics. Start by positioning your desk and monitors against one of the shorter walls, placing them at an equal distance from each side wall. This creates a symmetrical listening environment and helps minimize unwanted reflections.
Your listening position should form an equilateral triangle with your monitors, with each point roughly 3-4 feet apart. Aim to sit about 38% into the room’s length from the front wall – this helps you avoid major room modes and standing waves that can muddy your sound.
When placing acoustic panels, focus first on your room’s primary reflection points. These are the spots on your side walls, ceiling, and rear wall where sound first bounces before reaching your ears. To find these points, have a friend slide a mirror along your walls – wherever you can see your monitors in the reflection is where you need treatment.
Bass traps are most effective in corners, where low frequencies tend to build up. Start with the front corners, then add more to the rear corners if needed. Remember to keep your setup balanced – if you place a panel on one side wall, match it on the opposite wall to maintain symmetry.
For optimal results, keep furniture and other reflective surfaces to a minimum in your primary listening area. If possible, position larger items like bookcases or sofas behind your listening position to help diffuse sound naturally.
Creating an acoustically treated home studio doesn’t have to be overwhelming or expensive. By starting with the basics – addressing first reflections, managing bass traps, and strategically placing absorption panels – you can significantly improve your room’s sound quality. Remember that acoustic treatment is an ongoing process, and you can tackle it step by step as your budget and time allow.
Whether you’re recording music, podcasting, or simply wanting better sound in your space, the effort you put into acoustic treatment will pay off in superior audio quality. Start with the most critical areas first, test your results, and make adjustments as needed. Don’t be afraid to experiment with different solutions and placements to find what works best for your unique space.
Your journey toward better acoustics begins with a single panel. Take that first step today, and you’ll be amazed at the difference proper acoustic treatment can make in your home studio.