Transform your living room into an acoustic sanctuary without sacrificing style. Strategic placement of soft furnishings, acoustic panels, and carefully chosen décor can dramatically improve sound quality while enhancing your space’s visual appeal. Whether you’re creating the perfect home theater experience, reducing noise from busy streets, or simply wanting clearer conversations, acoustic treatment delivers remarkable results that blend seamlessly with modern interior design.
Today’s innovative acoustic solutions offer homeowners beautiful options beyond traditional foam panels – from stylish fabric-wrapped absorbers to decorative diffusers that double as wall art. By understanding basic acoustic principles and implementing targeted treatments, you can achieve professional-grade sound control while maintaining your living room’s welcoming atmosphere. Let’s explore how to create the perfect balance of form and function, turning your living space into an acoustically optimized environment that looks as good as it sounds.
Why Your Living Room Needs Acoustic Treatment
The Hidden Effects of Poor Acoustics
Poor acoustics in your living room can impact your daily life more than you might realize. When sound waves bounce chaotically off hard surfaces, they create an uncomfortable environment that subtly affects your well-being. Instead of enjoying calming soundscapes, you might find yourself constantly adjusting the TV volume or straining to hear conversations.
Studies show that exposure to poor acoustics can increase stress hormones and mental fatigue. During family gatherings or movie nights, you might notice people asking “What did they say?” more often, leading to frustration and decreased enjoyment. The quality of your entertainment system, no matter how expensive, can be severely compromised by bad room acoustics.
Communication becomes particularly challenging when sound reflections create echo and reverberation. You might find yourself raising your voice to be heard, which can make casual conversations feel more stressful than they should be. This is especially noticeable during video calls, where clear audio is essential for effective communication.
The good news is that these effects are reversible with proper acoustic treatment, turning your living room into a more comfortable and enjoyable space for both relaxation and social activities.
Signs Your Living Room Needs Acoustic Help
Is your living room sounding a bit off? There are several telltale signs that your space might need acoustic treatment. If you notice echoes when you speak or clap your hands, that’s a clear indicator of sound reflection issues. During conversations, you might find yourself repeatedly asking “What?” because voices sound muddy or unclear, especially when the TV is on.
Music lovers might notice that their favorite songs don’t sound quite right, with bass frequencies becoming boomy or certain notes appearing more prominent than others. If you’re constantly adjusting your TV or stereo volume – turning it up to hear dialogue but down when action scenes become overwhelming – that’s another red flag.
Pay attention to how sound travels through your space. Does noise from other rooms seem unusually loud? Can you clearly hear conversations from across the room? These issues often point to poor acoustic control. Additionally, if your room features lots of hard surfaces like bare walls, hardwood floors, and large windows, you’re likely experiencing excessive sound reflection that could benefit from acoustic treatment.
Essential Acoustic Treatment Solutions
Soft Furnishings and Textiles
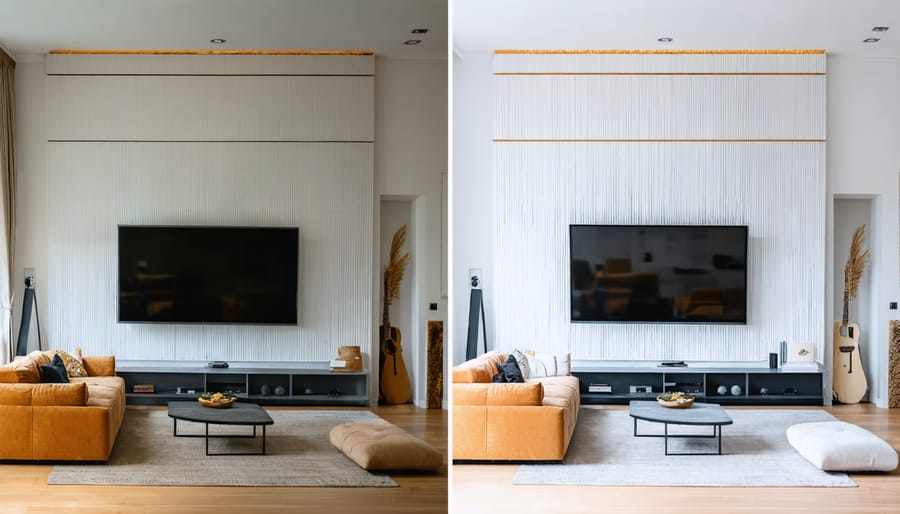
Soft furnishings are your secret weapon in acoustic treatment, offering both style and sound-absorbing benefits. Start with heavyweight curtains that extend from ceiling to floor – these not only control natural light but also prevent sound from bouncing off windows. Opt for thick, pleated fabrics like velvet or lined cotton for maximum effectiveness.
Area rugs play a crucial role in minimizing sound reflection from hard flooring. Choose thick, dense pile rugs and consider layering them for enhanced absorption. A large rug covering 60-70% of your floor space will make a noticeable difference in room acoustics.
When selecting upholstered furniture, prioritize pieces with soft, textured fabrics. A plush sofa with plenty of cushions doesn’t just look inviting – it’s actually working hard to absorb excess sound. Throw pillows and blankets aren’t just decorative touches; they add valuable sound-absorbing surfaces throughout your space.
Consider adding an upholstered ottoman or storage bench, which serves triple duty as seating, storage, and sound absorption. For maximum impact, mix different textile textures throughout your room – perhaps a wool throw on a velvet couch, or a chunky knit blanket draped over a linen chair.
Remember, these soft furnishings don’t have to match perfectly – creating layers of different textures and materials often works better for both acoustics and aesthetics.
Wall and Ceiling Treatments
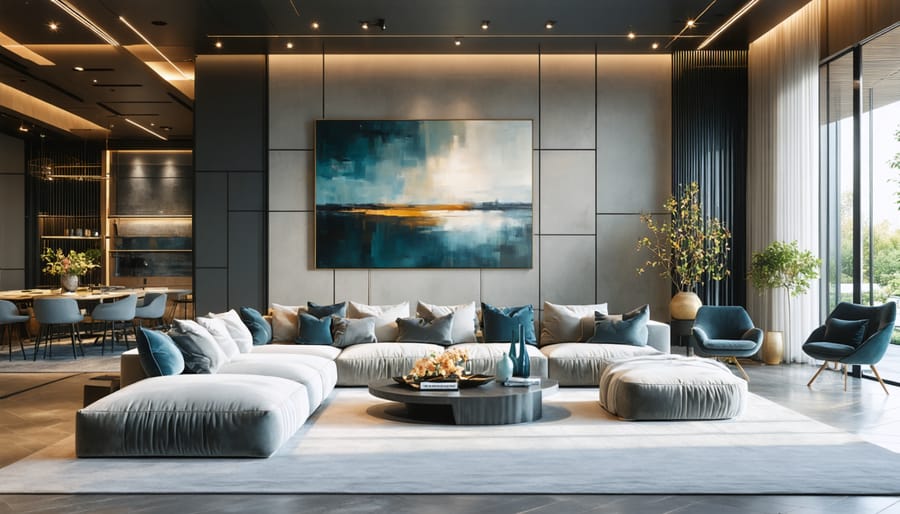
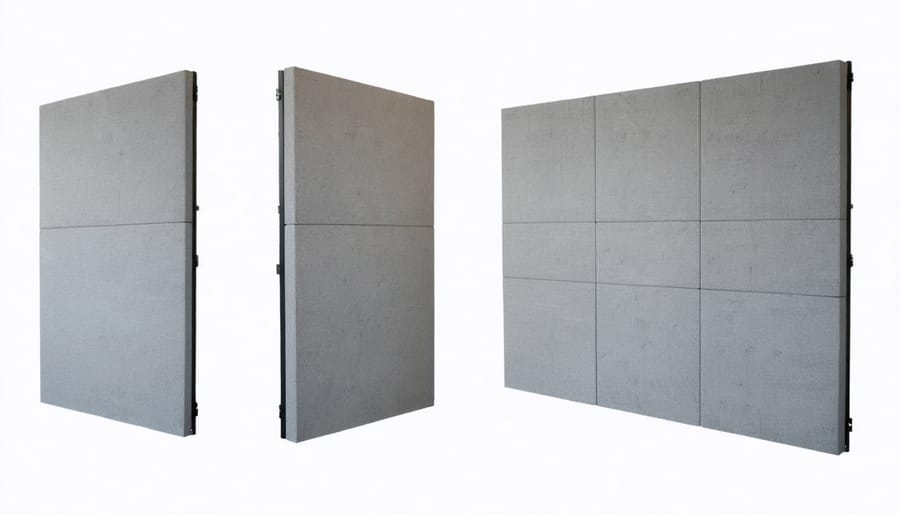
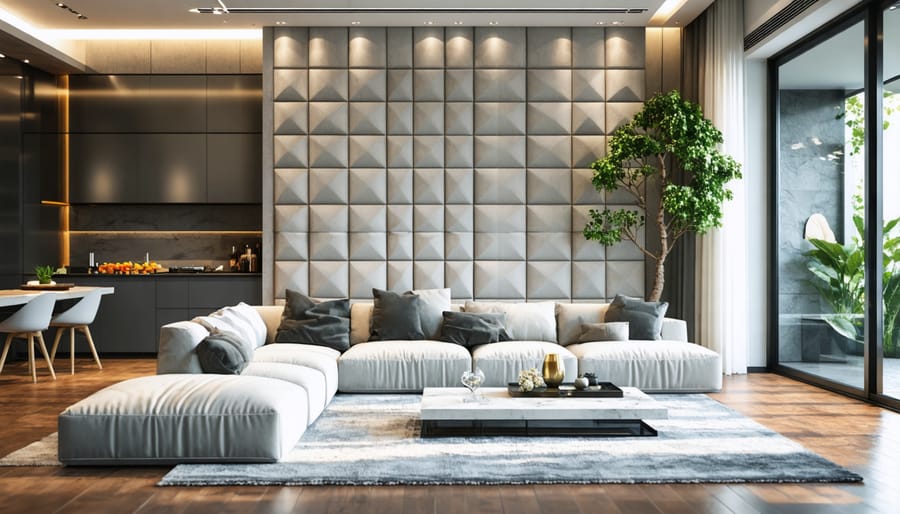
When it comes to transforming your living room into a sound sanctuary, wall and ceiling treatments are your best allies. Acoustic panels are a popular choice, available in various sizes, colors, and materials to match your décor. Consider fabric-wrapped panels that combine sound absorption with visual appeal – they can even double as artwork when printed with custom designs or photos.
Diffusers add another dimension to your acoustic treatment strategy. These sculptural elements scatter sound waves, preventing harsh echoes while creating interesting visual texture. Modern diffusers come in geometric patterns and wood finishes that can become striking architectural features in your space.
For a more subtle approach, try decorative solutions that serve double duty. Textured wallpaper, cork wall tiles, or fabric-covered DIY panels can effectively absorb sound while maintaining your room’s aesthetic. Ceiling treatments like dropped acoustic tiles or fabric-wrapped clouds can be strategically placed to target problem areas without overwhelming the space.
Mix and match these elements to create layers of acoustic treatment. Start with larger panels on primary reflection points, add diffusers for balance, and complement with decorative elements. Remember, the goal is to achieve both acoustic excellence and visual harmony – your living room should feel welcoming while sounding amazing.
Strategic Furniture Placement
The way you arrange your furniture can significantly impact your living room’s acoustics. Start by identifying the main sound reflection points – typically bare walls and corners. Position your primary seating area, like your sofa, slightly away from walls rather than flush against them. This setup helps reduce unwanted bass buildup and creates a more balanced soundstage.
Consider creating an asymmetrical furniture layout, as this helps scatter sound waves and reduce flutter echo. Place larger pieces like bookcases or cabinets at different distances from walls to break up parallel surfaces. If you have a TV or sound system, arrange seating in a way that creates an optimal listening triangle – with the main seat positioned at the point of an equilateral triangle formed with your speakers.
Soft furnishings play a crucial role too. Use area rugs to absorb sound reflections from hard flooring, and position upholstered chairs or ottomans strategically around the room. A reading nook with a plush armchair in a corner can help tame problematic bass frequencies while adding functional value to your space.
Remember to keep pathways clear and maintain a balance between acoustic treatment and practical living space. Avoid cramming furniture against walls or creating dense clusters that might block sound flow. The goal is to create a harmonious arrangement that serves both your acoustic and lifestyle needs.
Budget-Friendly DIY Acoustic Solutions
Homemade Acoustic Panels
Creating your own acoustic panels is a rewarding DIY project that can save money while effectively treating your living room’s acoustics. Here’s how to make professional-quality panels:
Materials needed:
– Wooden frame materials (1×4 lumber)
– Rockwool or fiberglass insulation
– Fabric (breathable material like burlap or linen)
– Staple gun and staples
– Wood glue and screws
– Hanging hardware
Start by building a simple wooden frame to your desired panel size (typically 24×48 inches). Cut your lumber at 45-degree angles for clean corners, then assemble using wood glue and screws. Next, cut your insulation material to fit snugly inside the frame – wear protective gear during this step.
Lay your chosen fabric face-down on a clean surface, place the frame with insulation on top, and carefully wrap the fabric around the edges. Start from the middle of each side when stapling to ensure even tension. Pay special attention to corners for a professional finish.
For mounting, attach picture hanging hardware to the frame’s back. Consider using spacers to create an air gap between the panel and wall for better low-frequency absorption.
Pro tip: Choose fabric colors and patterns that complement your room’s décor. You can even print custom designs on acoustic-friendly fabric to create unique art pieces that serve double duty as sound treatment.
Creative Sound-Absorbing Decor
Transform your living room into an acoustically pleasing space with these creative DIY decor elements that double as sound absorbers. Start with oversized canvas art pieces – simply add a layer of acoustic foam behind the canvas before mounting to create beautiful sound-absorbing wall art. For a cozy touch, layer multiple textured throw pillows and blankets made from thick, plush materials like wool, velvet, or chunky knits on your sofa.
Create a stunning vertical garden wall using preserved moss panels, which naturally absorb sound while bringing nature indoors. Macramé wall hangings made from thick cotton rope not only add bohemian charm but also help diffuse sound waves. Consider crafting your own acoustic panels by wrapping fabric-covered insulation boards in eye-catching patterns or prints that complement your decor.
Repurpose old wooden pallets into stylish bookshelf units, filling them with books and decorative objects to create natural sound diffusion. Hang thick, textured curtains from floor to ceiling, even on walls without windows, to add visual interest and sound absorption. For a modern touch, install geometric felt wall panels in coordinating colors to create an artistic focal point that improves room acoustics.
Remember to incorporate different textures and materials at varying heights throughout the room for the most effective sound treatment. These creative solutions prove that acoustic treatment doesn’t have to compromise your living room’s style.
Balancing Aesthetics and Acoustics
Design-Forward Solutions
Gone are the days when acoustic treatments meant unsightly foam panels plastered across your walls. Today’s design-forward solutions seamlessly blend form and function, transforming your living room into both a sonic paradise and a wellness sanctuary.
Consider incorporating textured wall panels that double as artistic installations. These sculptural pieces, available in various patterns and finishes, can create stunning focal points while diffusing sound. Fabric-wrapped acoustic panels now come in luxurious textures and custom prints, allowing you to match your existing décor or make a bold design statement.
For a more subtle approach, opt for decorative sound-absorbing curtains in rich, flowing fabrics. They not only manage acoustics but also add warmth and sophistication to your space. Modern acoustic ceiling treatments, like suspended geometric panels or cloud-like installations, can become striking architectural elements.
Furniture choices can also contribute to sound control without compromising style. Plush upholstered pieces with tall backs, curved sectionals, and deep-seated armchairs naturally absorb sound while creating inviting seating areas. Incorporate textured area rugs, decorative throw pillows, and wall tapestries – all of which help manage sound reflections while enhancing your room’s aesthetic appeal.
Remember, strategic placement of these elements can create visual balance while optimizing acoustic performance, proving that great sound and great style can coexist beautifully in your living space.
Color and Pattern Integration
Gone are the days when acoustic treatments meant unsightly foam panels dominating your walls. Today’s acoustic solutions can seamlessly blend with your living room’s aesthetic, becoming design elements in their own right. Start by choosing acoustic panels in colors that complement your existing color scheme. Many manufacturers offer customizable fabric coverings in various hues and textures, from bold statement pieces to subtle neutral tones.
Consider incorporating patterned acoustic panels that double as wall art. Abstract designs, geometric patterns, and even custom-printed images can transform functional sound treatment into a captivating focal point. For a cohesive look, match your acoustic treatments to existing textiles like curtains, throw pillows, or area rugs.
Don’t forget about texture play – mixing different material finishes can add visual interest while maintaining acoustic effectiveness. Combine smooth fabric panels with textured diffusers, or alternate between different weaves and patterns. Wood slat diffusers can bring warmth and natural elements to your space while providing excellent sound control.
For a truly integrated approach, think about creating an accent wall using acoustic panels in varying shapes and depths. This three-dimensional effect not only enhances sound quality but also adds architectural interest to your room. Remember, successful acoustic treatment doesn’t have to sacrifice style – it should enhance both the sound and visual appeal of your living space.
Creating a well-balanced acoustic environment in your living room doesn’t have to be complicated or compromise your space’s aesthetics. By implementing a mix of professional and DIY solutions, you can significantly improve your room’s sound quality while maintaining its style and comfort. Remember to start with the basics: identify problem areas, strategically place soft furnishings, and gradually incorporate dedicated acoustic treatments as needed.
Whether you choose to invest in professional acoustic panels, create your own DIY solutions, or combine both approaches, the key is to maintain balance and consistency in your treatment strategy. Start with one area at a time, test the results, and adjust as necessary. The benefits extend beyond just better sound – you’ll create a more comfortable, peaceful living environment that everyone can enjoy.
Don’t be afraid to experiment with different solutions and placement options. Your perfect acoustic setup might take some trial and error, but the improved sound quality, reduced echo, and enhanced living space will be worth the effort. Take that first step today toward creating your ideal acoustic environment – your ears (and your neighbors) will thank you!